Configure the Pulse Connect Secure gateway
This configuration consists of three parts:
Configure a new authentication server
Modify or Confirm the Sign-in Policies
Before you begin
Ensure that you have the common UDP port and secret key values available.
Configure a new authentication server
- Sign in to the Pulse Connect Secure Administrator Sign-In Page with sufficient privileges.
- Go to ,
- Click New, and then click New Server to define a new authentication server.
Alternatively, you can edit an existing RADIUS server by selecting it from the list of authentication servers.
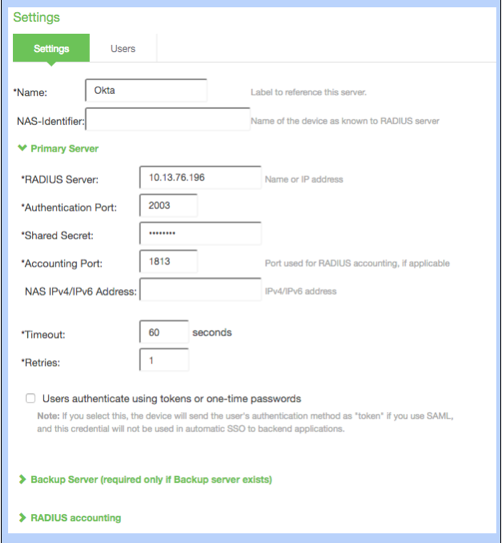
- Enter the following values to create a New RADIUS Server.
Name Unique name (for example, Okta)
NAS Identifier Optional
RADIUS Server IP or Name of Okta RADIUS Server Agent Authentication Port The UDP port Shared Secret The secret to access the port Server Address IP or name of Okta RADIUS Server Agent Accounting Port Required, but any value is acceptable NAS IPv5 Address Optional. Shows in the Okta logs, if defined Timeout Recommended: 60 seconds Retries 1 - Optionally. Repeat the settings for a backup server, if required and available.
- Ignore the RADIUS Accounting section.
- Expand the Custom RADIUS Rules dropdown list, and then click New RADIUS Rule.
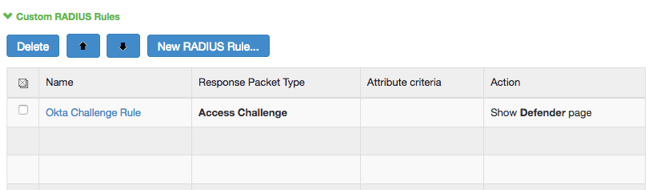
- The following page appears.
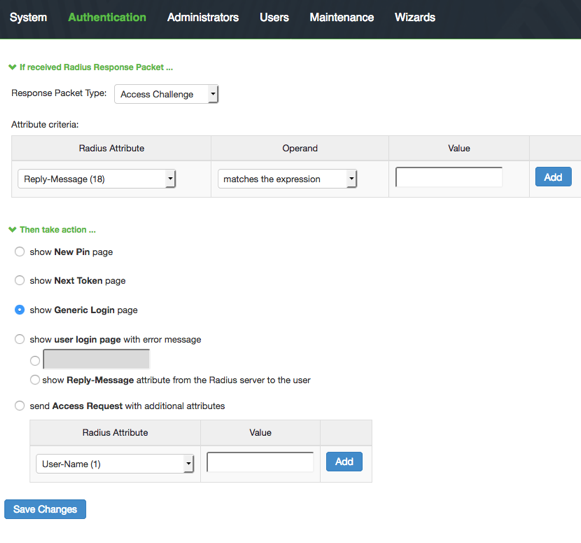
- Enter the following values to create a Custom RADIUS Rule.
Name Unique name (for example, Okta Challenge Rule). If received Radius Response Packet Select Access Challenge. Attribute Criteria Radius Attribute: select Reply-Message (18).
Operand: select matches the expression.
Value: leave blank.
Then take action Select show Generic Login page. - Click Save Changes.
- Ignore any warnings that the rule isn't specific.
- Click Save Changes for the new authentication server.
Create a User Realm
-
Go to .
-
From the Overview view, click New. Alternatively, you can edit an existing authentication realm by selecting it from the list.

- Enter the following values to create a New Authentication Realm.
Name Unique name (for example, Okta). Description Optional. Use any desired description. Authentication Okta (or the authentication server name your created earlier).
User/Directory Attribute Select Same as Above from the dropdown list. Accounting Select None from the drop-down list. Device Attributes Select None from the dropdown list. - Click Save Changes.
- Optional. Click the Role Mapping tab, and then select Role Mapping from the top menu. The following page appears:
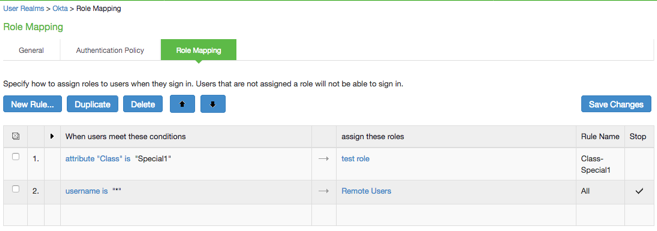
Define user attribute-driven role assignments. Combine this with Advanced Radius settings to enforce dynamic roles for users.
Modify or Confirm the Sign-in Policies
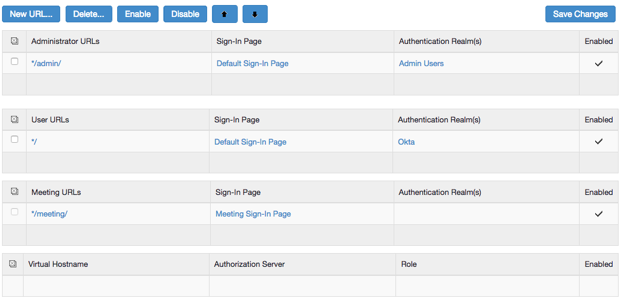
- Go to .
-
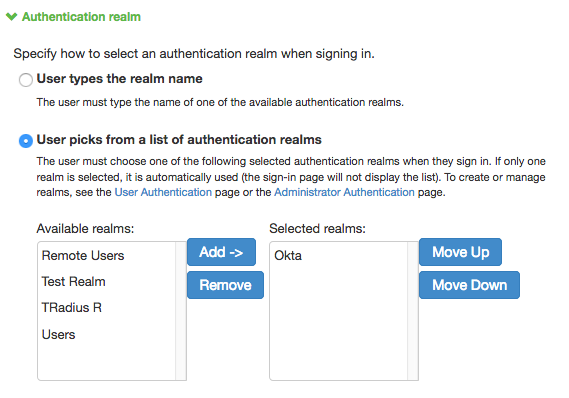
Identity the Sign-in Policy to modify or confirm and click the URL to confirm or edit its selected realms.
-
Expand the Authentication realm section of the policy detail page and make changes as needed.