Workplace by Facebook
This guide provides the steps required to configure provisioning for Workplace by Facebook.
Features
- Import new users
- Import profile updates
- Import user schema
- Push new users
- Push profile updates
- Push password updates
- Push user deactivation
- Push group
Requirements
To enable provisioning features, you need to first obtain an organization ID from Facebook.
After you receive your organization ID, you can create and configure a Workplace by Facebook app.
Configuration
-
In the Admin Console, go to .
- Click Browse App Catalog.
- Search for and select
Workplace by Facebook, and then click Add Integration. - Under General Settings, enter an Application label, your SubDomain, and Organization ID (see Requirements) values, then click Done.
- Go to the Provisioning tab, then click Configure API Integration.
- Check Enable API integration, then click Authenticate with Workplace by Facebook. A new window with your Workplace organization opens.
- You may be required to enter your Facebook administrator credentials to allow Okta to use the API on your behalf. To do this, click Add to Workplace. Select All groups for the Add Okta Identity to groups option.
- After a series of redirects, your new app is configured. Click Save and close this window with your Facebook org settings.
- When a message appears stating that the Workplace by Facebook was verified successfully, click Save.
- Select To App in the left panel, then select the provisioning features you want to enable, then click Save:
Schema discovery
Workplace by Facebook supports user schema discovery so that you can add extra attributes to a user's profile. Follow these steps to do this in Okta:
-
In the Admin Console, go to .
- Select the Apps section in the left pane, then find your app in the list.
- Check the list of the attributes. If you don't find what you need, click Add Attribute to display a list of extended attributes.
- Select the attributes that you want to add, and then click Save.
- You're now able to import and push user attribute values from or to Facebook.
Location attribute
By default, when creating or updating a Facebook user, Okta populates the user Location with comma-separated address properties (street, city, state, and so on). If this behavior doesn't fit your needs, you can add a Location field to AppUser through Schema Discovery and map it, similar to the following example:
- Click Refresh Attribute List.
- Find the Location field in the list of attributes.
- Add it to the AppUser profile.
- Set up mapping for the Location field from Okta to Workplace by Facebook.
For example: user.city > location
Limitations
The Workplace Facebook connector pulls the manager/employee relationship from a single AD domain. If you use provisioning with Okta into Facebook and pull user data from multiple AD domains, Okta can't provision users since these relationships can't be pulled across multiple domains.
Troubleshooting
Follow these steps to troubleshoot common issues.
Set the manager attribute
Configure mapping for the manager attribute using the following table as a guide. See Okta Expression Language for more details.
| Scenario | Manager attribute mapping |
|---|---|
| Don't push the manager to Workplace by Facebook | empty |
| Push the manager only for users from Okta | user.manager |
| Push the manager for users imported from AD | getManagerAppUser("active_directory", "facebook_at_work").userName |
| Push the manager for user from Okta and from AD | hasDirectoryUser() ? getManagerAppUser("active_directory", "facebook_at_work").userName : user.manager |
Adding a confirmed member leads to push group error
Error: The user isn't a member of the parent group.

- Go to in your Workplace by Facebook account.
- Check the Account Status for users in the group. No users should be in a Deactivated state.
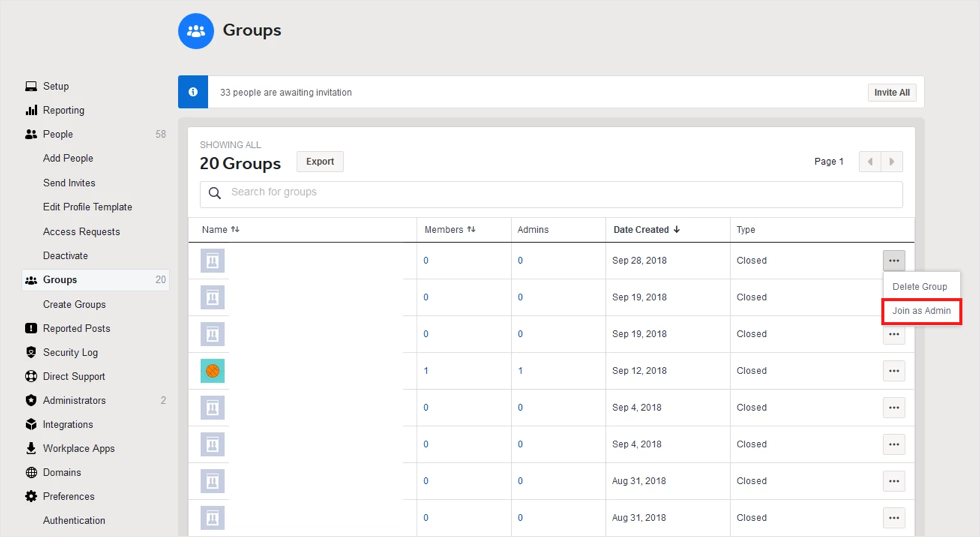
Group created but no members listed in the admin panel
- Go to in your Workplace by Facebook account.
-
Locate your group and click Join as Admin.