Configure the Check Point SmartConsole
During this task we will configure Check Point to use the Okta RADIUS app.
Steps
Before you begin
- Ensure that you have the common UDP port and secret key values available.
Define a RADIUS server object
- Launch the Check Point SmartConsole (Windows OS only).
- From the upper left corner menu, navigate to
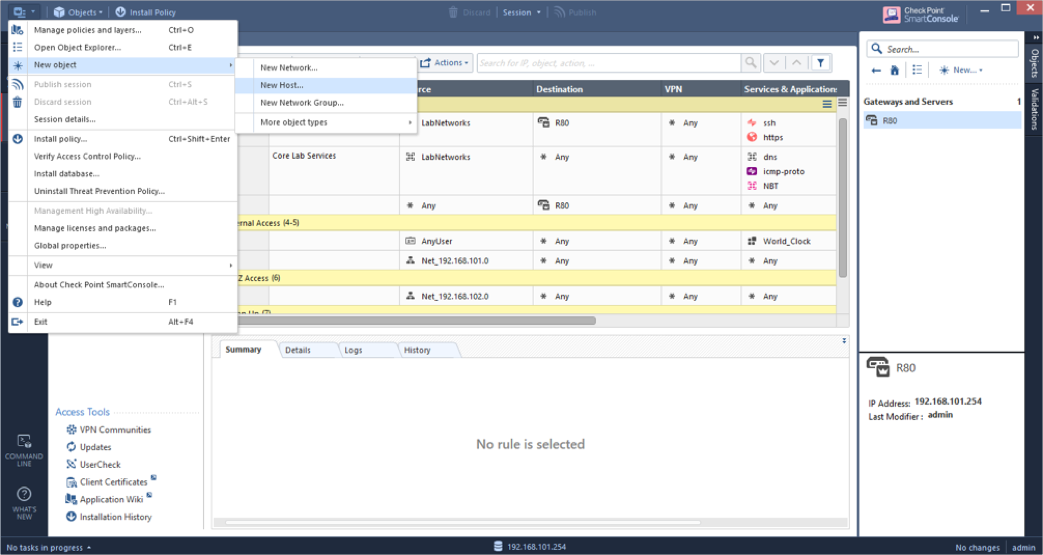
- Enter the following:
- Name: A unique name for the host where the RADIUS server is installed. For example, MyHost.
- IPv4 address: A unique IP address for the host where the RADIUS server is installed. For example, 192.168.1.101.
- Click OK.
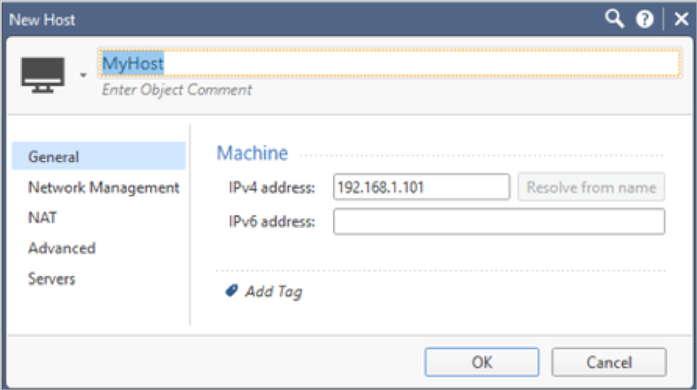
- From the upper left corner menu, navigate to , then enter the following:
- Name: A unique name for the RADIUS server. For example, MyRADIUS.
- Host: Select the Host you defined above.
- Service: Change to NEW-RADIUS to match UDP port 1812 set in the RADIUS App earlier.
- Shared Secret: Enter the RADIUS Secret defined in the Okta RADIUS App earlier.
- Version: Select RADIUS Ver 2.0.
- Protocol: Select PAP.
- Priority:1 is the default. Modify as needed when using multiple RADIUS servers.
- Click OK.
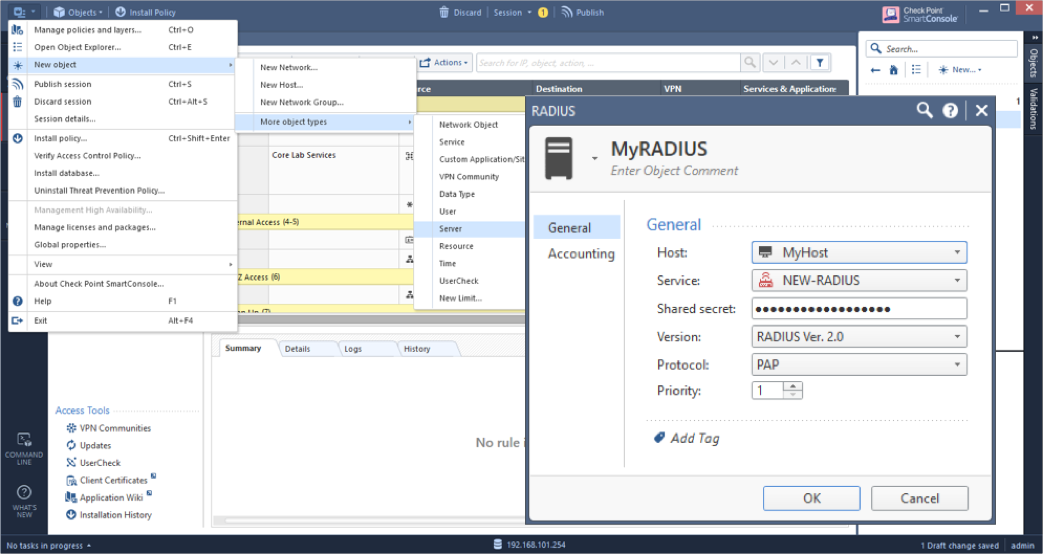
- From the upper left corner menu, navigate to , check add_radius_groups, then click OK:
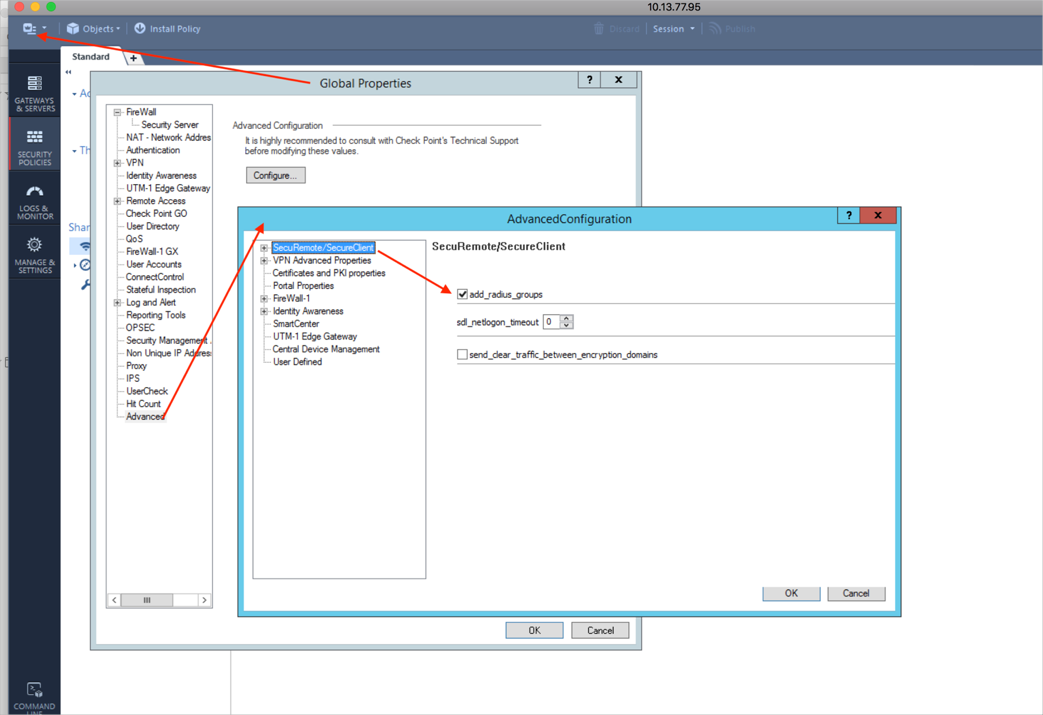
- Define the RADIUS user groups.
Note: It is not necessary to define RADIUS user groups if there is no requirement to use that group as a Participant User Group.
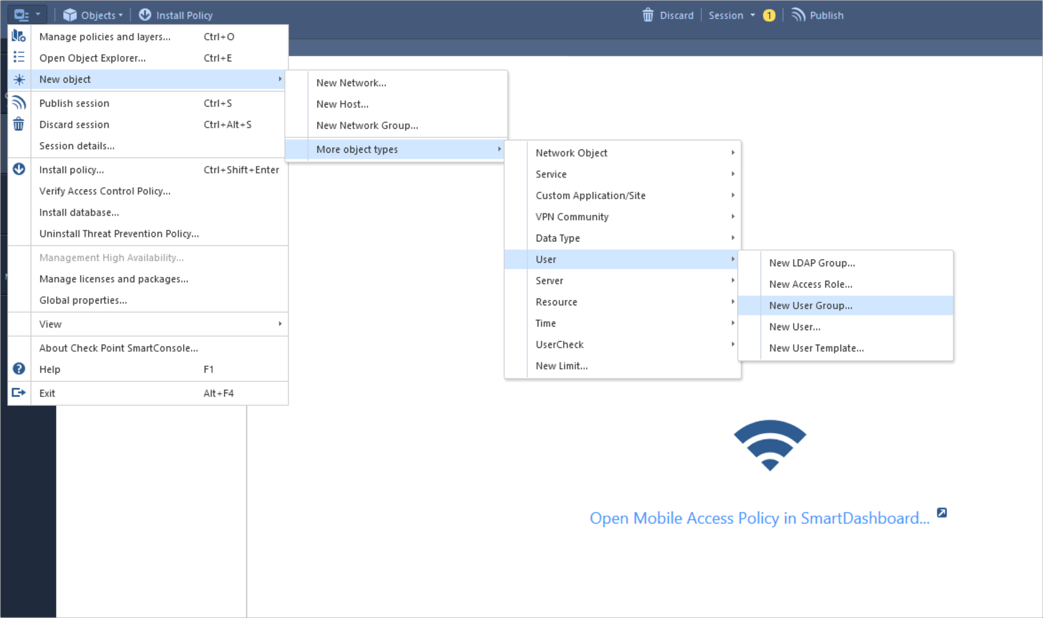
- From the upper left corner menu, navigate to .
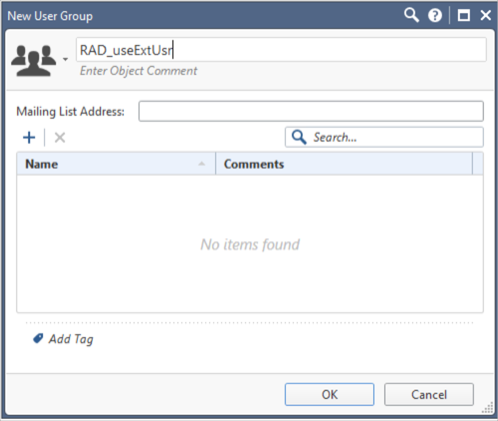
- Enter the name of the group in the following format:
RAD_<group to which the RADIUS users belong>.
Note: For older version the format might be different. Refer to your admin guide for details.
Make sure the group is empty. Click OK, then click Close.
Configure a policy to use RADIUS authentication
In this step, we'll describe the following two use cases:
Remote Access VPN client Example
-
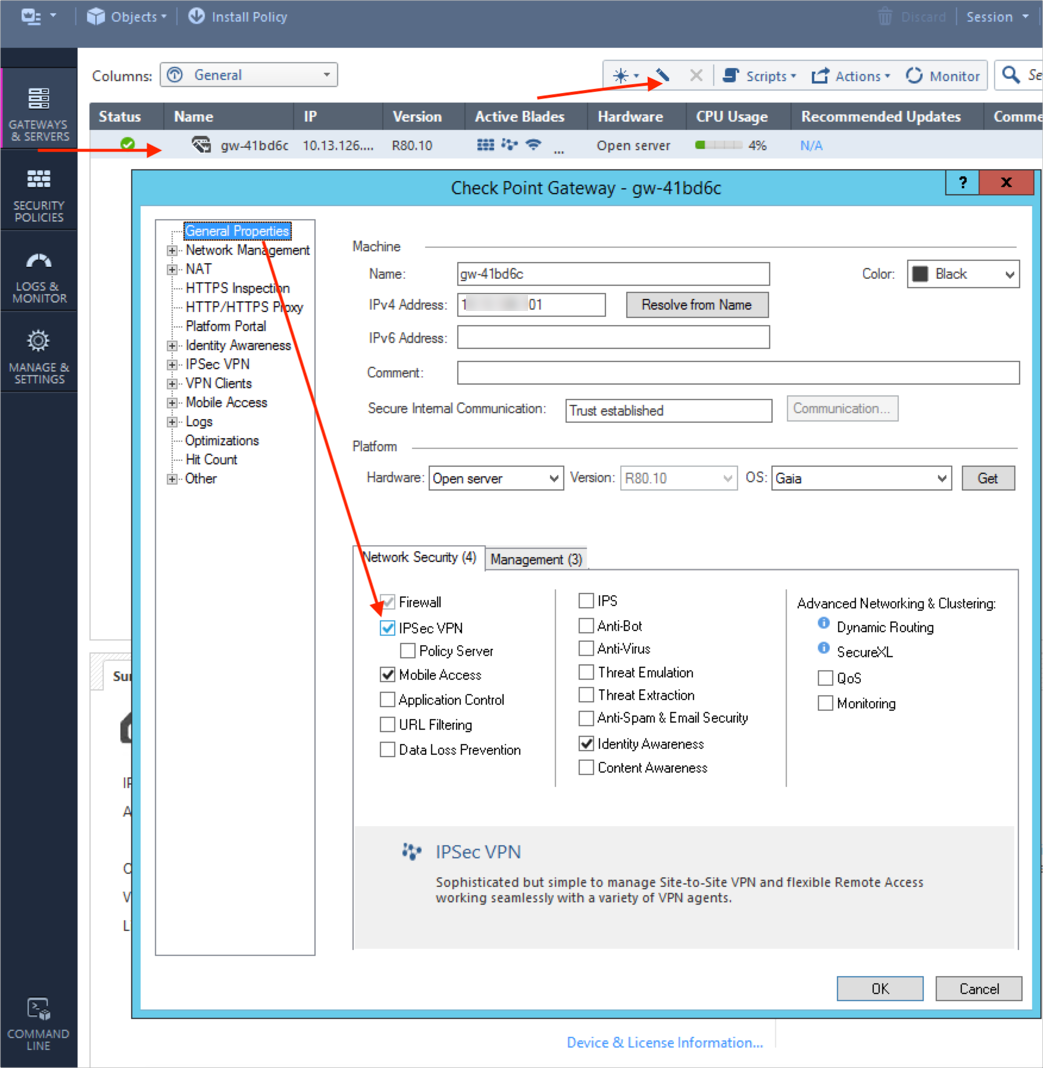
In the SmartConsole, edit the gateway object and select IPSec VPN:
-
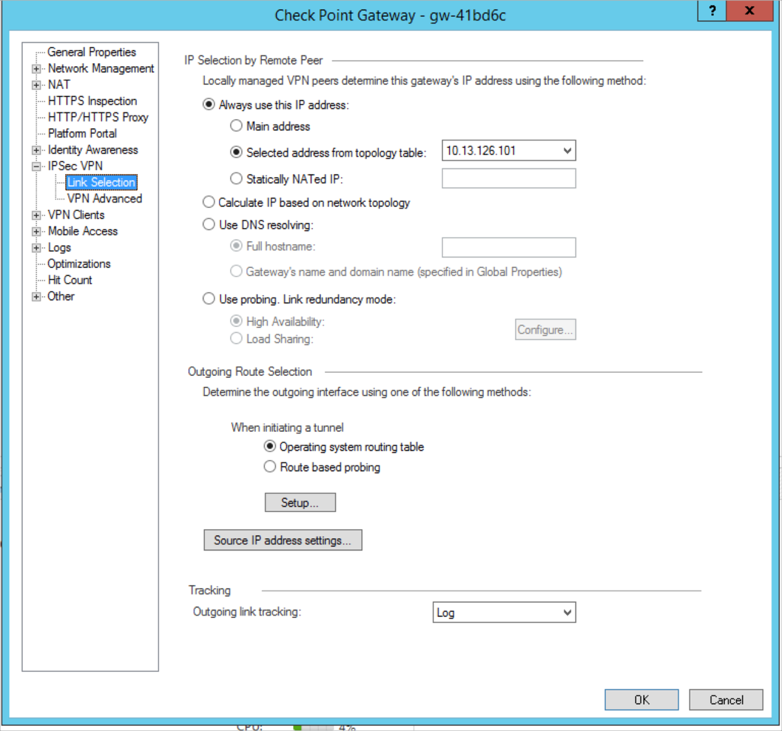
While editing the gateway object, select Link Selection in the IPSec VPN branch. If needed, also modify the gateway address to use the external gateway address.
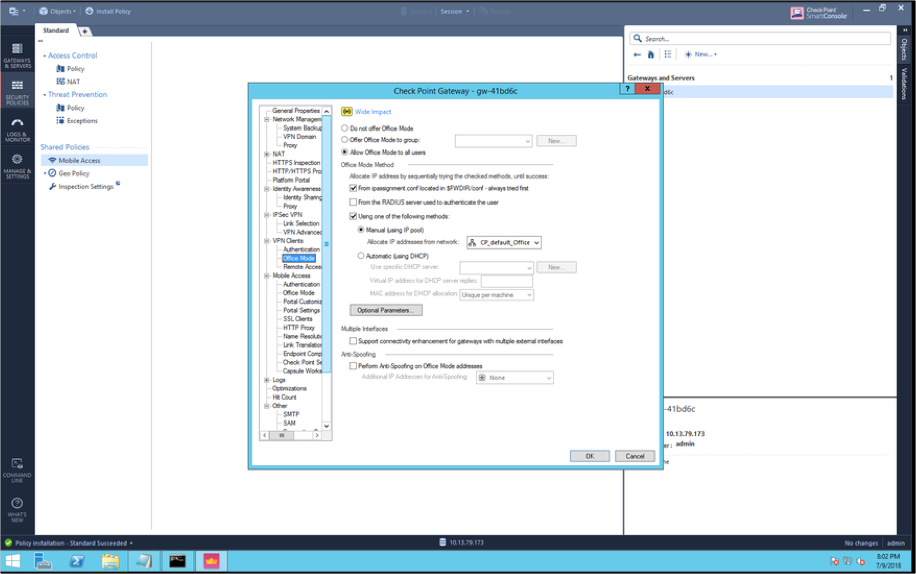
- Select the branch and enable Allow Office Mode for all users using the default CP_default_Office_Mode_addresses_pool object:
-
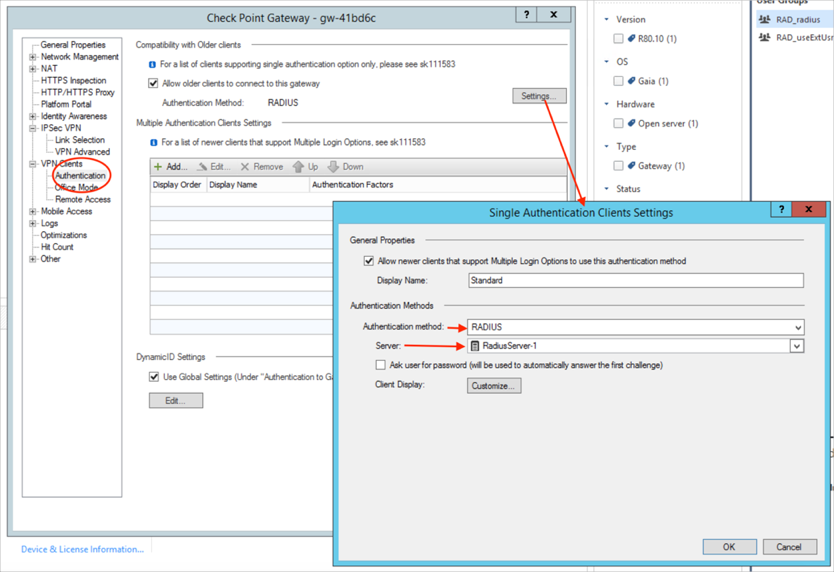
Navigate to , then in the Single Authentication Clients Settings dialog, select RADIUS as the Authentication method and for Server, select the RADIUS server we created earlier. Click OK when done.
-
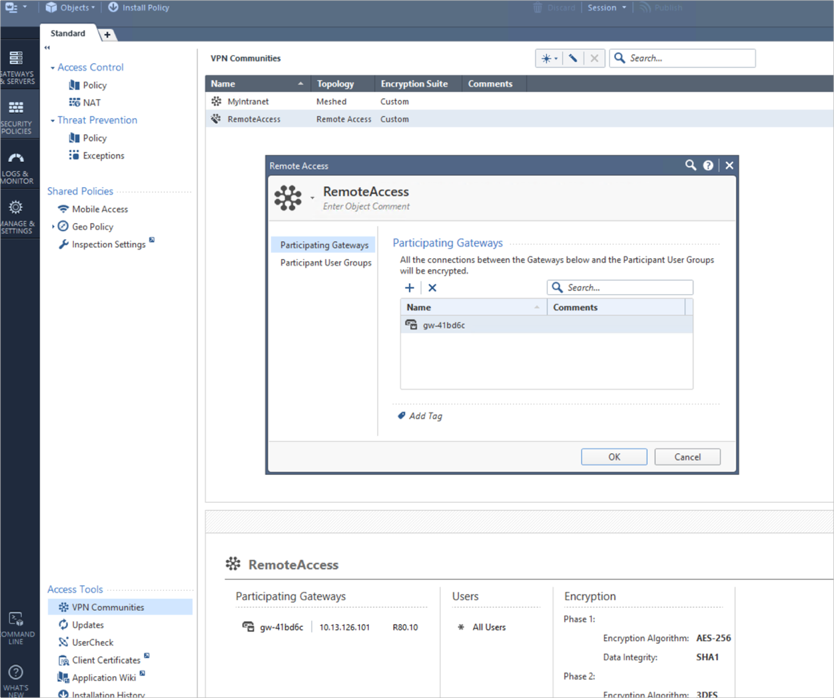
Navigate to SECURITY POLICIESthen select Access Control. This displays Access Tools VPN Communities. Click VPN Communities. Double-click to open the RemoteAccess community, then click + (plus) to add the gateway.
-
Click Participant User Groups and accept the default All Users.
Configure browser access to the Check Point Mobile Access SSL VPN portal
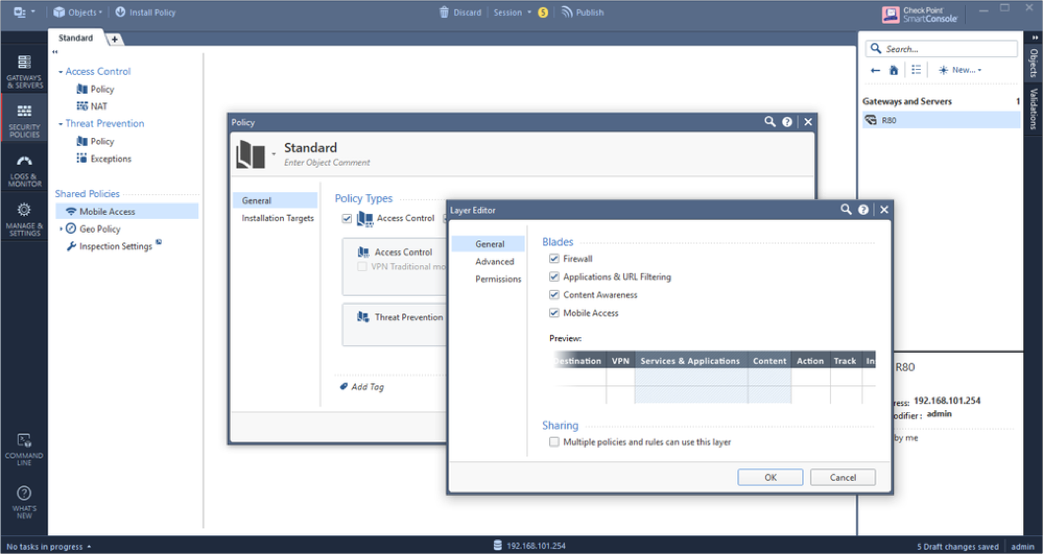
- Right-click the Access Control Policy and select Edit Policy. Select the Access Control Layer menu box, then select Edit Layer and Enable Mobile Access in the policy:
-
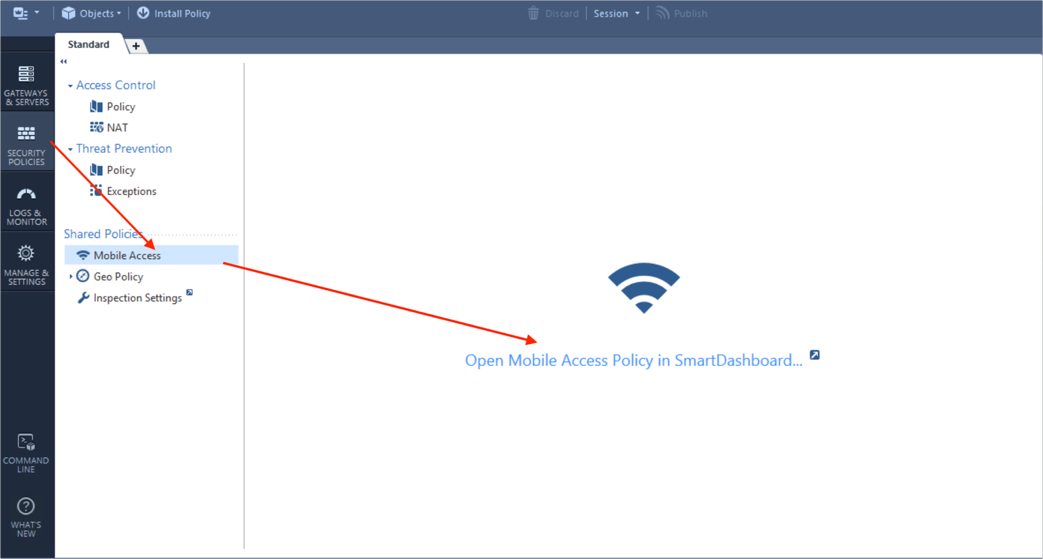
Select Mobile Access in the Access Control policy. Click the link to open the Mobile Access Policy in SmartDashboard.
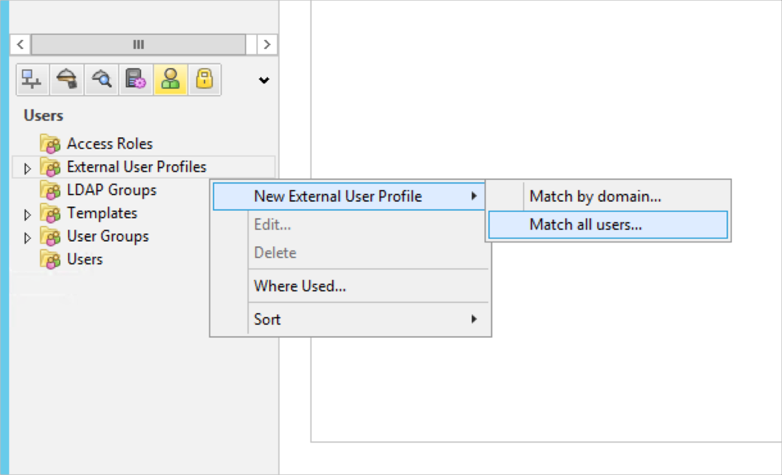
- In the lower left corner click on the Users object. Right-click External User Profiles and navigate to :
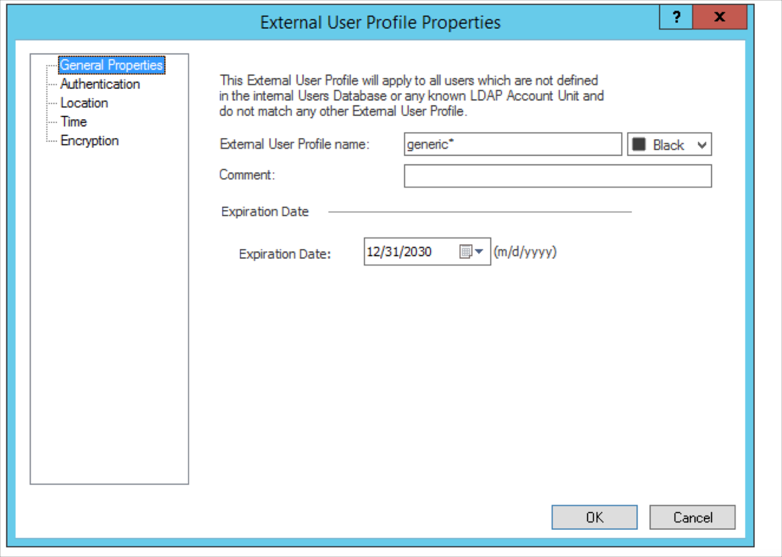
- The following External User Profile Properties dialog opens:
-
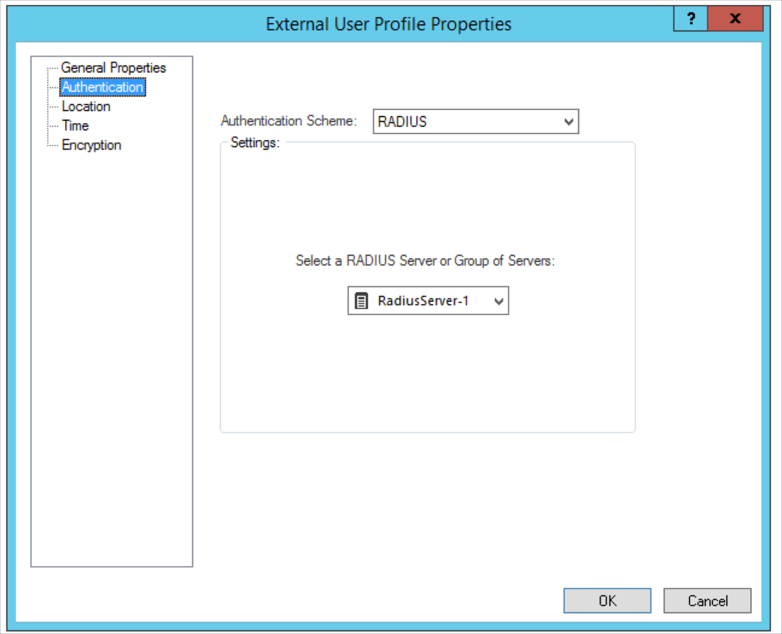
Select Authentication and select RADIUS as the Authentication Scheme, then select the RADIUS server configured above, for example: RadiusServer-1. Click OK when done:
-
Click OK, then click the Menu button then select . Close the SmartDashboard to return to the SmartConsole.
- Click Install Policy to publish the changes and install the policy on the R80 gateway.

