Configure the Cisco ASA VPN to interoperate with RADIUS
During this task we will configure the Cisco ASA VPN, specifically:
- Define a RADIUS Server Profile
- Define an Authentication Profile for Okta RADIUS Agent
- Apply the Okta RADIUS Authentication Profile to a Gateway
- Configure the portal to use the Okta RADIUS Authentication Profile.
Steps
Before you begin
- Ensure that you have the common UDP port and secret key values available.
Configure Cisco ASA VPN
- Define an AAA Server Group
- Sign in to the Cisco ASDM console for the VPN appliance using an account with sufficient privileges.
- Navigate to , as shown below.
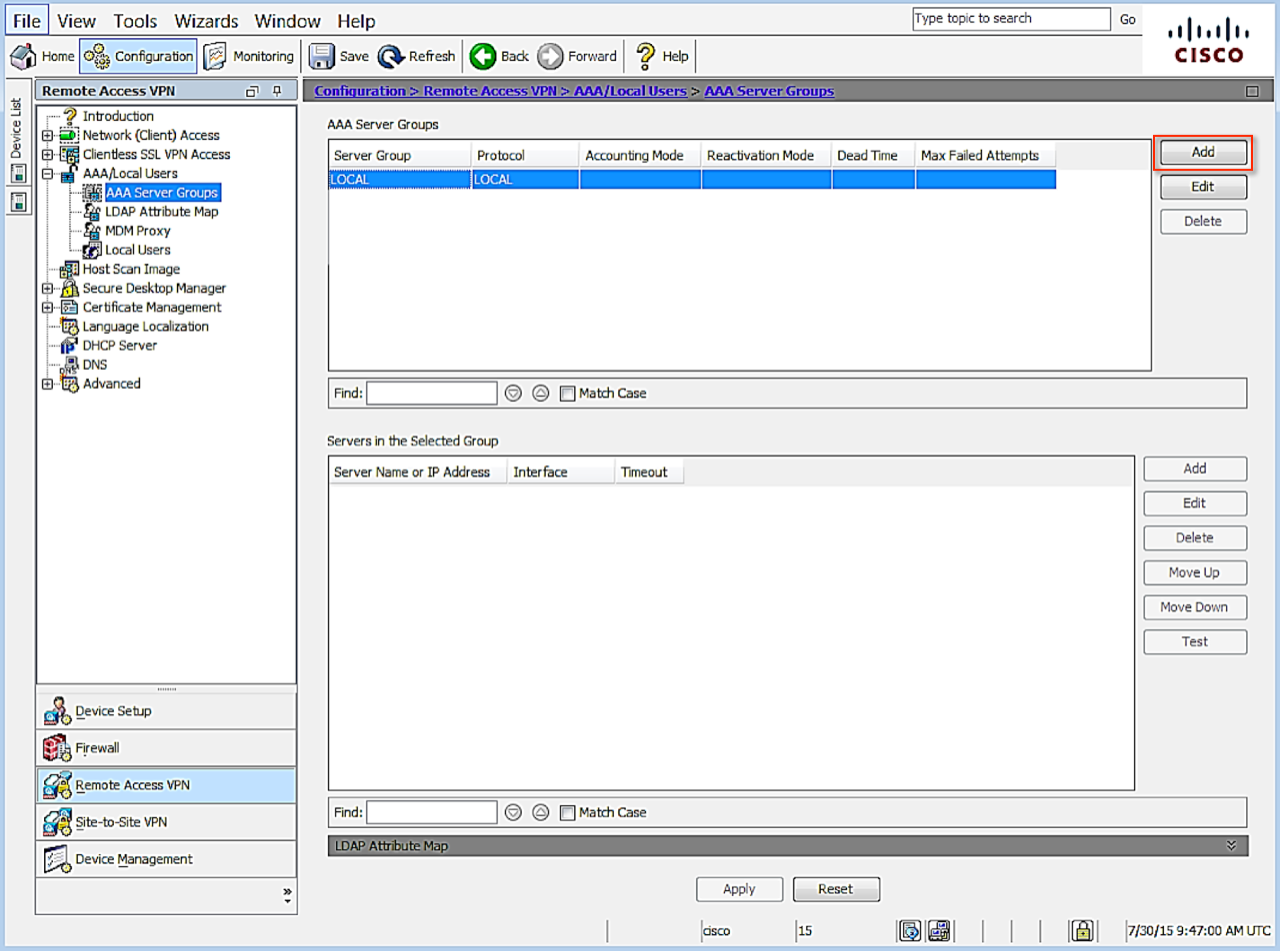
- Click Add to create a new group. The Add AAA Server Group dialog displays.
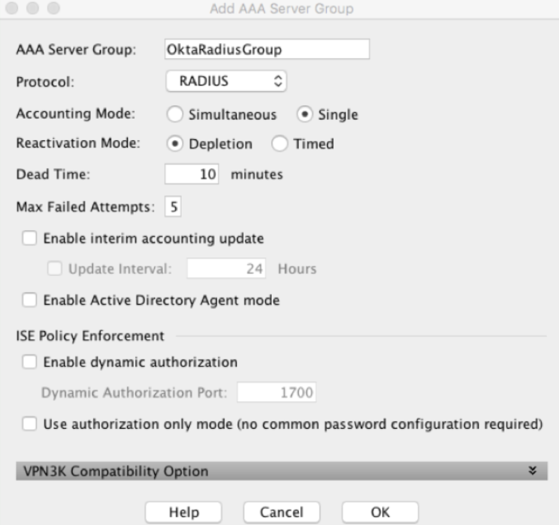
Leave the default settings except for the following:
AAA Server Group – specify a name to identify the group for the MFA server
Protocol – select RADIUS if necessary
- Click OK.
- Add AAA Server(s) to your AAA Server Group
Select Remote Access VPN and navigate to .
Select the server group just created.- Click Add.
The Edit 'ServerName' Server dialog displays.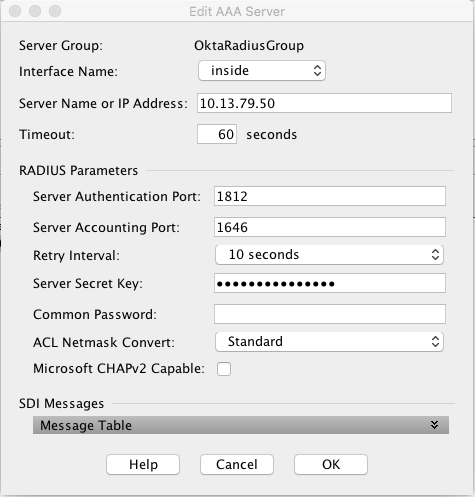
- Specify the following, leaving all other fields unchanged:
- Interface Name – select the interface that will handle communication with the MFA Server
- Server Name or IP Address – specify the name or the IP address of the Okta RADIUS Agent
- Timeout (seconds) – 60 seconds
- Server Authentication port – enter the required port number. Port 1812 was used as the example.
- Server Accounting Port – 1646. This value is not used, but must be entered to complete the setup.
- Retry Interval – leave default at 60 seconds
- Server Secret Key – provided secret defined when setting up the app in Okta.
- Common Password – leave blank.
- Uncheck Microsoft CHAPv2 Capable. (important).
- Click OK.
Click APPLY to save the configuration.
Modify the IPSec(IKEv2) Connection Profile
Modify the IPSec(IKEv2) Connection Profile to use the new Authentication Server group.
- Open the Cisco ASDM console for the VPN appliance.
- Click Configuration.

- Select Remote Access VPN.
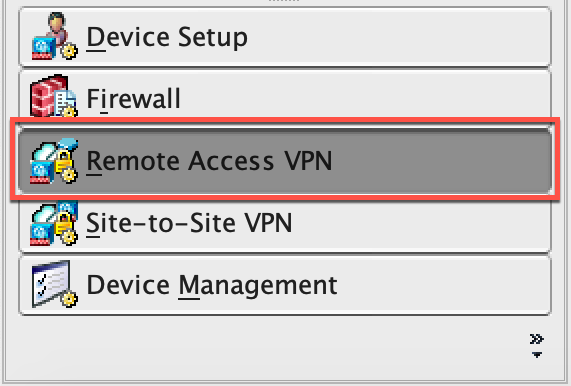
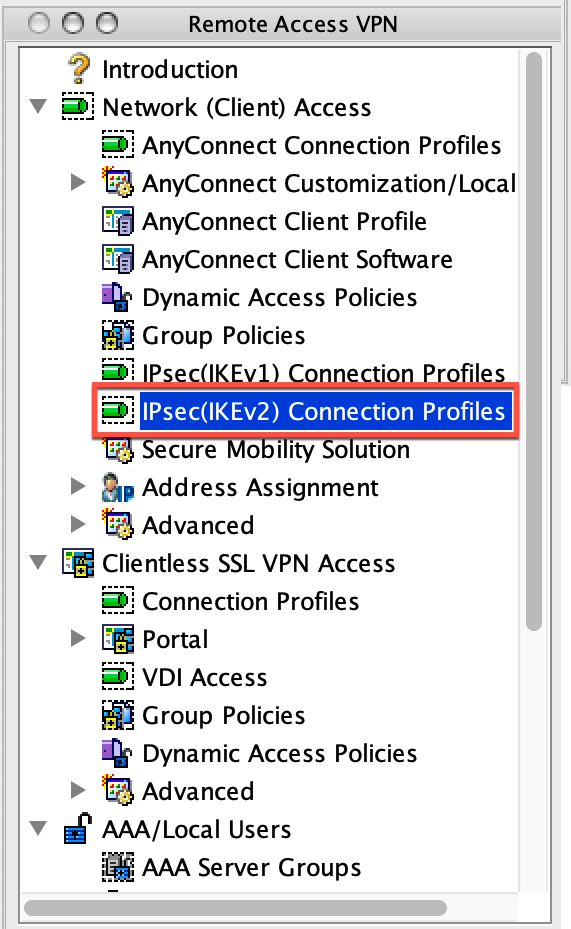
- In the Remote Access VPN section, select IPsec(IKEv2) Connection Profiles.
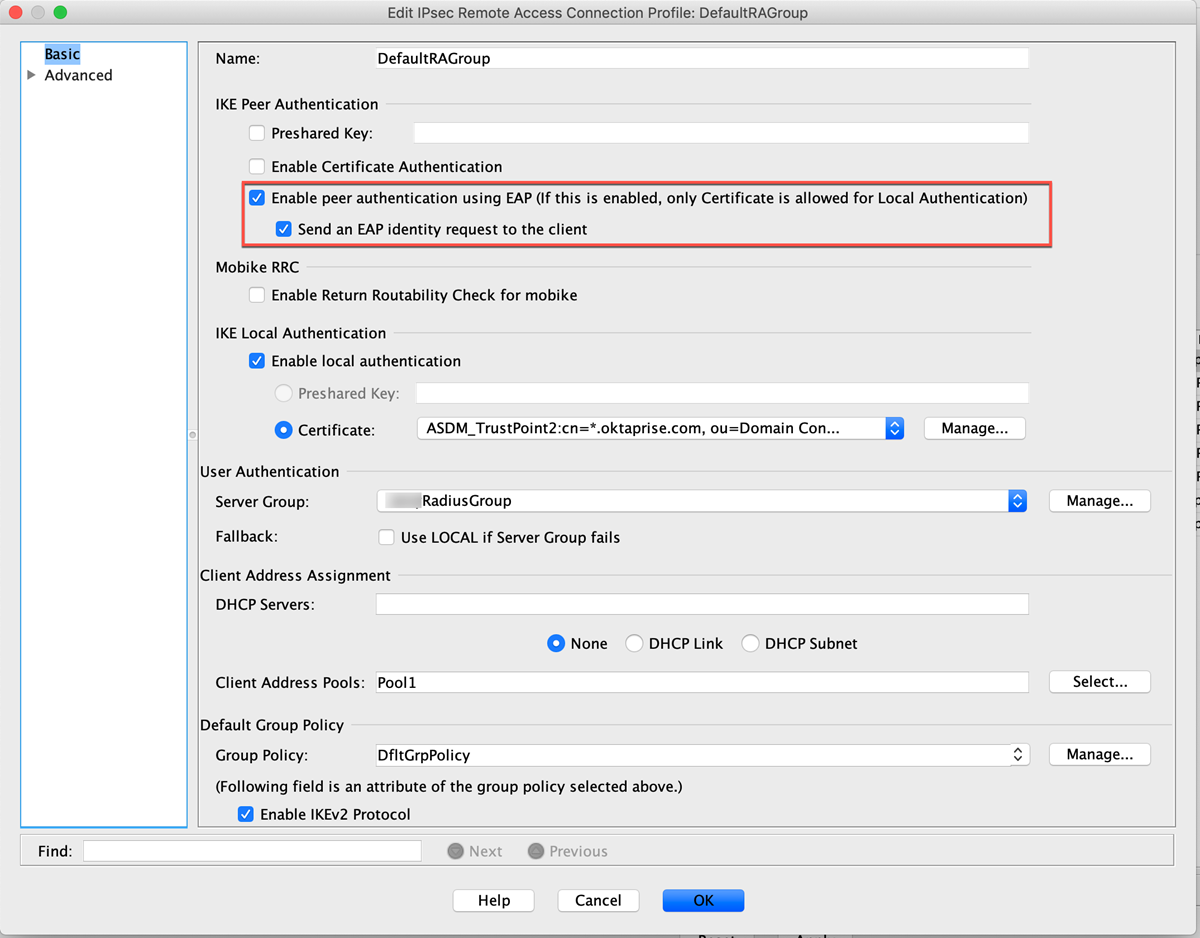
- Select the DefaultRAGroup group, and click Edit.

- In the IKE Peer Authentication Group section enable Enable Peer to Peer authentication using EAP and
Send an EAP Identity request to the client.
-
Click OK to save.

