Create the Oracle WebLogic Server application
During this task we will create the Oracle WebLogic Server application in Access Gateway.
- Sign in to the Access Gateway Admin UI console.
- Click the Applications tab.
- Click +Add.
-
Select the Oracle WebLogic option from the left column menu, and click Create.
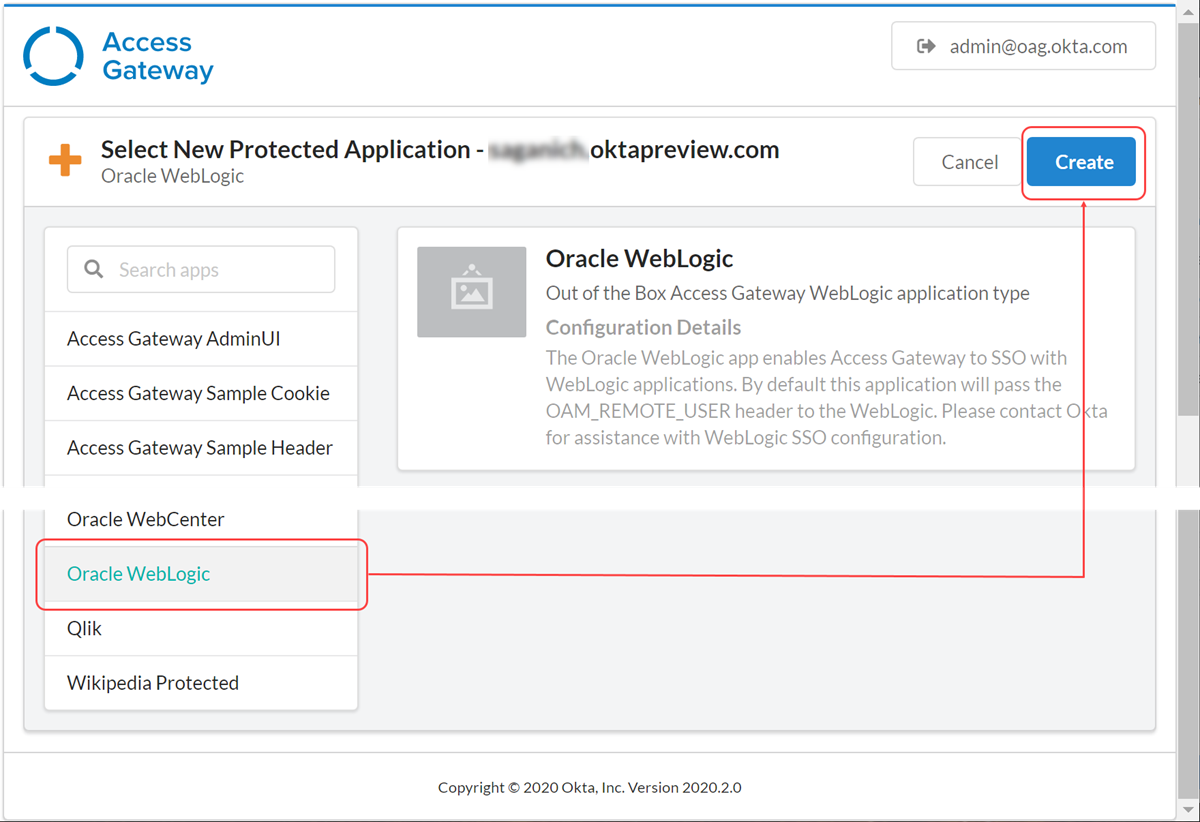
The New Protected Application wizard will start and display the Essentials pane for the application being added.
-
In the Essentials pane specify the following:
Field Value Label A name for the application. Public Domain A fully qualified host name such as <yourexternalname>.<your domain>. In the example provided this would be weblogic.externalexample.com. Protected Web Resource The URL of the internal protected application. In the example provided this would be
weblogic.internalexample.com:<port>/<path>Where:- port - the port WebLogic Server is listening on for http requests.
- path - represents the path to the application.
See also Configure load balancing.
Group Enter the group containing the users who should have access to the application. Description [optional] An appropriate description for your application.
Configure load balancing
Only use Access Gateway as the load balancer. See Load balancing.
- Expand the Protected Web Resource tab.
- Enable Load Balancing By Access Gateway. A table of hostnames and weights representing the target load-balancing instances appears. This table is initially empty. Click the Edit
 icon to modify an entry in the table, or click the Delete
 icon to delete an entry.
 - Choose either HTTP or HTTPS as the URL scheme. Each protected web resource that you add inherits this scheme.
- Optional. Enable and enter the Host Header value.
- Complete the following steps to add a host. Repeat these steps as required:
- Click Add protected web resource.
- Enter a fully qualified
hostname:portcombination, like for example,https://backendserver1.atko.com:7001. - Enter a weight from 1 to 100. Enter 0 to specify that a host is disabled. Note:
Weights represent the percentage of requests that are routed to this host. For example, two hosts of weights 2:1 result in requests being routed approximately 66% to the host weighted 2 and approximately 33% to the host weighted 1.
- Click Okay.
-
Optional. Configure health checks. They use GET operations to confirm that back-end resources are functional. New requests aren't routed to resources that have been labeled unhealthy by the health checks.
- Enable Load Balancer Health Check.
- Click Edit to modify health check settings.
- Modify the settings as required.
Field Value Default
Path The URI path to the resource used in the health check. / Method The HTTP method used in the health check. Always GET Status code The HTTP status code used to determine health. 200 Interval The interval between health checks in seconds. 10 Request timeout The health check request timeout in seconds. 1 Healthy threshold The number of requests that must succeed before a host is considered healthy. 3 Unhealthy threshold The number of requests that must fail before a host is considered unhealthy. 3 - Click Save.
Next steps