Configure Okta as a CA with delegated SCEP challenge for macOS with MEM
Configure a Certificate Authority (CA) to issue client certificates to your targeted macOS devices. This procedure describes how to create a Simple Certificate Enrollment Protocol (SCEP) profile in Microsoft Endpoint Manager (MEM) and generate a SCEP URL in Okta.
Prerequisites
-
Certificates that are deployed for digital signature, but not for other purposes (for example, encryption)
-
Microsoft Endpoint Manager
Microsoft Endpoint Manager is a solution platform that unifies several services. It includes Microsoft Intune for cloud-based device management, Configuration Manager for on premises device management, Co-management, Desktop Analytics, Windows Autopilot, Azure Active Directory, and Endpoint Manager admin center. You can use this procedure if you're using any of these services. For example, you can use this procedure if you're using Microsoft Intune.
-
Microsoft Azure
Okta as a CA doesn't support renewal requests. Instead, redistribute the profile before the certificate expires to replace the expired certificate. Configure all MDM SCEP policies to allow for profile redistribution.
Start this Procedure
-
Task 1: Register the AAD app credentials for Okta in Microsoft Azure
-
Task 2: Configure management attestation and generate a SCEP URL in Okta
-
Task 6: Verify that the certificate was installed on your macOS devices
Task 1: Register the AAD app credentials for Okta in Microsoft Azure
-
In Microsoft Azure, click App registrations.
-
Click + New registration.
-
On the Register an application page, enter the following:
-
Name: Enter a meaningful name for the app.
-
Supported account types: Select the appropriate supported account type. This procedure was tested with Accounts in this organizational directory only ([Your_Tenant_Name] only - Single tenant) selected.
-
Redirect URI (optional): Leave blank, or select Web, and then enter a redirect URI.
-
Click Register.
-
-
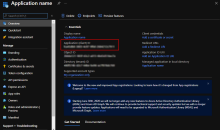
On the app page under Essentials, copy and make a note of the Application (client) ID.
You'll paste this value in the Okta Admin Console in Task 2.
-
Add a client secret:
-
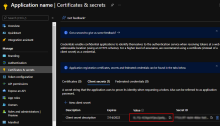
In the left pane, click Certificates & secrets.
-
Under Client secrets, click + New client secret.
-
In the Add a client secret section, enter the following:
-
Description: Optional. Enter a description for the client secret.
-
Expires: Select an expiration time period.
-
-
Click Add.
The secret appears under Client secrets.
-
In the Client secrets section, copy and make a note of the Value.
-
-
Set the scep_challenge_provider permissions:
-
In the left pane, click API permissions.
-
Click + Add a permission.
-
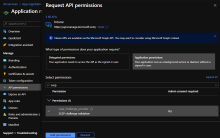
In the Request API permissions section, scroll down, and then click Intune.
-
Under What type of permissions does your application require?, click Application permissions.
-
In the Select permissions search field, enter scep, and then select the scep_challenge_provider checkbox.
-
Click Add permissions.
-
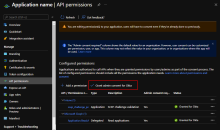
In the Configured permissions section, click .
-
Click Yes in the message that appears.
-
-
Set the Microsoft Graph Application.Read.All permissions:
-
Click + Add a permission.
-
In the Request API permissions section, click Microsoft Graph.
-
Under What type of permissions does your application require? click Application permissions.
-
In the Select permissions search field, enter application, expand Application, and then select the Application.Read.All checkbox.
-
Click Add permissions.
-
In the Configured permissions section, click .
-
Click Yes in the message that appears.
-
Task 2: Configure management attestation and generate a SCEP URL in Okta
-
In the Okta Admin Console, go to .
-
Select the Endpoint management tab.
-
Click Add platform.
-
Select Desktop (Windows and macOS only).
-
Click Next.
-
Configure the following:
-
Certificate authority: Select Use Okta as certificate authority.
-
SCEP URL challenge type: Select Dynamic SCEP URL, and then select Microsoft Intune (delegated SCEP).
-
Enter the values that you copied from Microsoft Azure into the following fields:
-
AAD client ID: Enter the value that you copied from Task 1.
-
AAD tenant: Enter your AAD tenant name, followed by .onMicrosoft.com.
-
AAD secret: Enter the secret value that you copied from Task 1.
For example:
-
-
-
Click Generate.
-
Copy and save the Okta SCEP URL. You'll paste the URL in Microsoft Endpoint Manager in Task 5.
Task 3: Download the x509 certificate from Okta
- In the Okta Admin Console, go to .
- Click the Certificate authority tab.
- In the Actions column for Okta CA, click the Download x509 certificate icon.
- Rename the downloaded file so that it includes a .cer extension.
You'll upload the certificate (CER) file to Microsoft Endpoint Manager in Task 4.
Task 4: Create a Trusted Certificate profile in MEM
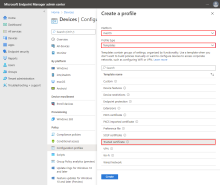
- In the Microsoft Endpoint Manager admin center, go to Devices.
- Click Configuration profiles.
- Click + Create profile.
- In Create a profile, do the following:
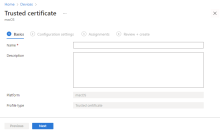
- Enter the following on the Basics tab of the Trusted certificate page:
- On the Trusted certificate page Configuration settings tab, do the following:
- Certificate file: Select the x509 certificate (CER) file that you downloaded from Okta in Task 3.
- Destination store: Select Computer certificate store - Intermediate.
- Click Next.
- On the Trusted certificate page Assignments tab, do the following:
- Included groups: Assign the trusted certificate profile to one or more user groups. The user groups must be the same as the groups that you'll assign the SCEP profile to in Task 5.
Make sure the user groups specified in both profiles are the same.
- Click Next.
- Included groups: Assign the trusted certificate profile to one or more user groups. The user groups must be the same as the groups that you'll assign the SCEP profile to in Task 5.
- On the Trusted certificate page Applicability rules tab, do the following:
- Configure any required rules.
- Click Next.
- On the Trusted certificate page Review + create tab, review the configuration, and then click Create.
Task 5: Create a SCEP profile in MEM
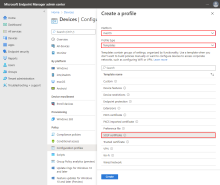
- In the Microsoft Endpoint Manager, go to Devices.
- Click Configuration profiles.
- Click + Create profile.
- In Create a profile, enter the following:
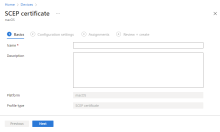
- On the Basics tab of the SCEP certificate page, do the following:
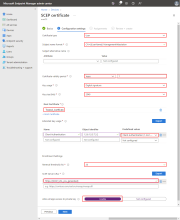
- On the SCEP certificate page Configuration settings tab, do the following:
Certificate type: Select User.
Subject name format: Enter a subject name. For example, CN={{UserPrincipalName}},G={{GivenName}},SN={{SurName}}.
Okta has no specific format requirements for this field. You can use this field to indicate the certificate's purpose as a device management signal for Okta or use profile variables provided by MEM. For a list of supported variables, see Use SCEP certificate profiles with Microsoft Intune.
Certificate validity period: Select Years in the list, and then enter 1 in the next field.
Key usage: Select Digital signature.
Key size (bits): Select 2048.
Click + Root Certificate.
On the Root Certificate page, select the trusted certificate that you created earlier in Task 4.
- Click OK.
Under Extended key usage, set Predefined values to Client Authentication.
SCEP Server URLs: Enter the SCEP URL that you generated in Task 2.
Allow all apps access to private key: Select Enable.
Click Next.
- On the SCEP certificate page Assignments tab, do the following:
- Assign the certificate to the same user groups to which you assigned the Trusted certificate profile in Task 4.
Make sure the user groups specified in both profiles are the same.
- Click Next.
- Assign the certificate to the same user groups to which you assigned the Trusted certificate profile in Task 4.
- On the SCEP certificate page Review + create tab, review the configuration, and then click Create.
Task 6: Verify that the certificate was installed on your macOS devices
- On a macOS device managed by MEM, open .
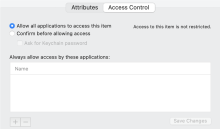
- Verify that a client certificate and the associated private key exist.
- Make sure that the private key is accessible to all apps:


