Configure the Check Point SmartConsole
During this task we will configure Check Point to use the Okta RADIUS app.
Steps
Before you begin
Ensure that you have the common UDP port and secret key values available.
Define a RADIUS server object
- Launch the Check Point SmartConsole (Windows OS only).
- From the upper left corner menu, navigate to
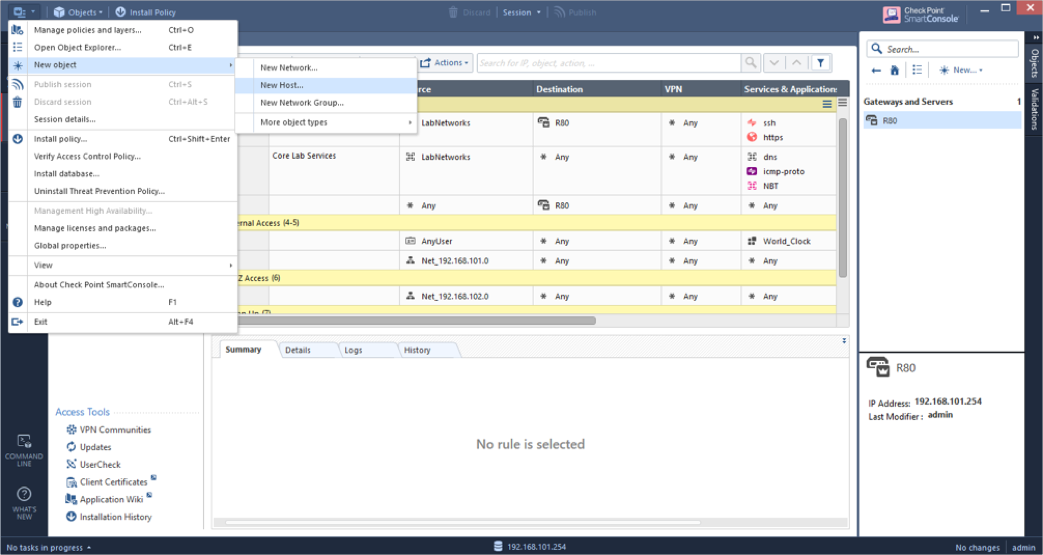
- Enter the following:
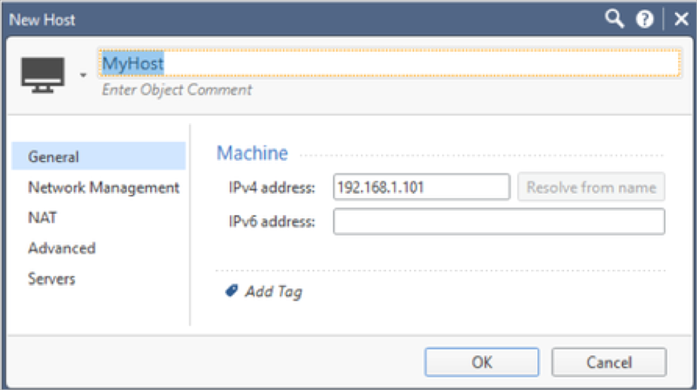
- Name: A unique name for the host where the RADIUS server is installed. For example, MyHost.
- IPv4 address: A unique IP address for the host where the RADIUS server is installed. For example, 192.168.1.101.
- Click OK.
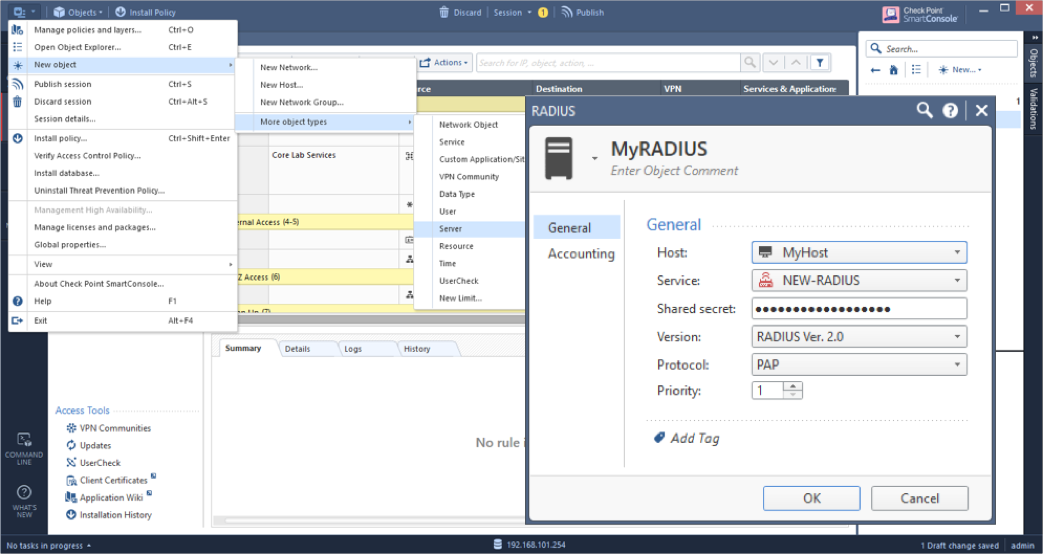
- From the upper left corner menu, navigate to , then enter the following:
- Name: A unique name for the RADIUS server. For example, MyRADIUS.
- Host: Select the Host you defined above.
- Service: Change to NEW-RADIUS to match UDP port 1812 set in the RADIUS App earlier.
- Shared Secret: Enter the RADIUS Secret defined in the Okta RADIUS App earlier.
- Version: Select RADIUS Ver 2.0.
- Protocol: Select PAP.
- Priority:1 is the default. Modify as needed when using multiple RADIUS servers.
- Click OK.
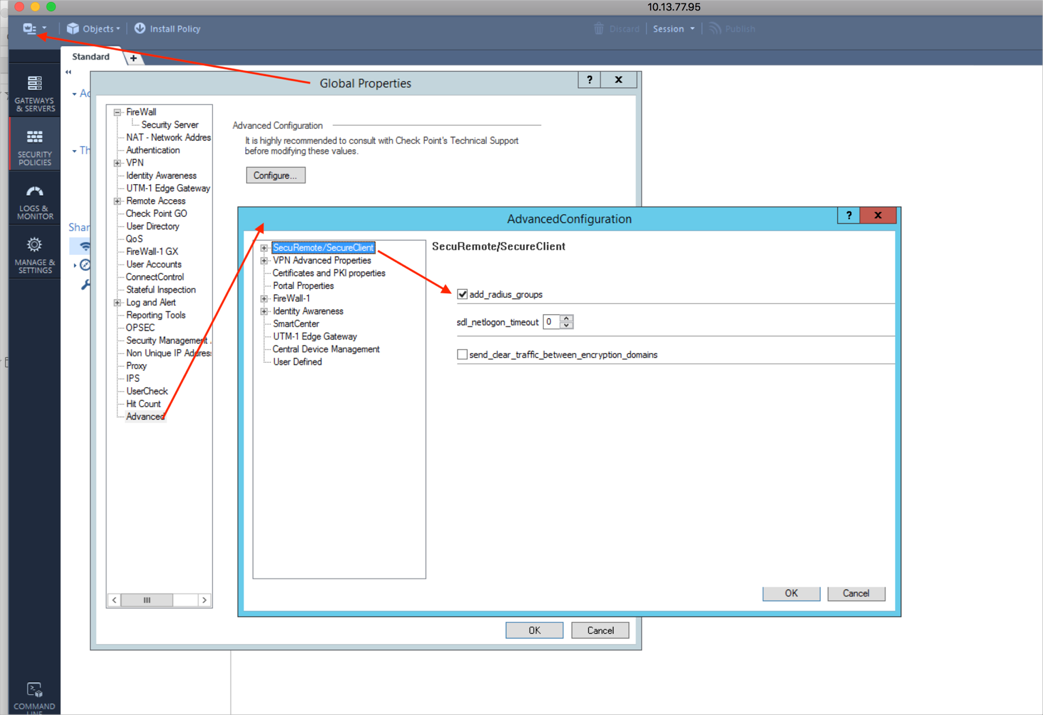
- From the upper left corner menu, navigate to , check add_radius_groups, then click OK:
- Define the RADIUS user groups.
Note: It is not necessary to define RADIUS user groups if there is no requirement to use that group as a Participant User Group.
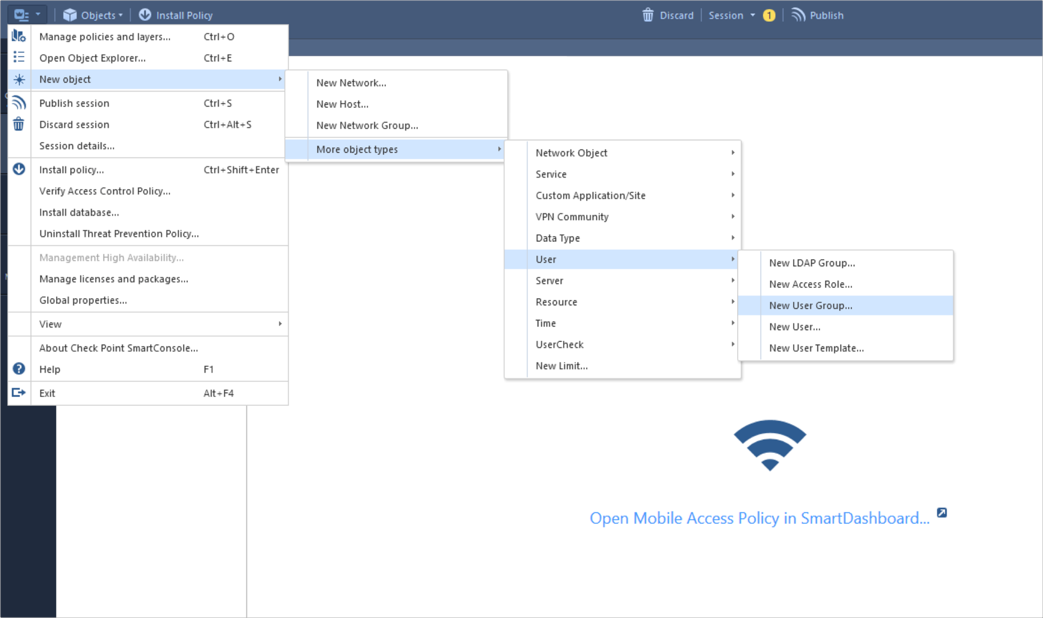
- From the upper left corner menu, navigate to .
- Enter the name of the group in the following format:
RAD_<group to which the RADIUS users belong>.Note: For older version the format might be different. Refer to your admin guide for details.
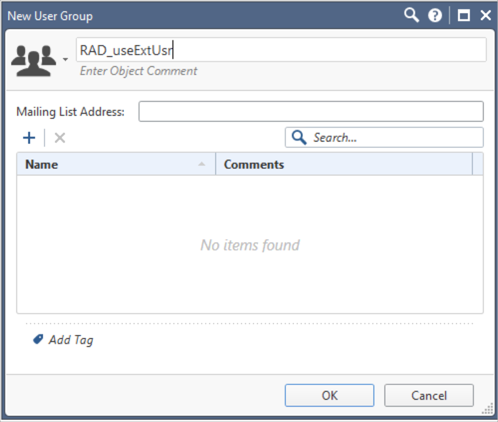
-
Make sure the group is empty. Click OK, then click Close.
Configure a policy to use RADIUS authentication
In this step, we'll describe the following two use cases:
Remote Access VPN client Example
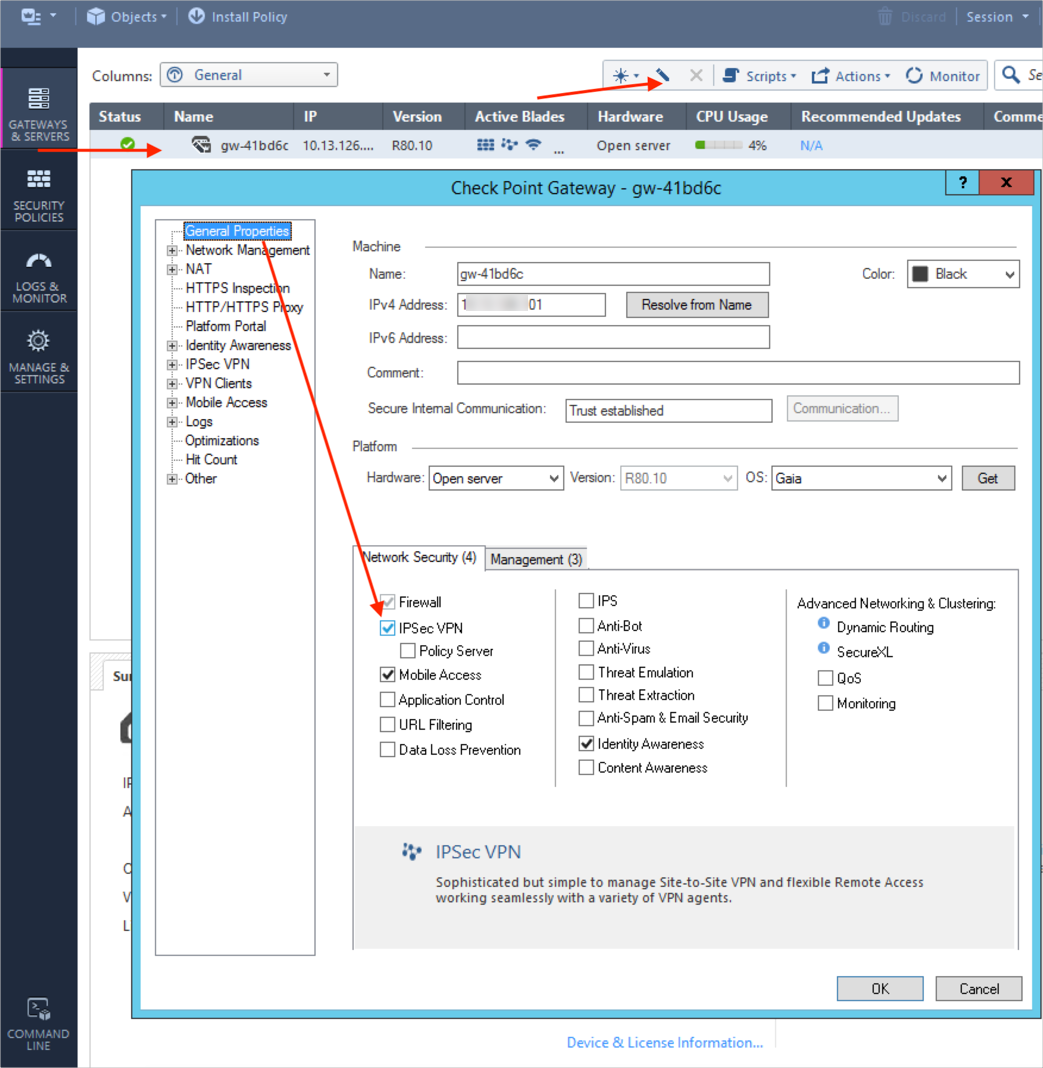
-
In the SmartConsole, edit the gateway object and select IPSec VPN:
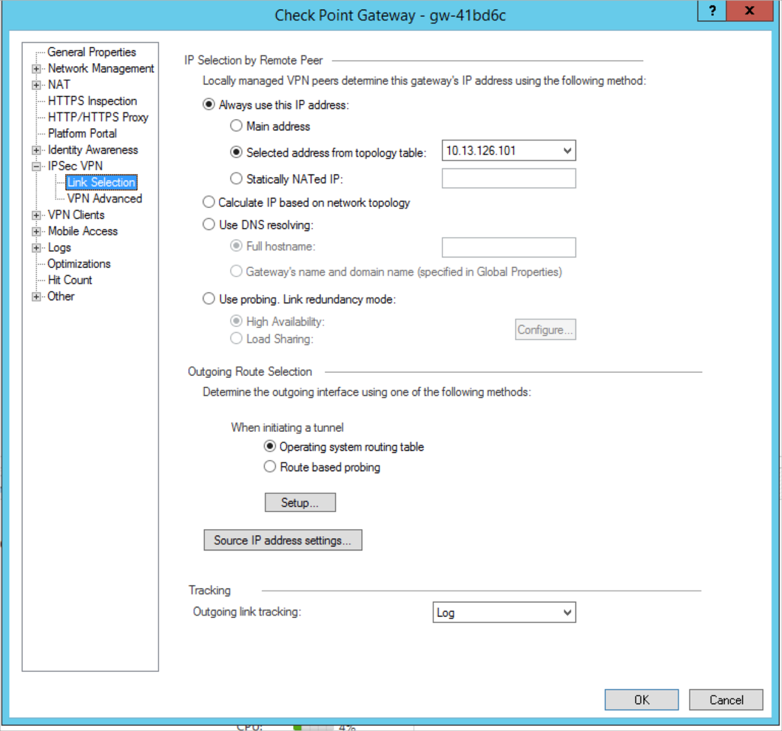
-
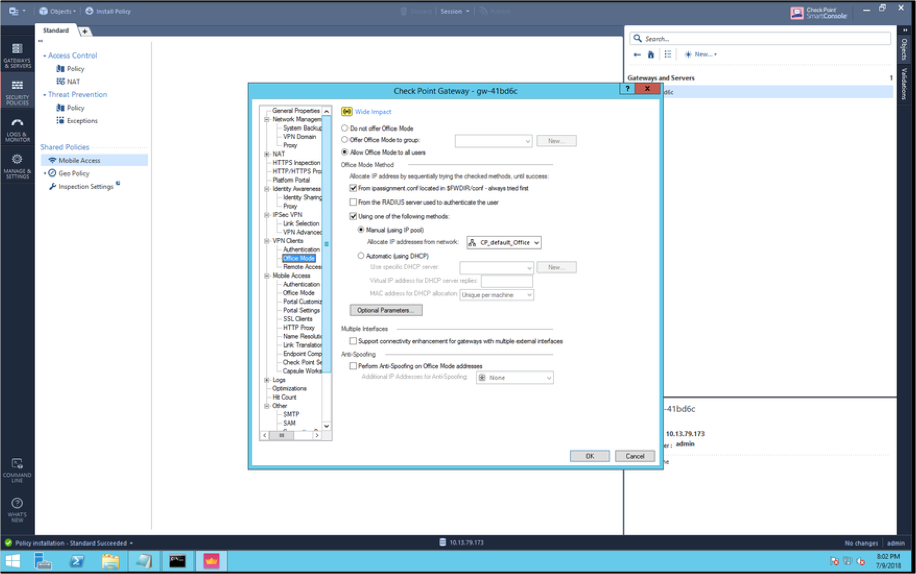
While editing the gateway object, select Link Selection in the IPSec VPN branch. If needed, also modify the gateway address to use the external gateway address.
- Select the branch and enable Allow Office Mode for all users using the default CP_default_Office_Mode_addresses_pool object:
-
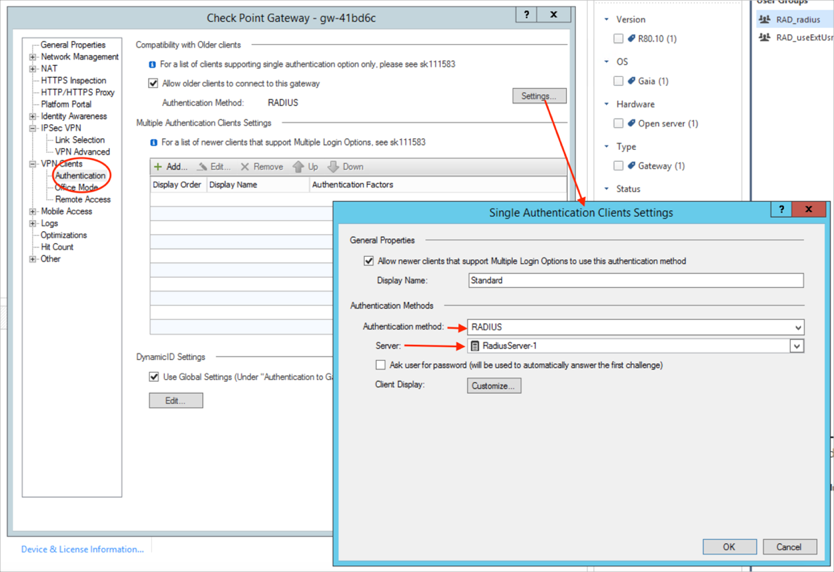
Navigate to , then in the Single Authentication Clients Settings dialog, select RADIUS as the Authentication method and for Server, select the RADIUS server we created earlier. Click OK when done.
-
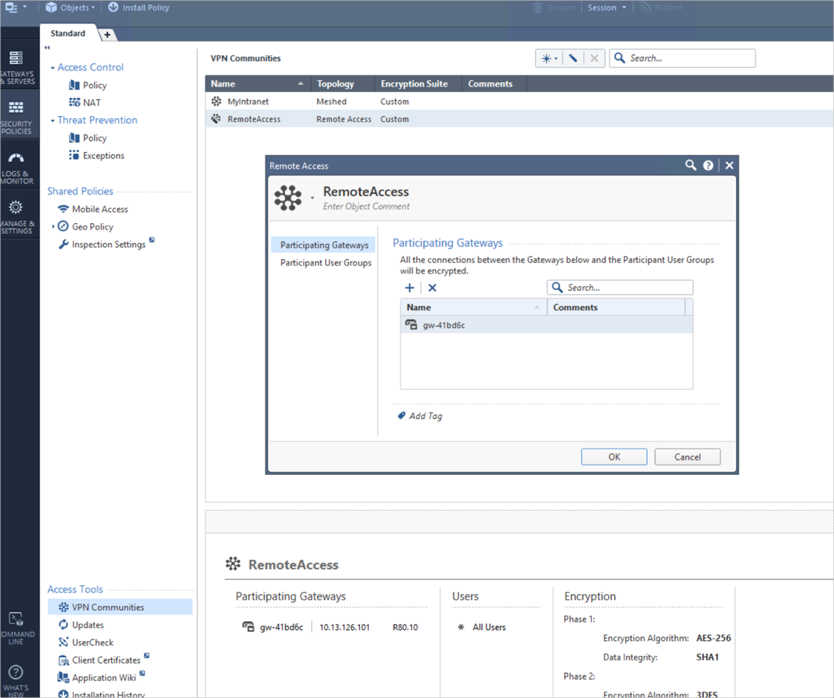
Navigate to SECURITY POLICIESthen select Access Control. This displays Access Tools VPN Communities. Click VPN Communities. Double-click to open the RemoteAccess community, then click + (plus) to add the gateway.
-
Click Participant User Groups and accept the default All Users.
Configure browser access to the Check Point Mobile Access SSL VPN portal
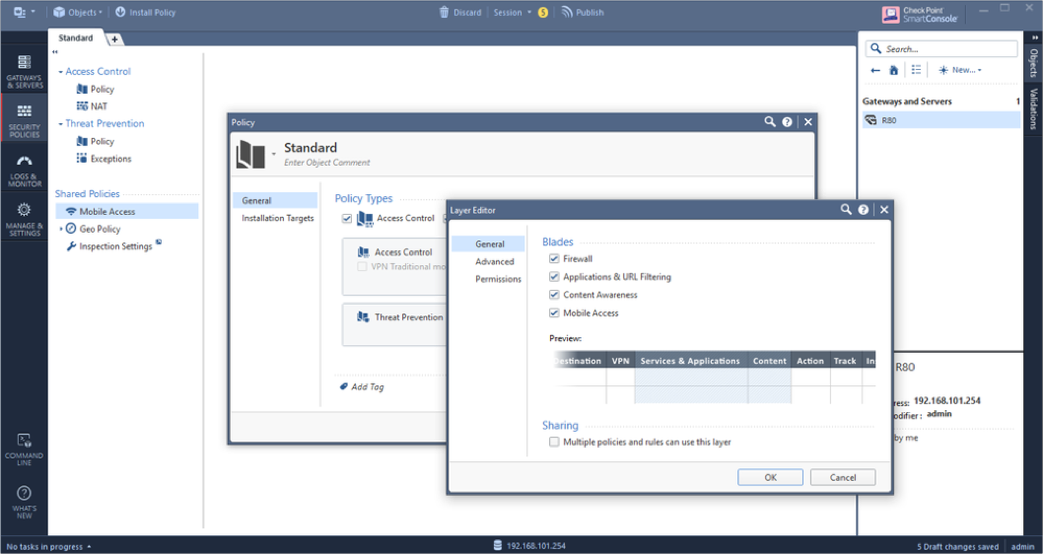
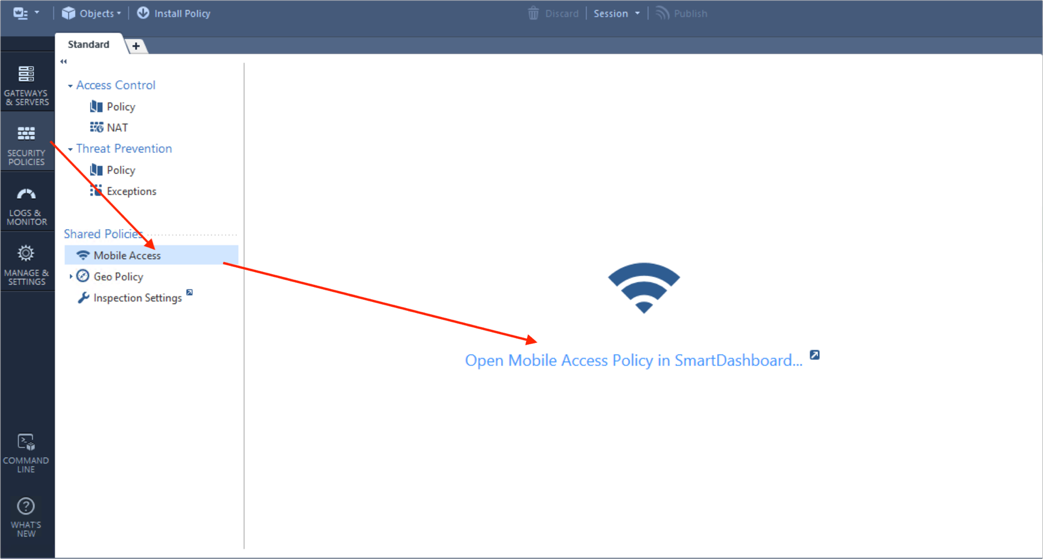
- Right-click the Access Control Policy and select Edit Policy. Select the Access Control Layer menu box, then select Edit Layer and Enable Mobile Access in the policy:
-
Select Mobile Access in the Access Control policy. Click the link to open the Mobile Access Policy in SmartDashboard.
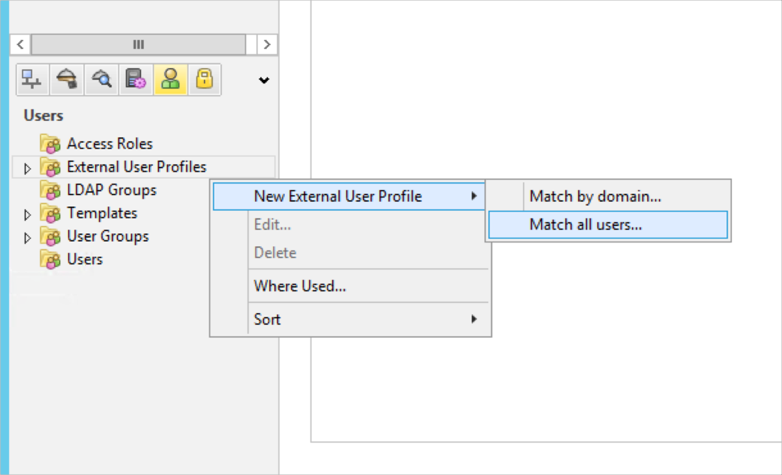
- In the lower left corner click on the Users object. Right-click External User Profiles and navigate to :
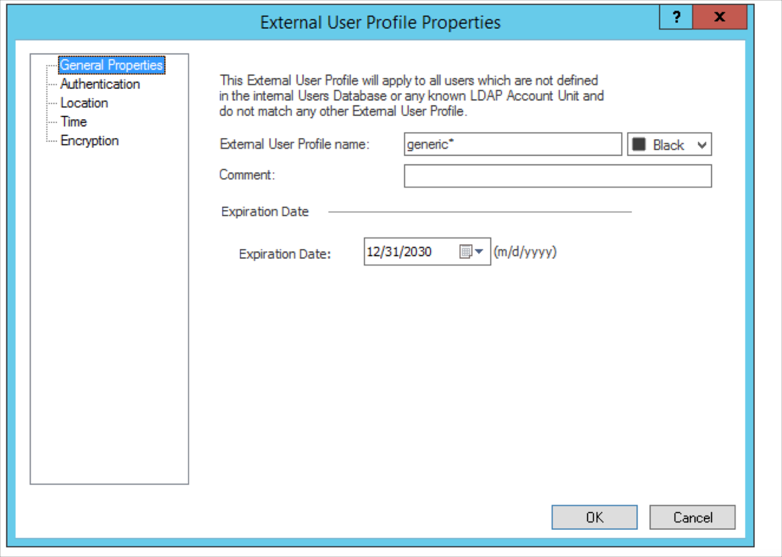
- The following External User Profile Properties dialog opens:
-
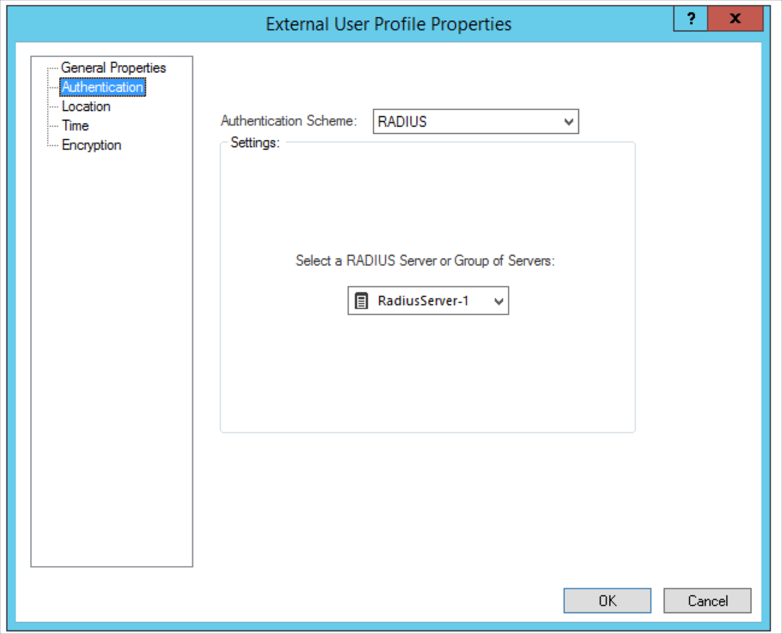
Select Authentication and select RADIUS as the Authentication Scheme, then select the RADIUS server configured above, for example: RadiusServer-1. Click OK when done:
-
Click OK, then click the Menu button then select . Close the SmartDashboard to return to the SmartConsole.
- Click Install Policy to publish the changes and install the policy on the R80 gateway.
Next steps