Configure the Cisco ASA VPN to interoperate with RADIUS
During this task we will configure the Cisco ASA VPN, specifically:
- Define a RADIUS Server Profile
- Define an Authentication Profile for Okta RADIUS Agent
- Apply the Okta RADIUS Authentication Profile to a Gateway
- Configure the portal to use the Okta RADIUS Authentication Profile.
Steps
Before you begin
Ensure that you have the common UDP port and secret key values available.
Configure Cisco ASA VPN
- Define an AAA Server Group
- Sign in to the Cisco ASDM console for the VPN appliance using an account with sufficient privileges.
- Navigate to , as shown below.
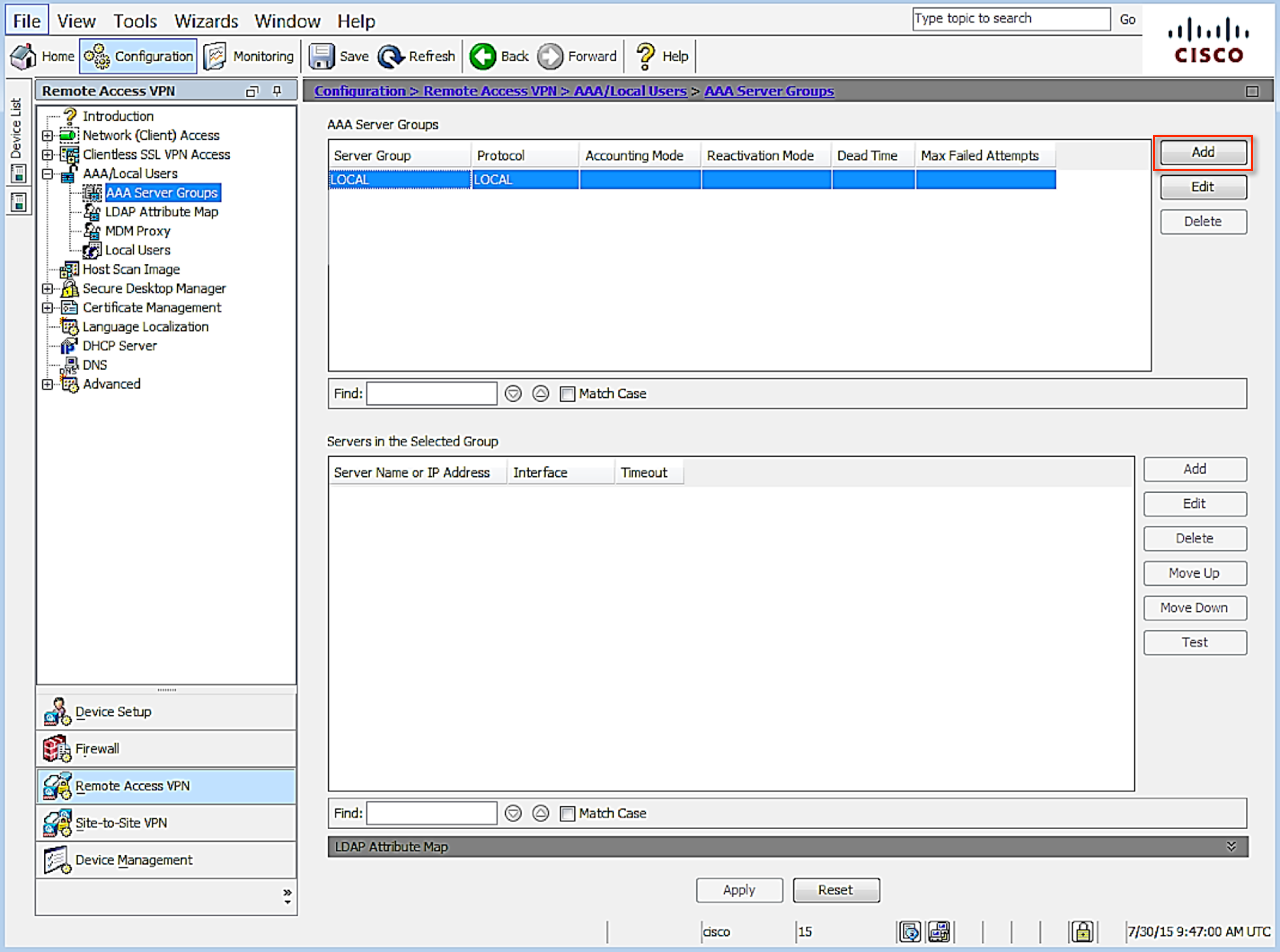
- Click Add to create a new group. The Add AAA Server Group dialog displays.
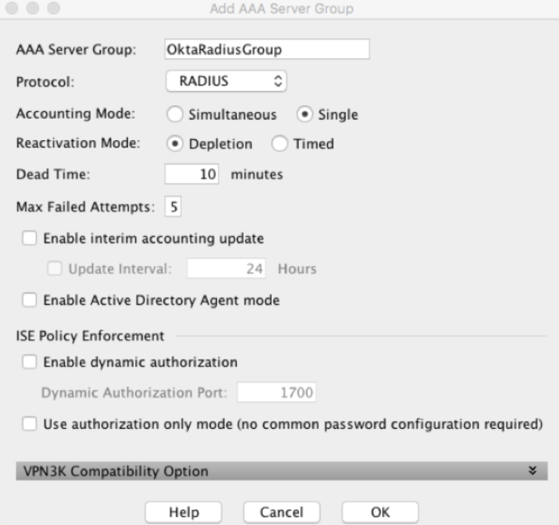
-
Leave the default settings except for the following:
-
AAA Server Group – specify a name to identify the group for the MFA server
-
Protocol – select RADIUS if necessary
-
- Click OK.
- Add AAA Server(s) to your AAA Server Group
-
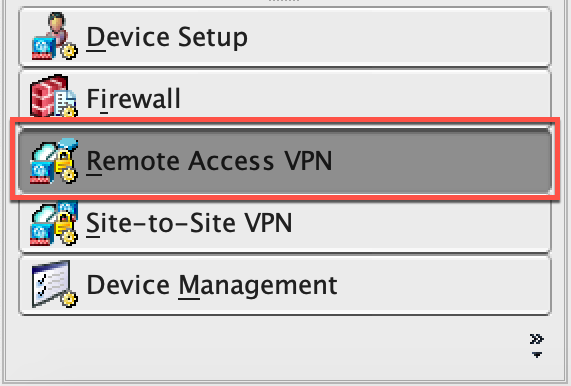
Select Remote Access VPN and navigate to . Select the server group just created.
- Click Add. The Edit 'ServerName' Server dialog displays.
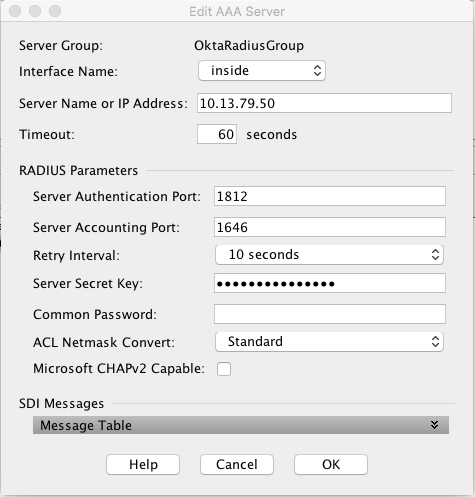
- Specify the following, leaving all other fields unchanged:
- Interface Name – select the interface that will handle communication with the MFA Server
- Server Name or IP Address – specify the name or the IP address of the Okta RADIUS Agent
- Timeout (seconds) – 60 seconds
- Server Authentication port – enter the required port number. Port 1812 was used as the example.
- Server Accounting Port – 1646. This value is not used, but must be entered to complete the setup.
- Retry Interval – leave default at 60 seconds
- Server Secret Key – provided secret defined when setting up the app in Okta.
- Common Password – leave blank.
- Uncheck Microsoft CHAPv2 Capable. (important).
- Click OK.
-
Click APPLY to save the configuration.
-
Modify the IPSec(IKEv2) Connection Profile
Modify the IPSec(IKEv2) Connection Profile to use the new Authentication Server group.
- Open the Cisco ASDM console for the VPN appliance.
- Click Configuration.

- Select Remote Access VPN.
- In the Remote Access VPN section, select IPsec(IKEv2) Connection Profiles.
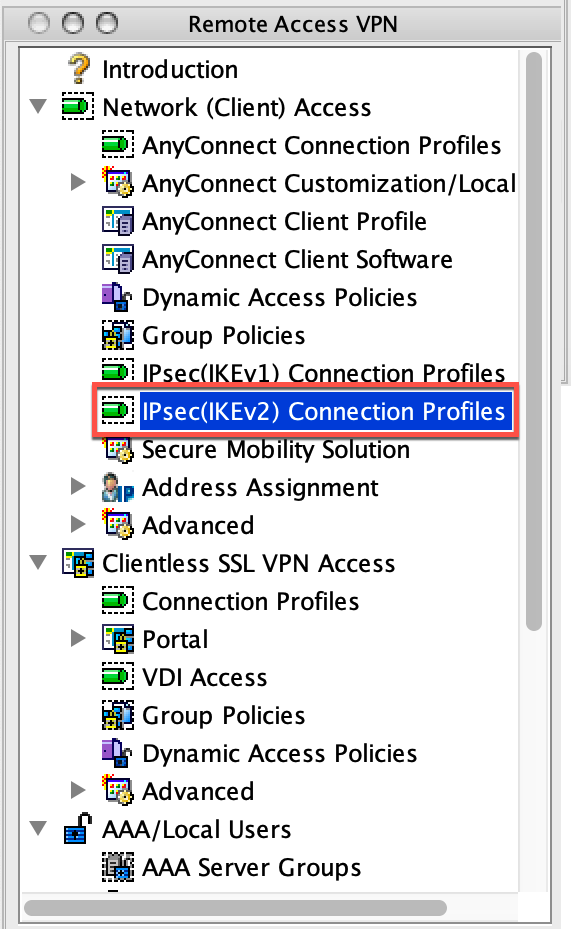
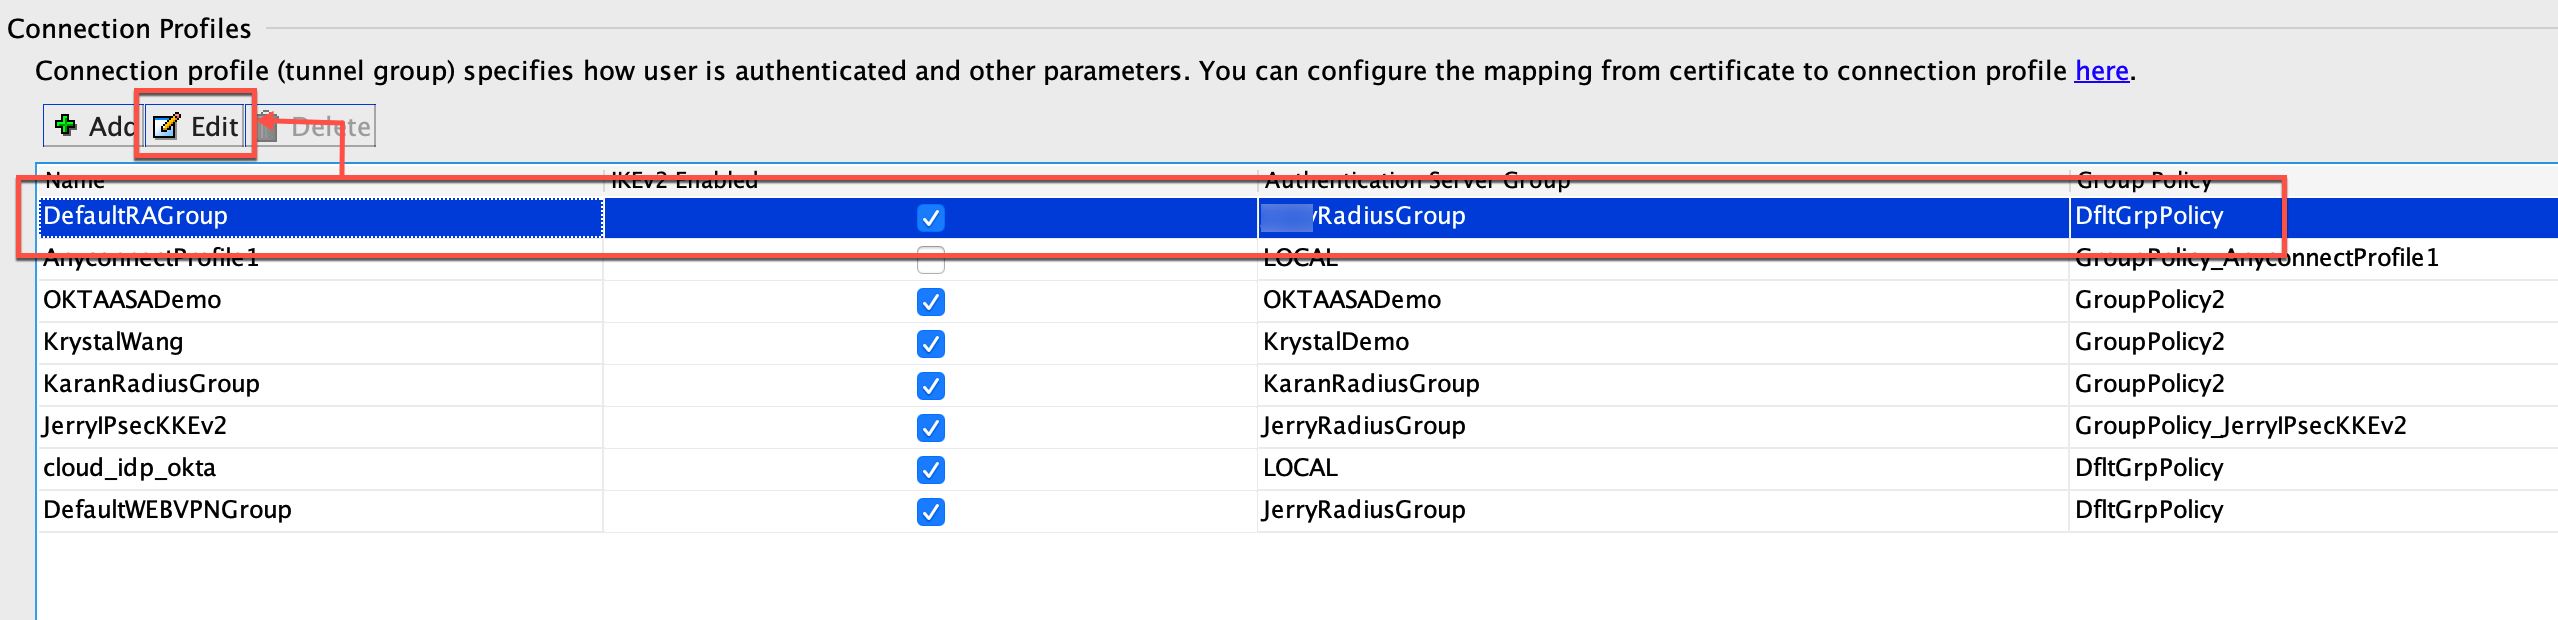
- Select the DefaultRAGroup group, and click Edit.
- In the IKE Peer Authentication Group section enable Enable Peer to Peer authentication using EAP and
Send an EAP Identity request to the client.
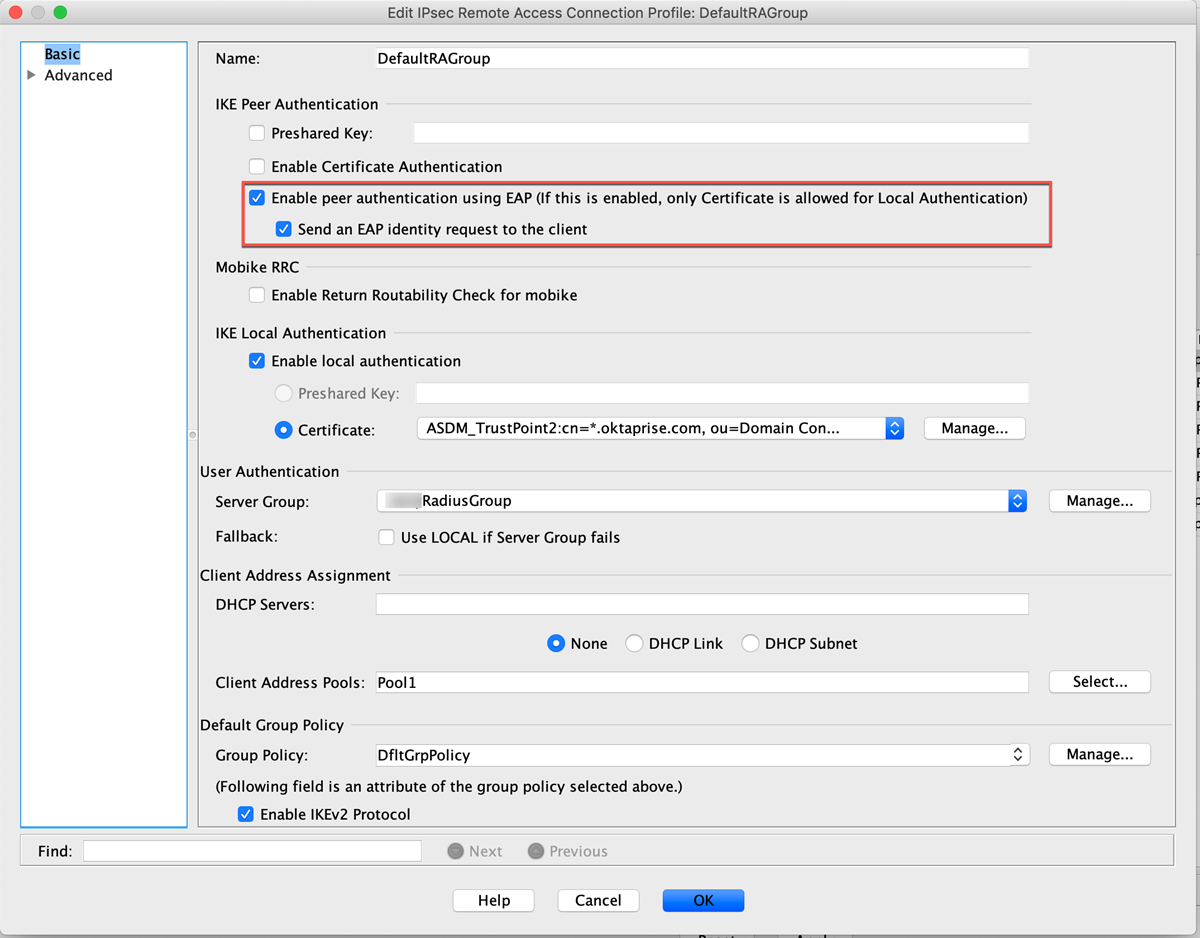
-
Click OK to save.