Configure the Fortinet gateway
During this task we will use the Fortinet web based Admin Console to integrate Fortinet with RADIUS.
Steps
- Define a RADIUS Server Profile
- Define a Firewall Group
- Define an IPv4 Policy
- Define Authentication/Portal Mapping
Before you begin
Ensure that you have the common UDP port and secret key values available.
In Part 3 you define a RADIUS Server Profile, define a RADIUS server, define a firewall group, define an IPv4 policy, and define Authentication/Portal mapping. Complete these using the Fortinet web based Admin Console.
Define a RADIUS Server Profile
- Sign in to the Fortinet Admin console for the VPN appliance with sufficient privileges
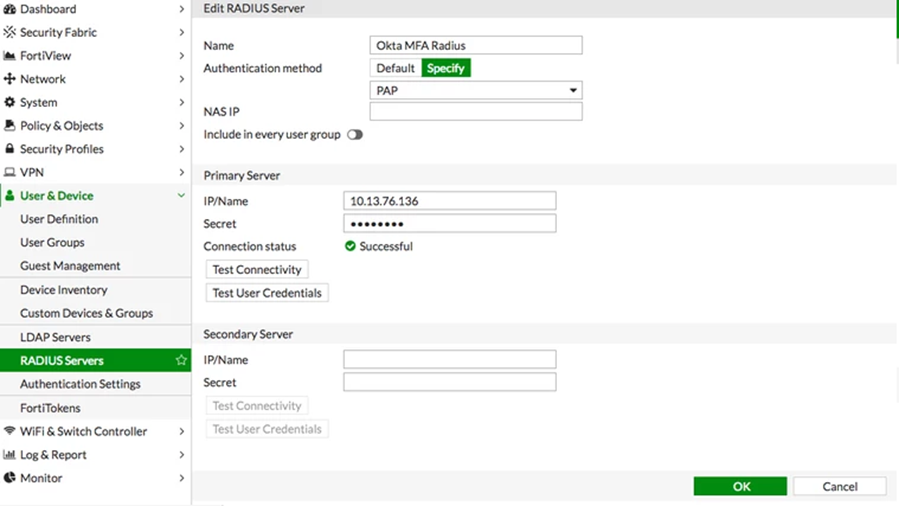
- Navigate to , and then click Create New to define a new RADIUS server, as shown below.
-
Enter the following values to create a New RADIUS Server
Field Value Name Unique and appropriate name (Okta MFA RADIUS) Primary Server IP / Name IP or Name of Okta RADIUS Server Agent Primary Server Secret Secret Key for the Fortinet Fortigate (RADIUS) App defined in Part 2, Step 3, above Secondary Server IP / Name Optional Secondary Server Secret Optional Authentication Method Specify Method PAP NAS IP Blank Include in every User Group unchecked Note: FortiGate defaults to using port 1812. To modify this setting, follow command line instructions below.
- Click OK to save these settings.
-
Set the Remote Authentication Timeout
The default timeout for Fortinet is 5 seconds; however, this timeout is insufficient when using Okta Verify Push. Run following commands from the command line to increase the timeout to 60 seconds.config system global set remoteauthtimeout 60 end -
[Optional] Change the Standard Port Definition
To define a UDP Port other than the default (usually 1812), run the following commands from the command line.
Note: These commands show the full RADIUS definition.
MyRadiusSecretKeyis the secret key for the Fortinet Fortigate (RADIUS) App defined in Part 2, Step 3, above. The command to define the RADIUS port is highlighted.config user radius edit "Okta MFA RADIUS" set server "10.20.251.19" set secret MyRadiusSecretKey set radius-port 1814 set auth-type pap next end
Define a Firewall Group
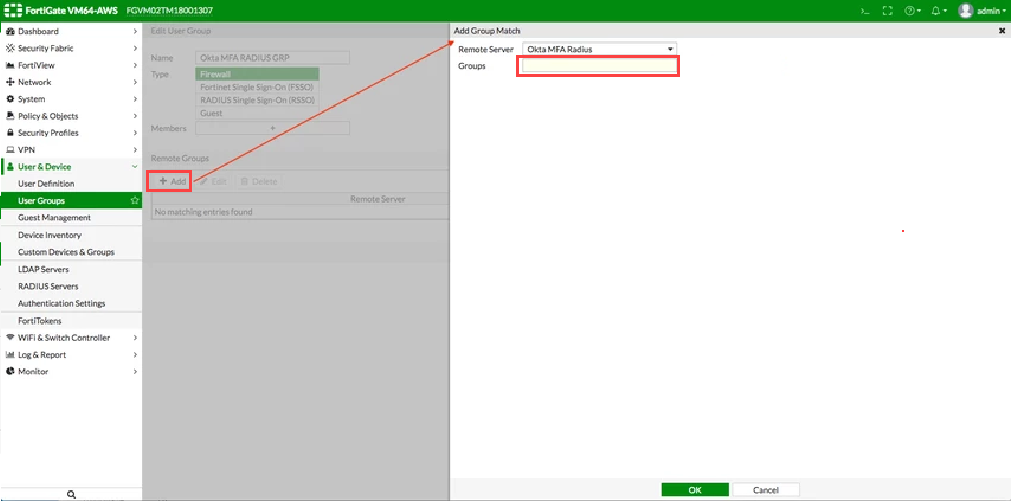
- Navigate to , and then click Add to define a new Group Match, as shown below. Note: Leave the Groups field blank.
-
Enter the following values to create a New Firewall Group
Field Value Name Unique and appropriate name (Okta MFA Radius Group) Type Firewall Single Sign-On (RSSO) Members blank Remote Groups Create New
Remote Server: Use the name created in Step 1, above (Okta MFA Radius)
Group Name: Any (Note: In Fortigate firmware 5.6.5 and above, leave the Group Name blank.)
- Click OK to save these settings.
Define an IPv4 Policy
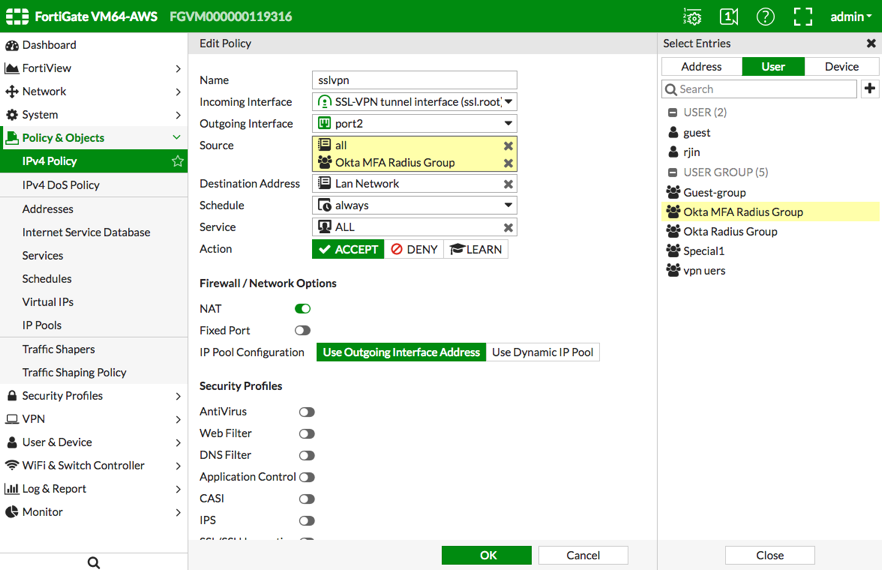
- Navigate to , and then locate and edit the policy related to your SSL-VPN interface. Edit the Source, as shown below.
- Navigate to the User Define an IPv4 Policy Select Entries dialog.
-
Select and add the group you created in the previous step (Okta MFA Radius Group).
-
Click OK to apply and save the settings.
Define Authentication/Portal Mapping
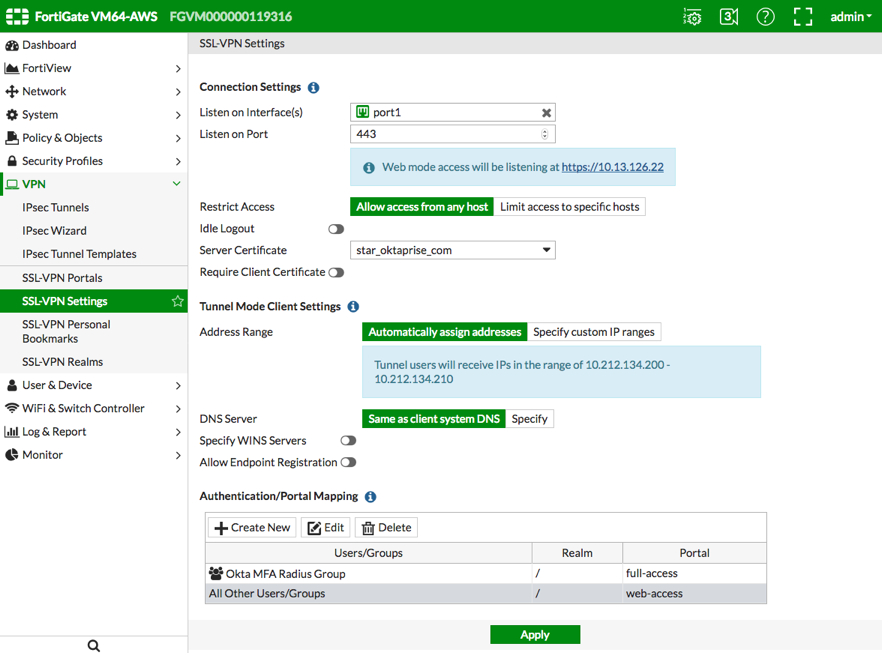
- Navigate to , and then go to the Authentication/Portal Mapping section,
- Create a new or edit an existing mapping, as shown below, to grant access to the Firewall group you just created in the previous step.
- Navigate to the User Define an IPv4 Policy Select Entries dialog.
-
Click Apply to apply and save the settings.
Next steps