Set up Okta Workflows for YubiKey shipment
This procedure explains how to connect your Yubico org with your Okta org using Okta Workflows. This Workflow is triggered when you order a pre-enrolled YubiKey for a user. It enrolls and activates a YubiKey for the user, creates the shipment order in the Yubico org, and sends a PIN to the user.
If the shipment information is sourced from an HRIS (Human Resource Information System) app such as ServiceNow or Workday, you also need to connect this app in Okta Workflows.
Before you begin
The second part of the journey to Require phishing-resistant authentication with pre-enrolled YubiKey contains tasks that you complete in the Okta Workflows Console. Complete Create phishing-resistant app sign-in policies and then proceed with this step.
Create a connection from the Okta org
- Create a connection from your Okta org. See Authorize the Okta connector.
- Create a connection for Okta Devices. See Authorize the Okta Devices connector.
Create a connection from the Yubico org
- Generate an API token in your Yubico org. Go to your .
- Make a copy of the token and store it in a secure location.
- In the Okta Workflows Console, go to .
- Select the Yubico connector.
-
In the New Connection window, enter the Connection Nickname. This is the display name you want to appear in your list of connections.
- In API Secret, paste the API token from Yubico, and then click Create.
Set up the Okta Workflows template for pre-enrolled YubiKey
- Add the pre-enrolled YubiKey template in your Workflows environment. See Available Workflows templates.
- Ensure that the template folder has the following flows:
- Create shipment trigger - MFA initiated
- Create shipment trigger - Group add
- Process shipments (cron job)
- Create shipment
- Call Enrollment API
- Map credential JWE
- Map FactorID to Key ID
- Process shipment
- Iterate shipment item
- Process product data
- Call Activate API
- Map credential response to enrollment ID
Activate Okta and Yubico connection in the flows
Connect each flow to your Okta or Yubico org. Perform the following steps for each flow:
- Open the flow and find the cards with an Okta or Yubico connection.
- Click Choose connection.
- Select your Okta org or Yubico org. Click Save. A green check mark appears next to Okta and Yubico, indicating that the connection is successful.
- Repeat for all other cards and the flows in the template.
-
Back in the folder, turn on each flow by toggling the On/Off switch. Okta recommends turning off the Create shipment trigger - Group add App Event flow. Only one App Event flow should be on at a time. The folder looks like this:

Update Create Shipment flow to integrate HRIS
This step is required only if the shipment information for your users is sourced from an external HRIS app, such as ServiceNow or Workday. If this information is sourced from Okta, skip this step.
The Okta Workflows template is set up to use Okta Universal Directory as the source for the shipment information. If this information is sourced from the HRIS, you need to update the Create shipment flow to import this information into the flow.
The flow looks like this after updating:

Create a connection from HRIS
Create a connection from the HRIS app. See Configure a connection. This connects the HRIS app to Okta Workflows.
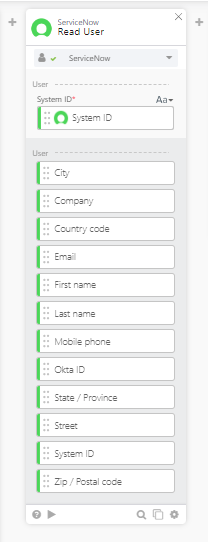
Create a Read User card for HRIS
In the Create shipment flow, next to the Okta Read User card, add a Read User card for the HRIS app.
- Under the + icon, click the cloud icon.
- Search for the HRIS app. Click the app to open the list of available action cards.
- Click the Read User card to add to the flow. Some apps may have a different name for this card. For example, in Workday, it's called the Read Worker card.
- In the card, ensure that the app is connected. A green bullet appears in front of the app name, indicating that the connection is successfully established.
- Click Save. The Inputs and Outputs sections appear.
- In the Outputs section, select the following fields that are required for the shipment and sourced from the HRIS app:
- Secondary email: Required for all Staged users and the Active users who have never signed into their account.
- Primary phone
- Street address
- City
- State
- Zip code
- Country code
- Organization
- Click Save.
Update mapping for error handling
Drag and drop each of these fields to replace the equivalent Okta fields in the flow to update the mapping for error handling.
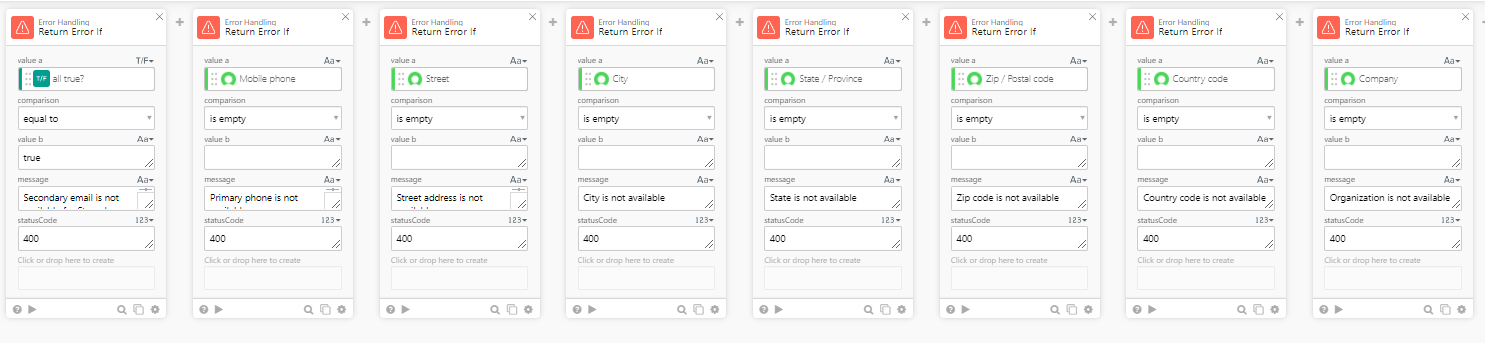
Here's an example:
- Drag and drop the City field to replace the Okta City field. The Replace All dialog opens.
- Click Replace All. This replaces all instances of the Okta field in the flow with the HRIS field.
- Repeat these steps for all other fields.
- Click Save Flow.
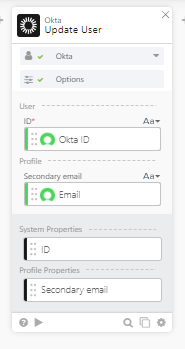
Add an Update User card for Okta
Next to the last Error Handling card, add the Okta Update User card.
- Under the + icon, click the cloud icon.
- Search for the Okta app. Click the app to open the list of available action cards.
- Click the Update User card to add to the flow.
- In the card, ensure that the app is connected. A green bullet appears in front of the app name, indicating that the connection is successfully established.
- Click Save. The Inputs and Outputs sections appear.
- In the Inputs section, select the Secondary email field. Clear all other fields in the section.
- In the Outputs section, select the ID and Secondary email fields. Clear all other fields in the section.
- Click Save.
- Map the user's secondary email address sourced from the HRIS to their secondary email address in Okta. This updates the user's secondary email address in Okta.
The Create shipment flow is now set up to source information from the HRIS app.