Build a custom API action card
A Custom API Action (CAPIA) is an action card for connectors that allows the end user to make an authenticated HTTP request to an external service.
The base URL is hard-coded into the connector, so users only need to add the relative URL for the endpoint. They then manually create the required objects for header, query, and request body, if necessary.
The CAPIA then returns data from the service as three outputs: Status Code, Headers, and Body.
-
Create a flow under the Flows tab by clicking + New Flow in the upper right corner of the page.
-
Click Action.
-
Click Save in the toolbar and name the flow
Custom API Action. -
In the flow description field, type
Make an authenticated HTTP request to the {your service} API. Select the Save all data that passes through the Flow option, and then click Save. -
Click Add Options on the Connector Action card.
-
Click Add Field and add a field with the label
Request Typeand a type of Dropdown: Static Values. -
Click Add Option to add a row for each request type the user can choose for your API:
GET,PATCH,POST,PUT, andDELETE. Fill in the Option and Value fields with the same text. You don't need to select a default. -
Make sure that the field is marked as Required and click Save.
-
Click Add Inputs on the Connector Action card.
-
Click Add Field and add the following fields and data types and click Save.
-
Relative URL: Text and Required -
Query: Object -
Headers: Object -
Body: Object
-
-
Add input validation for the Relative URL input. This prevents against vulnerabilities such as Cross-Site Request Forgery (CSRF) attacks.
-
Add a Text At card as the first card in the flow.
-
Drag the Relative URL output from the Connector Action card into the text input on the Text At card.
-
Set the position input to
0on the Text At card. -
Add an error handling Return Error If card as the second card in the flow.
-
Drag the character output from the Text At card into the value a input on the Return Error If card.
-
Set the comparison option to not equal on the Return Error If card.
-
Set the value b input to
/on the Return Error If card. -
For the message input, enter
Relative URL must include a leading '/'.on the Return Error If card. -
Set the statusCode input to
400on the Return Error If card.
-
-
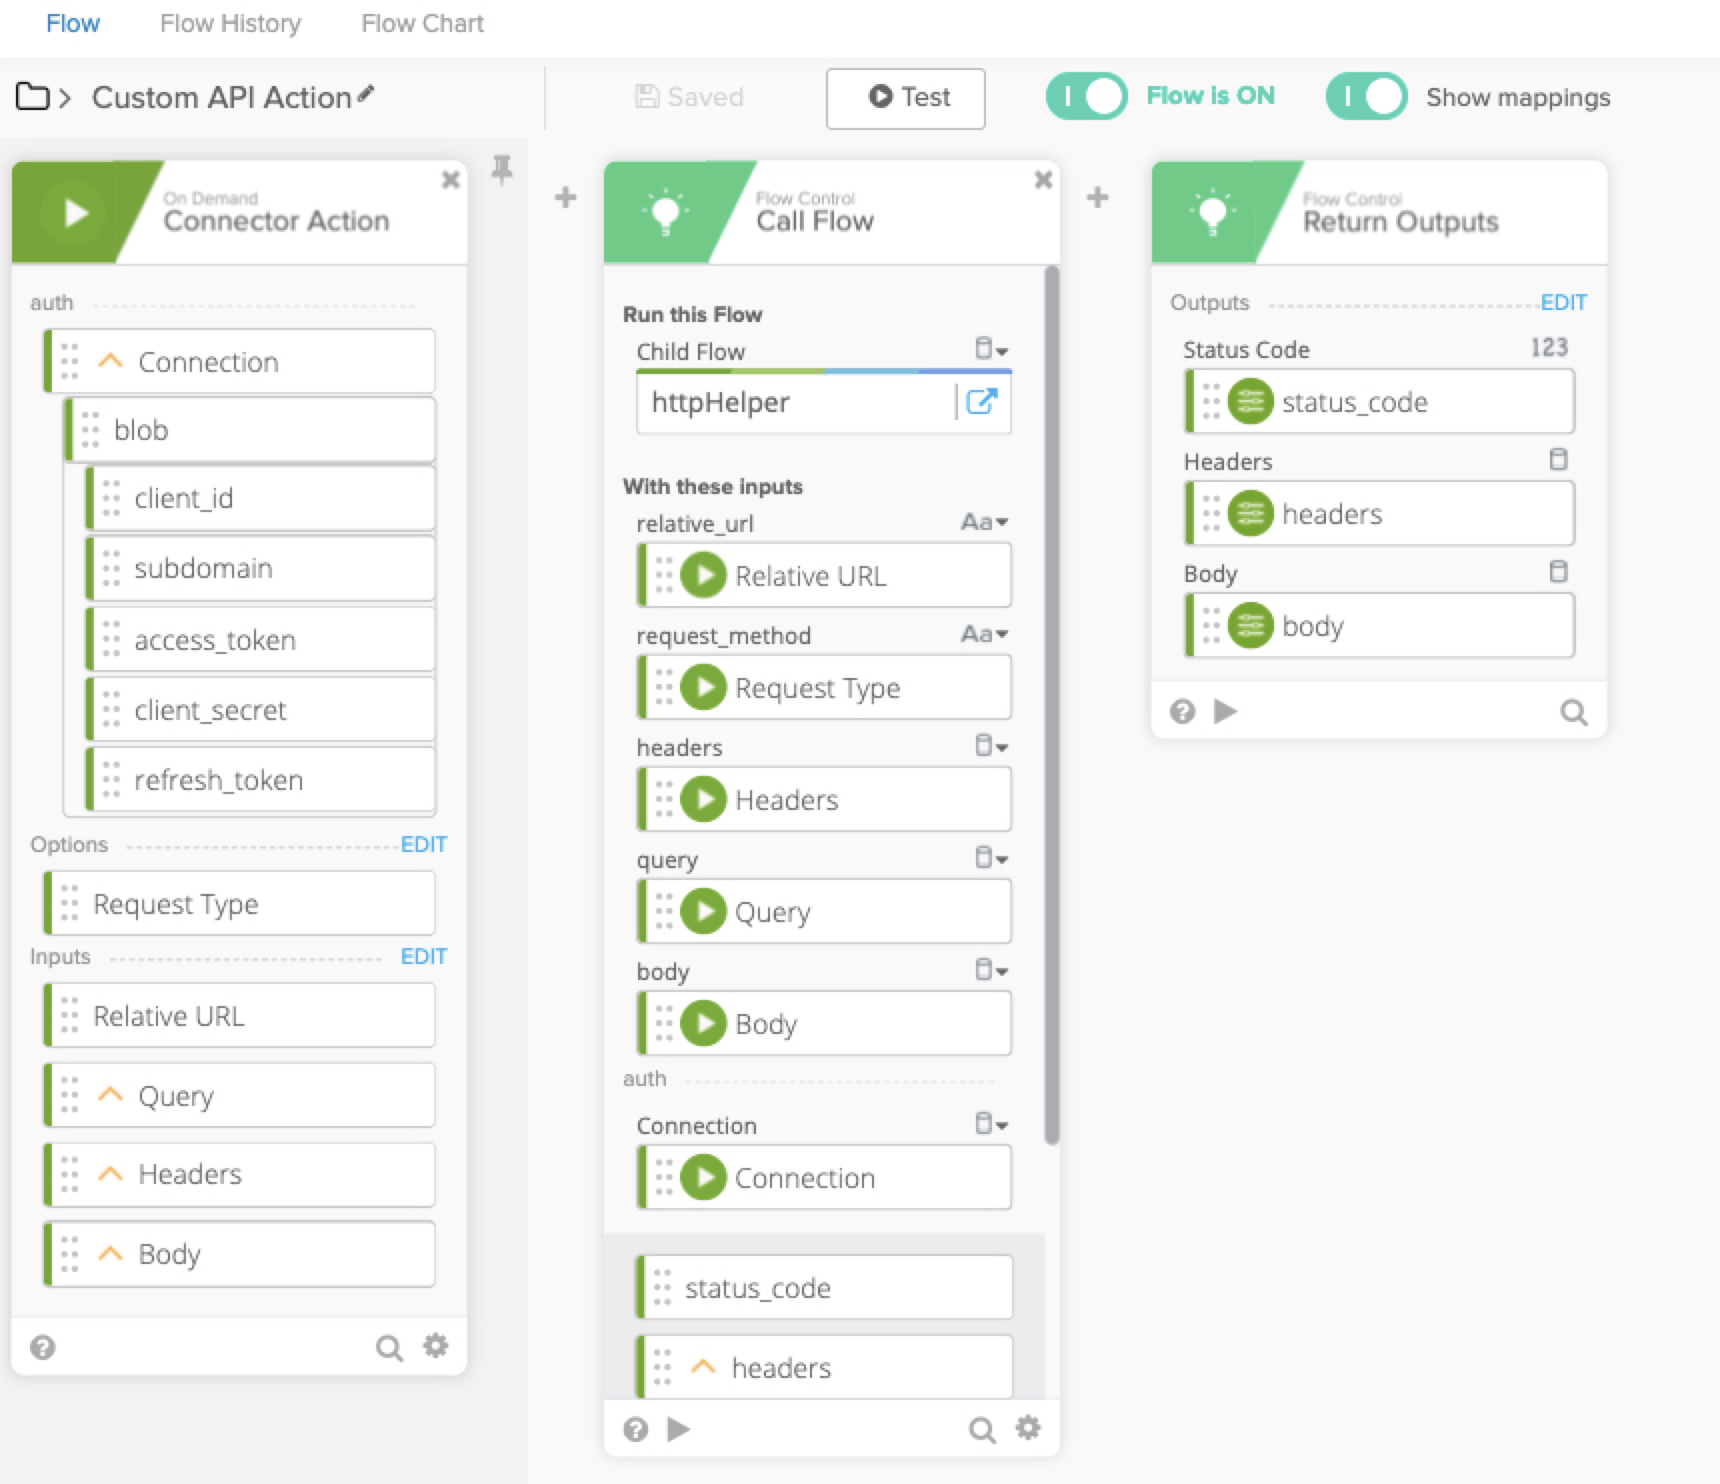
From the Flow Control functions, add a Call Flow card as the third card in the flow.
-
Click Choose Flow.
-
Select the httpHelper flow you previously created. The card automatically populates using the inputs defined in the httpHelper flow.
-
Drag the Relative URL output from the Connector Action card into the relative_url input on the Call Flow card.
-
Drag the Request Type output from the Connector Action card into the request_method input on the Call Flow card.
-
Drag the Query output from the Connector Action card into the query input on the Call Flow card.
-
Drag the Headers output from the Connector Action card into the headers input on the Call Flow card.
-
Drag the Body output from the Connector Action card into the body input on the Call Flow card.
-
For the outputs on the Call Flow card, you also need to define the same keys as on the httpHelper flow's outputs:
-
status_code: Number -
headers: Object -
body: Object
-
-
Click Add Outputs on the Return Outputs card.
-
Click Add Field to add the following three new fields with data types and click Save.
-
Status Code: Number -
Headers: Object -
Body: Object
-
-
Drag the outputs from the Call Flow card to the corresponding inputs on the Return Outputs card.
-
Drag the auth object from the connector Authping card to the Connection input field of the Call Flow card.
-
Save and test your flow by manually adding a request method, relative URL, and any other data to the test dialog.
Next steps