Guidance for Okta connector
Read the following information for guidance and best practices when using an Okta connector in your flows.
Authentication
-
You must have super admin credentials.
Note:In addition to the initial authorization of the connector, reauthenticating this connection requires an account with either Okta super admin, Workflows Administrator, or Connection Manager privileges.
-
You must be assigned to the Okta Workflows OAuth app.
-
You also need the following information for authorizing your Okta account:
-
Domain: The domain of your Okta org, without the
https://prefix or the-adminportion of the URL. For example, if your Okta Admin Console URL ishttps://yourcompany.okta.com, then your domain isyourcompany.okta.com. -
Client ID and Client Secret: The client ID and client secret from your Okta Workflows OAuth app.
You can retrieve these values through the Okta Workflows OAuth application:
-
In the Admin Console, go to .
-
Open the Okta Workflows OAuth application.
-
Click the Sign On tab and copy the Client ID and Client secret values in your Okta connection details.
-
-
Types of accounts
The account used to create the connection must have super admin credentials.
Often, it's a better practice to create a specific service account with super admin credentials for Okta Workflows and then use that account to authorize the connection. Otherwise the Okta user account used to set up the connection is associated with any actions performed by Okta Workflows.
Grant or revoke scopes
To change the scopes in your Okta Workflows OAuth app, perform the following steps in the Workflows Console:
-
Go to . A list of available scopes appears.
-
Review the Scopes for Okta connector cards to find out which scopes you need for the event and action cards you want to use with this connection.
-
Click Grant for each scope that you want to grant. Click Revoke for each scope that you want to remove.
-
If the scope isn't listed in the Okta Workflows OAuth app, you can use the Okta API to handle this.
-
If you don't already have one, create an API token.
-
Manually grant the scope using the Grant consent to scope API endpoint. Or revoke the scope by calling the Revoke an app Grant API endpoint.
See OAuth 2.0 Scopes for a list of all available scopes.
-
For an existing Okta connection, you must reauthorize the connection to pick up any scope changes.
New features and scopes
When a release of Okta Workflows adds features, or when a feature is enabled for your org, these changes can add new scopes to the available scopes in the Okta Workflows OAuth app.
To add the new scopes to your existing connections, follow the steps in the Grant or revoke scopes section.
Best practices
The following information provides more configuration information for Okta cards.
Search System Log options
-
In the Keyword field, the query parameter q is used to perform keyword matching against the attribute values for a
Log Eventsobject. All input keywords must be matched exactly (keyword matching is case-insensitive). See System Log. -
No values are returned when using a keyword match on an attribute with a null.
-
The eq operator is used to concatenate each key and value pair, and combines different keys with an
andoperator. To use other operators, use the Custom Filter field to build your own expression. Those predefined fields and the Custom Filter field are concatenated using theandoperator. See System Log.
Get users or groups
The following examples show configurations for obtaining both the first 200 groups and for streaming records.
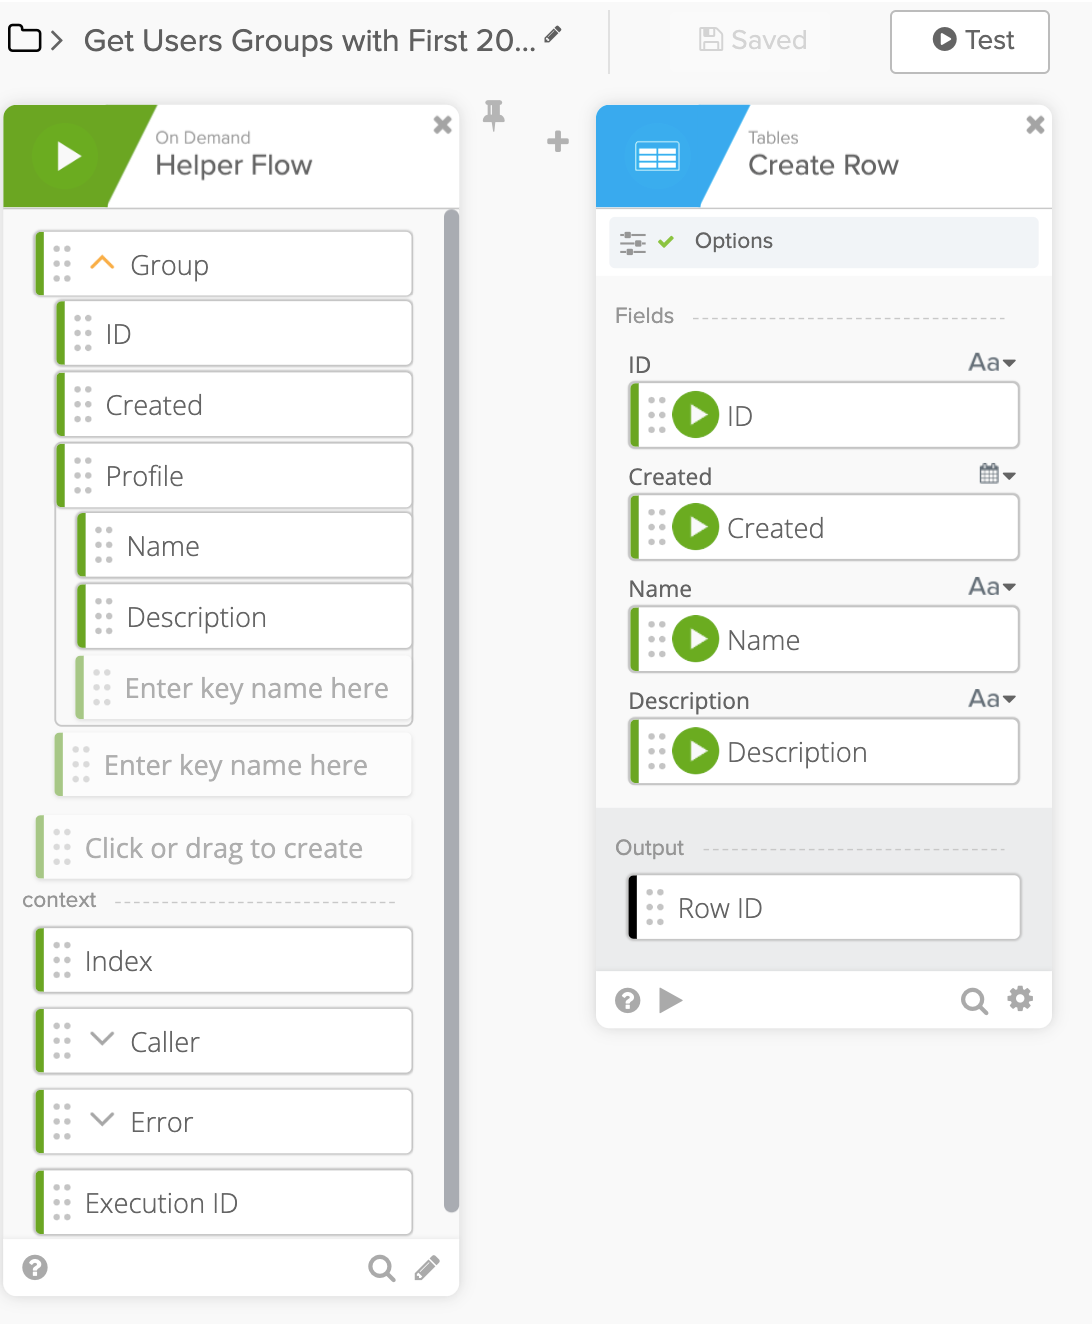
First 200 records
This flow captures the first 200 groups that a user joined on a monthly basis.
-
Parent flow
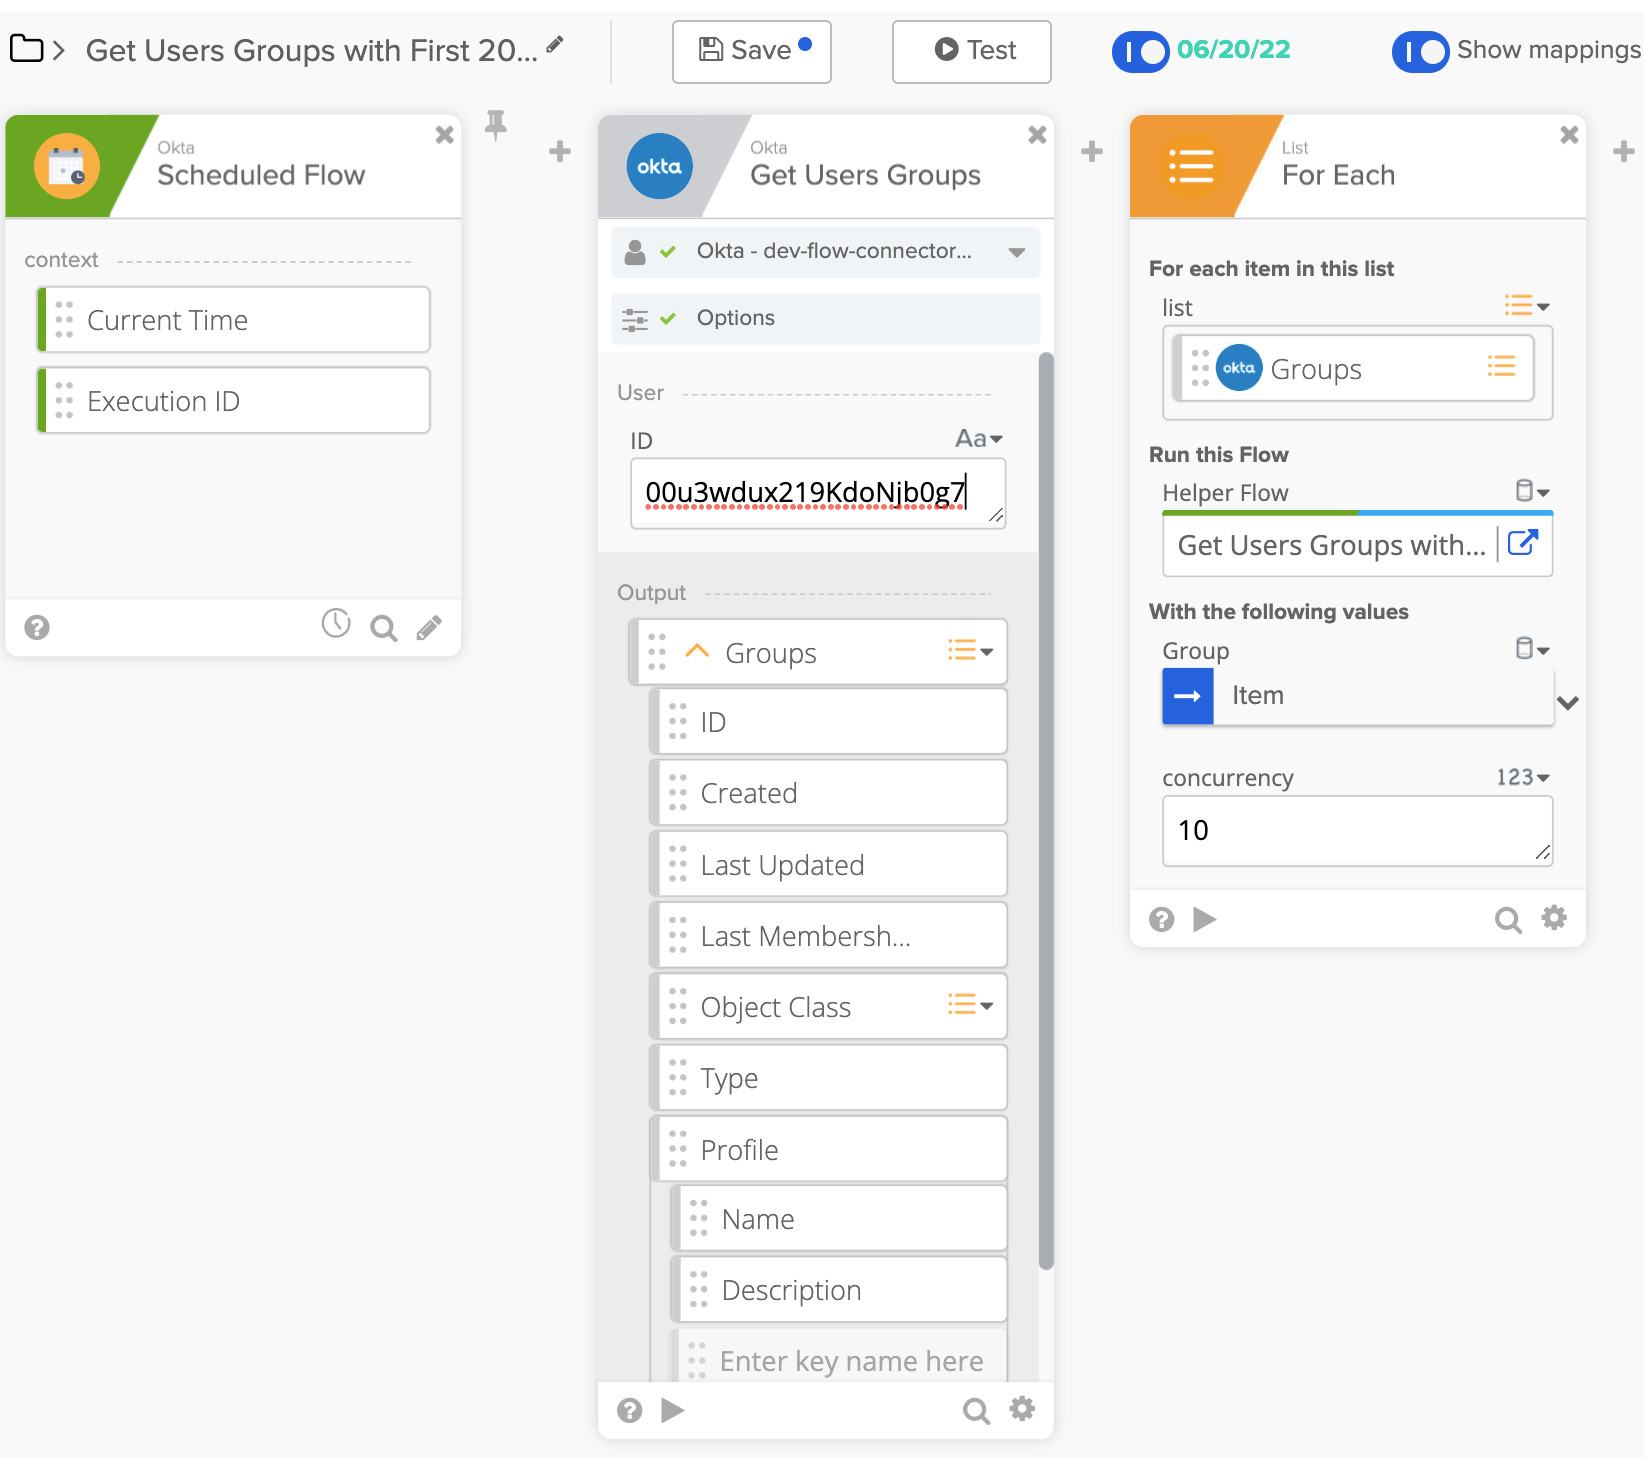
-
Helper flow
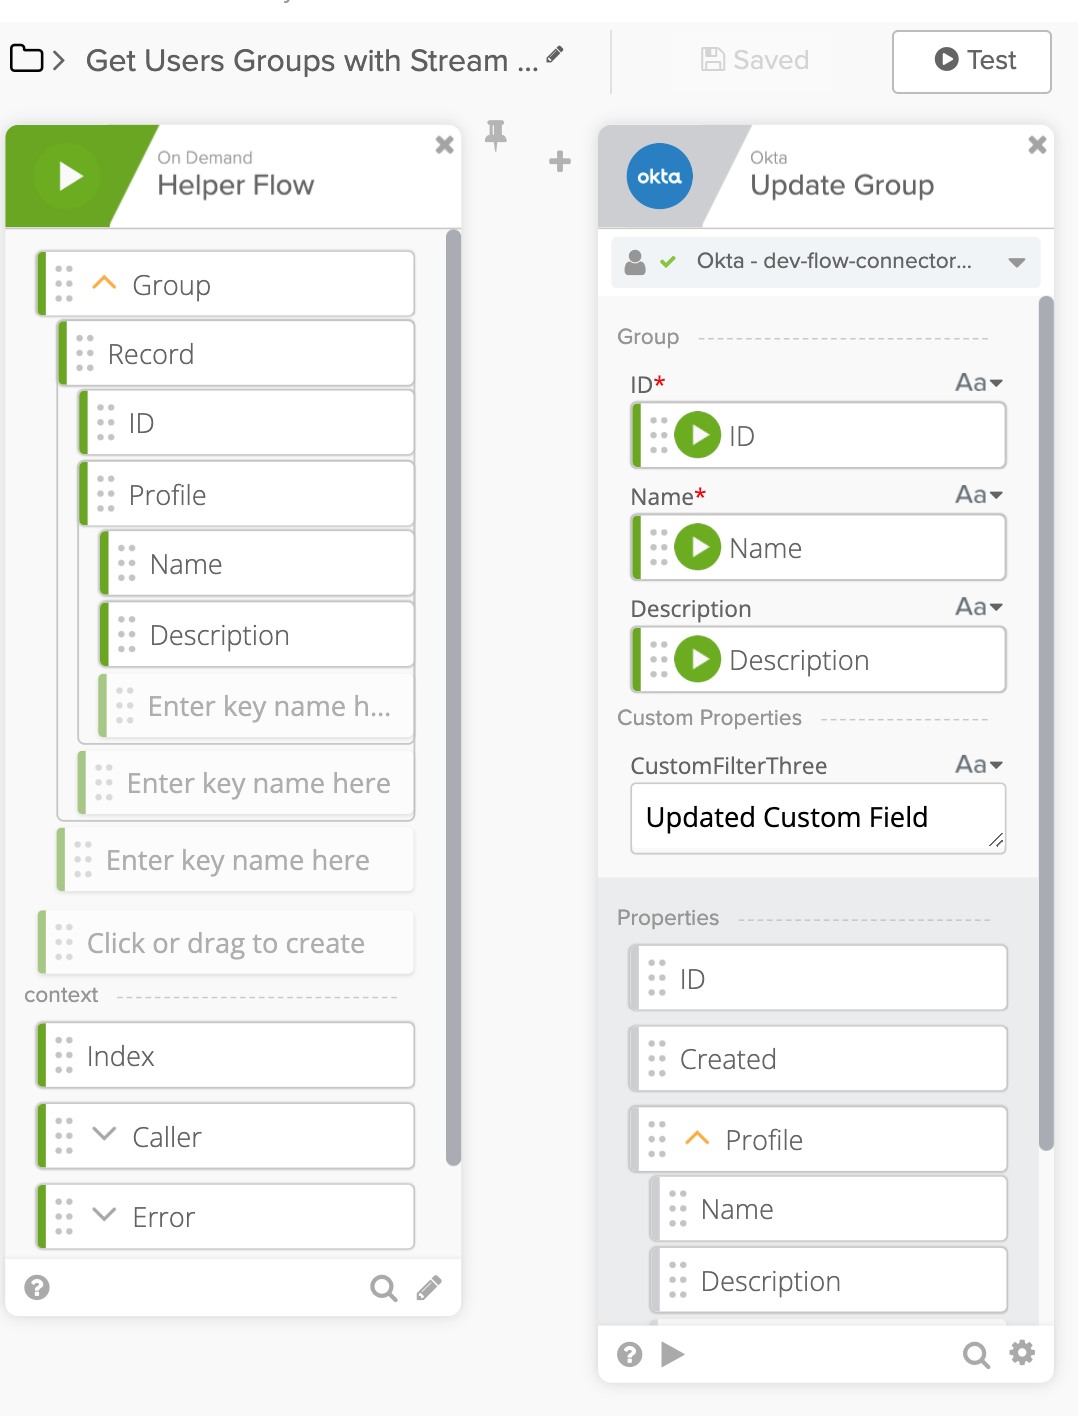
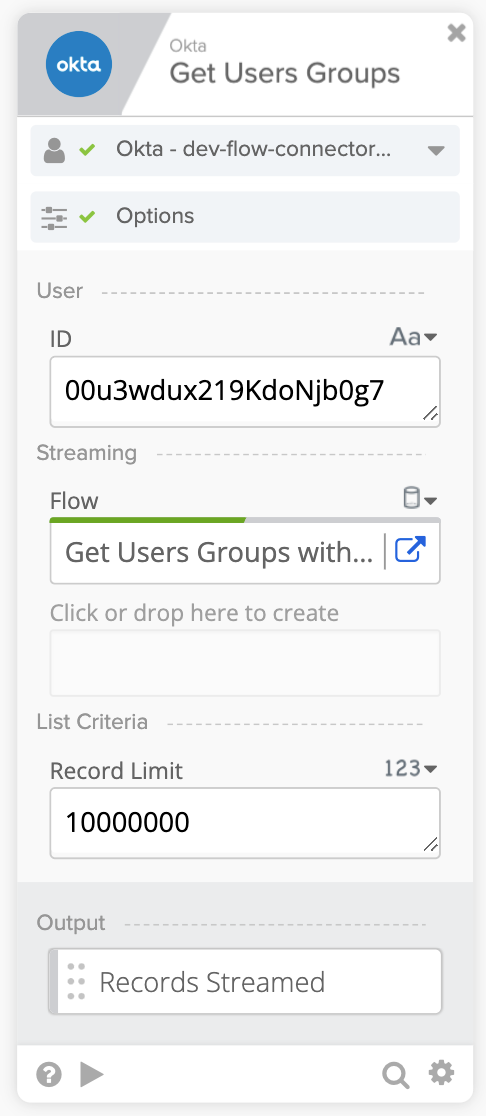
Stream records
This flow updates one Custom Field value for all the groups that a specific user joined.
-
Parent flow
-
Helper flow