Connect your applications
When you build a flow, connections authorize Okta to interact with your target application. Each application controls access in different ways--some use API tokens and others use OAuth scopes. Each user has a different access level depending on their permission level in that application.
Authenticate your Okta account
Authenticate your Okta account before you do anything else in the Workflows Console. You only need to do it once. This task requires you to copy information from your Admin Console to the Workflows Console, so be sure to keep Admin Console open.
- In Admin Console, go to .
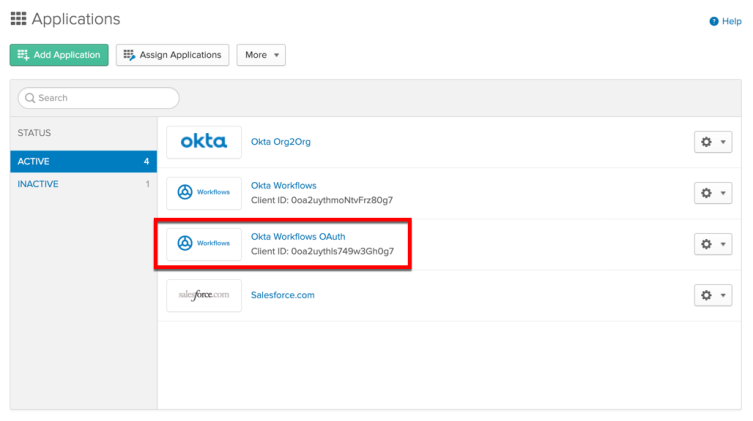
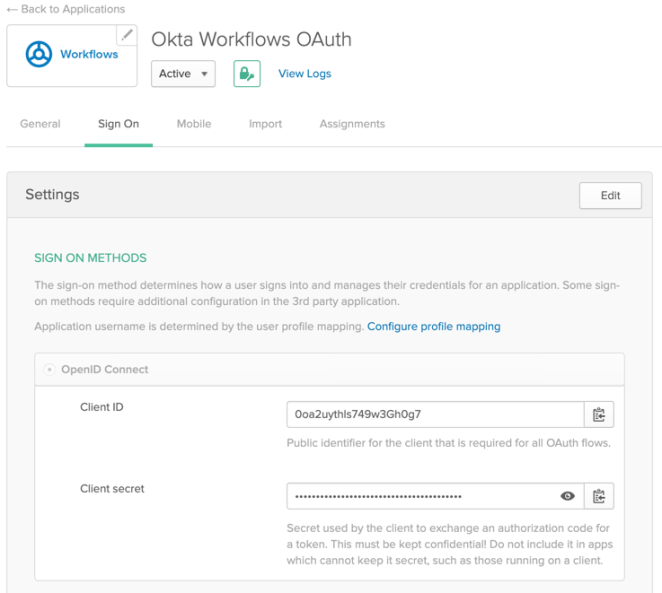
- Select the Okta Workflows OAuth app, and then open the Sign On tab. Keep this page open, and continue to step 3.

- In the Admin Console, go to .
- In the Workflows Console, click New Connection.
- In the Connection Nickname field, enter the display name that you want to appear in your connector list.
- In the Domain field, enter your Okta org's domain, without http:// and -admin, if applicable. For example, if the URL is http://organization-admin.okta.com, your domain is organization.okta.com.
- In the Admin Console, copy the client ID from the Okta Workflows OAuth app. Return to the Workflows Console, and paste it in the Client ID field of the Connection window.
- In the Admin Console, copy the client secret from the Okta Workflows OAuth app. Return to the Workflows Console, and paste it in the Client Secret field of the Connection window.

- In Workflows Console, click Create.
Connect other applications
With your Okta account authenticated, you can now start building Flows to other applications. Connection requirements vary by application, but all require a Connection Nickname so that you can create multiple accounts (for example, admin or end user).
There are two ways to set up connections:
- On the Settings page in the Workflows Console, click New Connection. Click the icon of the app you want to connect, and enter the required information. App-specific help is available in this window by clicking Need Help?.
- In the Workflows Console, click New Flow. When you add an event or action for an unauthorized app, the card prompts you to connect. Click New Connection, and enter the required information.
After the connection is authorized, you can add that app to any flow without reentering credentials. When you choose an event or action card, select the connection you want to use and click Done.
If your connection is lost, reauthorize by following the instructions on this page.
