Build and test a flow
Use the drag-and-drop interface in the Workflows Console to build your own flows. Each event and action in a flow works with a pre-built connector, which allows you to communicate with other applications without code or APIs. Simply connect your applications, specify the event and actions, and fill in the details.
Before you begin
Before you build a flow, perform these steps:
-
Learn about cards and fields in a flow. See Workflow elements.
-
Create a connection for the Okta connector. See Authenticate your Okta account.
-
Optionally, create connections for other applications in your flow.
Build a flow
This procedure covers the basic sequence of commands to build a flow. After you learn the mechanics, try building some flows for real-world use cases. See Okta Workflows use cases.
-
In the Okta Admin Console, go to .
-
In the Workflows Console, open the Flows tab.
-
Create a folder and select the folder name to open it.
-
Click +New Flow.
-
In the first card, click Add Event.
-
Pick the app where the event occurs, and then select from its available events.
-
If you haven't connected to the app yet, click New Connection and enter the required information. Click Need help? to open app-specific help in this window.
-
If you've already connected to the app but you have multiple accounts, select the one that you want to use.
-
-
In the second card, click Add app action or Add function.
-
Action cards send a command to an application. Pick the app where the action occurs, and then select from its available actions. If you haven't connected the app yet, Okta prompts you to make the connection. Click the question mark icon
 to open action card-specific help.
 -
Function cards act on the data from a card or branch into another logical flow. You can choose a logic function, like branching or error handling, or a function that manipulates data, like a compose card. You can also select advanced functions that make HTTP requests or parse JSON strings. Click the question mark icon
 for function-specific help in the console.
-
-
If you need another identical instance of the same card in your flow, use the Duplicate option at the bottom of the card.
-
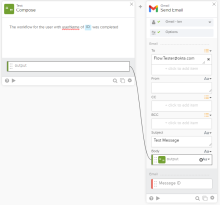
Map the data between cards. Drag the output from one card and drop it in the input of another card. Be sure that the field types match.
While you're building a flow, you can test the functionality of any card by clicking
 . Testing individual cards is a good way to ensure that your mappings work.
 -
Click Save or use the keyboard shortcut CTRL+S (Windows) or ⌘+S (macOS) to save the flow. If you haven't named your flow yet, you can do so here.
Test your flow
There are two ways to test a flow:
-
You can manually enter data into the event card
-
You can trigger the event inside the app.
It takes about 60 seconds for the flow to enable. After saving and turning on your flow, wait one minute before you attempt to trigger it.
Manually enter data
-
In the Workflows Console, click Run.
-
In the Run Flow window, manually enter test data into the card fields.
-
Click Run. The console view displays the progress of the flow. A check mark appears in the name field of each successfully executed card.
-
If the flow encounters an error, check the details and then click Back to Flow to make corrections.
Trigger the flow in the app
-
In the Workflows Console, toggle Flow is OFF to ON.
-
You can click the Run button, or use the keyboard shortcuts CTRL+SHIFT+ENTER (Windows) or ⌘ +SHIFT+ENTER (macOS) to run the flow.
If your flow is triggered through an event card, you can create a test event to activate the flow.
-
If your event occurs in Okta, use your Admin Console to perform the action that triggers the flow. For example, if your flow runs whenever a user is assigned to the Salesforce app, go to , and assign a test user to Salesforce.
-
If your event is triggered through another application, you need to go to the app and trigger a test event there.
-
-
Return to the Workflows Console to view the progress of the flow. A check mark appears in the name field of each successfully executed card.
-
If the flow encounters an error, check the details and then click Back to Flow to make corrections.
Check execution history
Check the Execution History page for a log of all flow executions from the past 30 days. You can sort the execution history pane by completed Okta Workflows and those still in progress.
When you select a record from the execution history, the full execution of the flow appears in the Workflows Console.
- The results, duration, and time of the flow are explained in the Execution Details window.
- Input and output fields are populated, and the duration of time it took to successfully execute each card appears beneath a green check mark.
- If the flow stopped, the card containing the invalid data is marked with an error.
- If other applications supplied raw error details, that information is included for debugging purposes.
- If you immediately triggered the flow after turning it on, you may not see it in execution history. Wait one minute before you try it again.


