Can’t sign in to an app with Okta FastPass

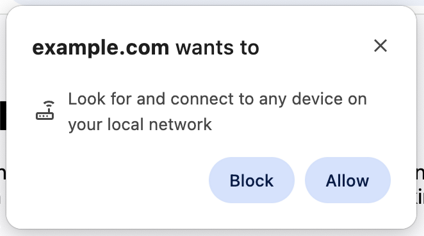
If you can’t sign in to your app with Okta FastPass and receive a message in the sign-in window, you might be able to troubleshoot the problem.

After you fix the issue, try to sign in to your app again. If you still can’t access your app, contact your organization’s help desk for assistance.

Before you begin

Ensure that you’re using the latest version of Okta Verify.

Generic message

If you receive a Device requirements not set message, your device doesn’t meet your organization’s security requirements. Check the Device health page in Okta Verify to see the device conditions that are blocking access to your app.

  1. Open Okta Verify on your device.
  2. Go to the Device health page:
    • On Android, go to Settings (...)Device health.
    • On iOS, go to Settings (...)Device Health.
    • On macOS or Windows, click the gear icon, and then select View device health.
  3. Identify which security checks failed and follow the instructions to fix the issue.
  4. Message What to fix
    Outdated operating system version Update to the latest version of your operating system.

    No password set

    Ensure that your device has a password set on the lock screen.
    Biometric authentication is not enabled Ensure you can unlock your device with your fingerprint or face recognition.
    Disk is not encrypted Encrypt your device.
    Operating system is rooted or jailbroken Reset your device to remove any unofficial versions of the operating system that were installed.
    Device has hardware keystore You may be required to access protected resources from a device that has a built-in hardware-backed keystore. There’s no remediation for this error other than using a different device.

After you complete the security remediation steps, if you still can’t access your app, contact your organization’s help desk for assistance.

Messages in the sign-in window

The remediation steps in the following tables depend on your device operating system version. For details, see the documentation for your operating system and device manufacturer:

Android

Message Remediation
Update to Android version number
  1. On your device, go to Settings.

  2. Scroll down and select System.

  3. Select Software update or System update. The wording may vary depending on your device.

    If an update is available, tap Download and install. After the installation, your device restarts automatically and runs the latest version of Android.

    The steps might vary slightly depending on the make and model of your device and the version of Android you're running. Some devices might have a separate app for checking and downloading updates.

Enable lock screen

Your device must have a lock screen enabled.

  1. On your device, go to Settings.

  2. Scroll down and tap Security or Lock screen and security. Go to your phone manufacturer's support page for details.

  3. Tap Screen lock or Screen lock type.

  4. Choose the type of lock screen that you want to use, such as Pattern, PIN, or Password.

  5. Set up the lock screen by following the prompts. For example, if you choose a pattern lock, you need to draw a pattern that you use to unlock your device.

  6. Choose how quickly your device locks after it goes to sleep. This can help protect your device if you accidentally leave it unlocked.

Enable lock screen and biometrics

Ensure you can unlock your device with your fingerprint or face recognition.

  1. On your device, go to Settings.

  2. Go to Security or Lock screen and security. Go to your phone manufacturer's support page for details.

  3. Tap Biometrics or Biometric preferences.

  4. Turn on the option for the type of biometric authentication you want to use, such as Fingerprint or Face unlock. Follow the instructions on the screen.

  5. After you enabled biometrics, go back to the Lock screen and security section.

  6. Tap Screen lock or Screen lock type.

  7. Choose the type of lock screen that you want to use, such as Pattern, PIN, or Password.

  8. Go to Biometrics or Biometric preferences and turn on the option for the type of biometrics you want to use on your lock screen.

    After you set up the lock screen, you can use biometric authentication to unlock your device.

Encrypt your device

Your Android device is required to have encryption enabled.

  1. On your device, go to Settings.

  2. Go to Security or Lock screen and security.

  3. Tap Encrypt phone or Encrypt tablet.

  4. If you have a screen lock set up, you’re prompted to enter your Pattern, PIN, or Password.

  5. Read the information about encryption and tap Encrypt phone or Encrypt tablet to proceed.

    Your device begins the encryption process, which may take an hour or more depending on the amount of data stored on your device.

    When the encryption process is complete, you’re prompted to enter your screen lock password, PIN, or pattern to access your device.

iOS

Message Remediation
Update to iOS version number
  1. Make sure that your device is connected to Wi-Fi and has enough battery life or is plugged in.

  2. On your device, go to SettingsGeneralSoftware Update.

  3. If an update is available, tap Download and Install.

  4. After the download is complete, tap Install Now.

    Your device restarts and the update process begins. During this time, your device might restart again and you might see a progress bar on the screen. When the update is complete, your device restarts again and you see the Hello screen.

Set a passcode for the lock screen

Your iOS device is required to have a lock screen enabled.

  1. On your device, go to Settings.

  2. Scroll down and tap Touch ID & Passcode or Face ID & Passcode, depending on your device model.

  3. Enter your current passcode or use Face ID or Touch ID to authenticate.

  4. Tap Turn Passcode On or Change Passcode if you already have one set up.

  5. Choose a 6-digit passcode, or tap Passcode Options to choose a custom alphanumeric code or a 4-digit code.

  6. Reenter your passcode to confirm it.

Set passcode for lock screen and enable Touch ID or Face ID

Your iOS device must have Touch ID or Face ID enabled.

  1. On your device, go to Settings.

  2. Scroll down and tap Touch ID & Passcode or Face ID & Passcode, depending on your device model.

  3. Enter your current passcode or use Face ID or Touch ID to authenticate.

  4. To enable Face ID, tap Enroll Face. To enable Touch ID, tap Add a Fingerprint.

  5. Follow the instructions to scan your face or fingerprint. You may need to reposition your face or finger a few times until the device has a good scan.

  6. When the scan is complete, tap Continue.

    You're prompted for Face ID or Touch ID for certain features such as unlocking your device, making purchases, or accessing passwords.

  7. With the toggle, enable the features you want to use with Face ID or Touch ID.

macOS

Message Remediation
Update to macOS version number
  1. Make sure that your computer is connected to Wi-Fi and has enough battery life or is plugged in.

  2. From the Apple menu, click System SettingsGeneralSoftware Update.

  3. If an update is available, click Upgrade Now.

Set a password for the lock screen

  1. From the Apple menu, click System SettingsUsers & Groups.

  2. Follow the instructions to set up a password.

Turn on FileVault
  1. Follow the Apple documentation to turn on FileVault. Follow the steps based on your macOS version.

  2. Click Turn On FileVault to encrypt the content of your computer to prevent unauthorized access.

  3. You’re prompted to create a recovery key. Follow the instructions to create and verify your recovery key.

  4. Choose whether to store your recovery key with Apple or to keep it locally.

  5. If you have multiple user accounts on your Mac, you're prompted to choose which accounts should be allowed to unlock the disk.

  6. Choose the accounts that you want to be able to unlock the disk.

  7. Restart your Mac when prompted.

    When your computer restarts, the encryption process begins. This may take some time, depending on the size of your disk and the speed of your computer. After the encryption process is complete, sign in as usual.

Windows

Message Remediation
Update to Windows version number

Windows 10

  1. From the Start menu click SettingsUpdate & SecurityWindows Update. Windows automatically checks for updates and downloads any available updates.

  2. After the download is complete, click Restart now to install the updates. Your computer restarts and the installation process begins.

  3. Follow the instructions to complete the installation process. Your computer restarts again after the installation process is complete.

Windows 11

  1. From the Start menu click SettingsWindows Update. Windows automatically checks for updates and downloads any available updates.

  2. If there are updates available, click Download and install.

  3. Follow the on-screen instructions to complete the installation process.

    Your computer restarts several times during the installation process.

Enable Windows Hello for the lock screen

Your Windows device is required to have Windows Hello enabled.

  1. From the Start menu click SettingsAccountsSign-in options.

  2. Under Windows Hello, click Set up if you haven't already set up Windows Hello. If you have already set up Windows Hello, click Improve recognition.

  3. Follow the instructions to improve recognition, which may involve positioning your face or fingerprint in front of the camera or scanner multiple times.

  4. When the recognition process is complete, click Done to exit.

Encrypt all internal disks with BitLocker

  1. In the search box in the taskbar, type Manage BitLocker and select it from the list of results.

  2. In the BitLocker Drive Encryption window, find the drive you want to encrypt and click Turn on BitLocker.

  3. Choose how you want to unlock the drive, either with a password or with a smart card. If you choose a password, make sure it's a strong and memorable one.

  4. Choose where you want to store your recovery key. You can save it to your Microsoft account, a file, or a USB drive. If you choose to save it to a file or USB drive, make sure to keep it in a safe place.

  5. Choose whether to encrypt the entire drive or just the used space. Encrypting the entire drive provides better security but takes longer.

  6. Click Start Encrypting to begin the encryption process.

  7. Wait for the encryption process to complete. This may take some time, depending on the size of your drive and the encryption method you chose.

  8. When the encryption process is complete, your drive is locked and you must enter your password or insert your smart card to unlock it.

Related topics

Check the health of your Android device

Check the health of your iOS device

Check the health of a macOS device

Check the health of a Windows device