Build an _authping flow
An _authping flow is a system flow used by the platform to call an API and check for valid authorization.
This action acts as a validation check and runs when you first authenticate the connector, add new connectors, or open flows.
The flow must be named _authping for the platform to recognize it. End users don't see the _authping flow as only the platform uses it. The flow has no options or input fields.
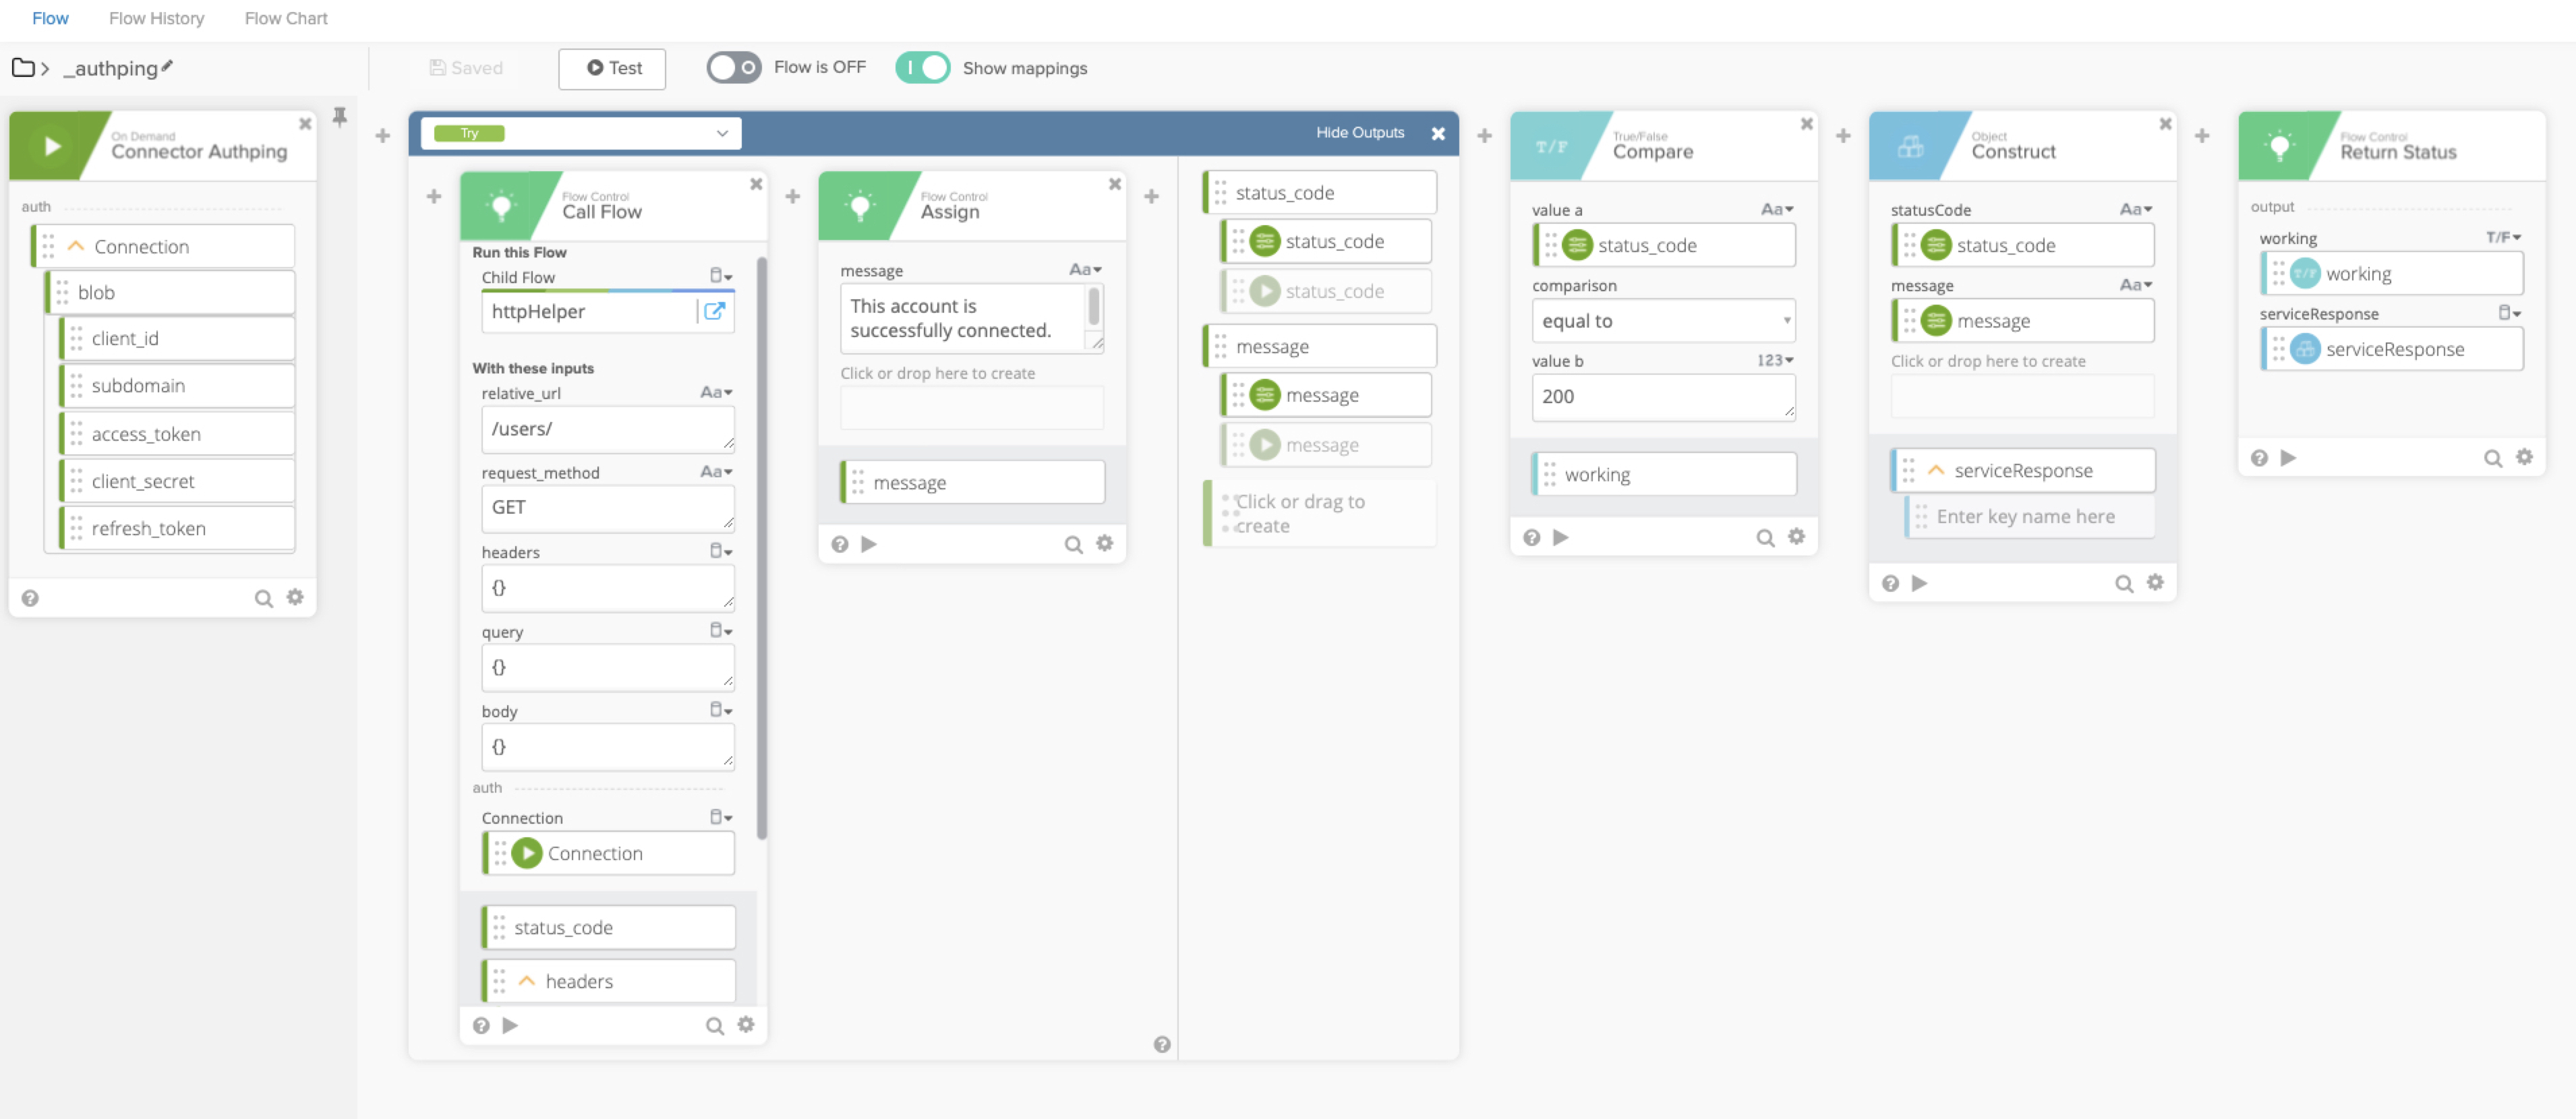
Here's an example of what a complete _authping flow looks like in Okta Workflows.
Before you begin
To build this common flow, first you need to:
-
Create the connector. See Create a new connector.
-
Build authentication. See Authentication.
Start this task
-
Create a new flow under the Flows tab by clicking on + New Flow in the upper right corner of the page.
-
At the far left of the page, click Authping.
-
Click the Save button in the toolbar and name the flow
_authping. Note that_authpingis a reserved name and must be exact. -
In the flow description field type
Connection health check, check the Save all data that passes through the Flow box, and click Save. -
Add an Error Handling If Error card as the first card in the flow.
-
Add a Flow Control Call Flow card inside the Try section of the card.
-
Click on the Choose Flow button and select the httpHelper flow created previously. The card will automatically populate with the inputs defined in the httpHelper flow.
-
Manually enter the relative url of the endpoint to use as a "ping". The endpoint should require authorization from the server, and the ping response should contain a small packet of data including a standard HTTP status code.
-
Manually enter a request method (GET, PATCH, POST, PUT, or DELETE).
-
Enter any additional information required for the call in the query, headers, or body field. You may need to add an Object Construct card before the Call Flow card to build out any necessary objects.
-
For the outputs on the Helper Flow card, you'll need to define the same keys as on the httpHelper flow's outputs:
-
status_code (Number)
-
headers (Object)
-
body (Object)
-
-
Add a Flow Control Assign card to the right of the Call Flow card that is inside the If Error function. Click Click or drop here to create and name the field message.
-
Manually add a success message in the new field. For example:
This account is successfully connected. -
Click on the View Outputs link at the top right of the Error If card to expand the card's outputs section.
-
In the outputs section, click Click or drag to create and enter
status_code. Two inputs will appear that read Drag output here. -
Drag the status_code output field from the Call Flow card into the top of the two inputs under the status_code field.
-
In the outputs section, click Click or drag to create and enter
message. -
Drag the message output field from the Assign card into the top of the two inputs under the message field.
-
Select the dropdown at the top of the If Error card and select If Error. This is where any service specific error handling can be managed.
-
Depending on the service, add additional keys to the Error object in the left panel of the If Error card to pull the status code and error message from the object returned by the service. Add keys by clicking Enter key name.
-
Drag these new keys into the corresponding outputs of the If Error card.
-
Add a True/False Compare card to the right of the Error Handling If Error function card.
-
Drag the status_code field from the If Error card outputs into the value a field of the Compare card, and make sure the comparison is set to equal to.
-
In the value b field, enter the status code of a successful request. In most cases, this will be
200. -
On the True/False Compare card, to name the output field working, click the field's dropdown, then click customize. Note that the naming of these fields is a best practice and not a requirement.
-
Drag the working output from the Compare card into the working field on the Return Status card.
-
Add an Object Construct card.
-
Click Click or drop here to create and add a label named
statusCode. -
Drag the status_code field from the If Error card outputs into the new statusCode field of the Construct card.
-
Add another input field to the Construct card and name it body.
-
Drag the message output field from the Assign If card into the body field on the Construct card.
-
On the Object Construct card, rename the output field to serviceResponse.
-
Drag the serviceResponse output from the Construct card into the serviceResponse field on the Return Status card.
-
Drag the auth object from the Connector Authping card to the Connection input field of the Call Flow card.
-
Save and test your flow.
Next steps