Provision users to Office 365
You can create, update, deprovision, and sync users in Office 365 from your Okta org. You can import users from different source directories into Okta and provision them in Office 365 using profile mappings.
Before you begin
- Complete Configure single sign-on for Office 365.
-
Bring users into Okta: You can import users from a directory such as Active Directory (AD) or an app such as Salesforce. Currently, Okta doesn't support imports that take longer than two hours to complete. Contact Support if you have this type of import. You can also create users directly in Okta. See the following for more information:
-
Decide the type of provisioning, depending on your provisioning needs. See Provisioning options for Office 365.
-
Ensure that you have a Global administrator account in Microsoft and an App administrator account in Okta tenant.
Start this procedure
To provision users in Office 365, you need to perform the following tasks in order:
Set up Okta to Office 365 provisioning
You can automate provisioning tasks by enabling API integration, obtaining admin consent for user import and provisioning, and configuring settings for user lifecycle stages.
Enable API integration
Office 365 requires your consent to authenticate against the Microsoft API. This allows Okta to enable provisioning in Office 365 apps.
- Go to .
- Check Enable API Integration.
-
Click Authenticate with Microsoft Office 365 to provide consent. You're redirected to the Microsoft Azure login page.
- Click Accept. Upon accepting the scopes in the Microsoft Azure portal, you're redirected back to Okta.
Select provisioning type and settings
The provisioning options depend on the provisioning type that you select. Profile Sync is selected by default.
- Go to .
-
Select Office 365 Provisioning Type.
You can change the provisioning type from Profile Sync to Licenses & Role Management Only, Universal, or User Sync. See Provisioning types for office 365.
For Universal Sync only: Select Send full profile, contacts, and conference rooms from these AD instances if you want to sync Active Directory groups and resources.
Note:To support app-based authentication, Okta creates a dedicated app in your Microsoft Entra ID named
ConnectSyncProvisioning{instanceId}@{tenant}, where{instanceId}is your Office 365 app instance ID in Okta and{tenant}is your Microsoft tenant. This applies to User Sync and Universal Sync provisioning types only. Don't delete this app. If you delete the Office 365 app instance in Okta, this app remains in your Microsoft Entra ID and must be removed manually. - Optional. Enabling User Sync or Universal Sync provisioning without credentials can lead to an error about insufficient permissions. To fix it, follow these steps in PowerShell.
-
Install v1.0 and beta Microsoft Graph PowerShell modules.
Install-Module Microsoft.Graph -ForceInstall-Module Microsoft.Graph.Beta -AllowClobber -Force -
Connect with the Microsoft Hybrid Identity Administrator account.
Connect-MgGraph -scopes "Organization.ReadWrite.All,Directory.ReadWrite.All" -
Verify the status of the DirSync type.
Get-MgOrganization | Select OnPremisesSyncEnabled -
Store the tenant ID in a variable named
organizationId.$organizationId = (Get-MgOrganization).Id -
Store the updated value for the
DirSyncEnabledattribute.$params = @{onPremisesSyncEnabled = $true} -
Perform the update.
Update-MgOrganization -OrganizationId $organizatnnnnionId -BodyParameter $params -
Verify the command.
Get-MgOrganization | Select OnPremisesSyncEnabled
-
- Enable Create Users to create or link a user in Microsoft
Office 365 when you assign the app to a user in Okta.
Note:
This option isn't available if the provisioning type is set to Licenses & Role Management Only .
- Enable Update User Attributes to update a user's attributes in Microsoft Office 365 when you assign the app to a user in Okta.
- Manage provisioning scope for create and update actions.
- Enable or disable other provisioning settings. See Get started with Office 365 provisioning and deprovisioning.
- Click Save.
Note:
Verify your Provisioning scope before saving. Saving your settings triggers an immediate synchronization. Based on the scope selected, Okta pushes user attributes, licenses, and roles to Microsoft Entra ID for all users assigned to the app.
Each user provisioned for Office 365 has an attribute, StsRefreshTokensValidFrom, which is a date that invalidates existing user sessions and refresh tokens when users change their password, requiring the user to sign in to their apps again. This attribute is automatically calculated and populated based on the provisioning type.
-
License Only or Profile Sync: The
StsRefreshTokensValidFromattribute is set to the current date and time when the user changes their password in Okta. -
User Sync or Universal Sync: If the user is linked from Active Directory (AD), the
StsRefreshTokensValidFromattribute is set to thepwdLastSetattribute in AD. For all other users, theStsRefreshTokensValidFromattribute is set to the current date and time when the user changes their password in Okta.
Manage provisioning scope for create and update actions
This section is only visible if you enable Create Users or Update User Attributes.
Select the level of user data that Okta manages in Microsoft Office 365:
- User Attributes, Licenses, and Roles: Select this option to manage attributes, licenses, and roles. This is the default option.
-
User Attributes Only: Select this option to manage user attributes only.
Note:
The User Attributes Only option isn't available if Entitlement Management is enabled or if the provisioning type is set to Licenses & Role Management Only.
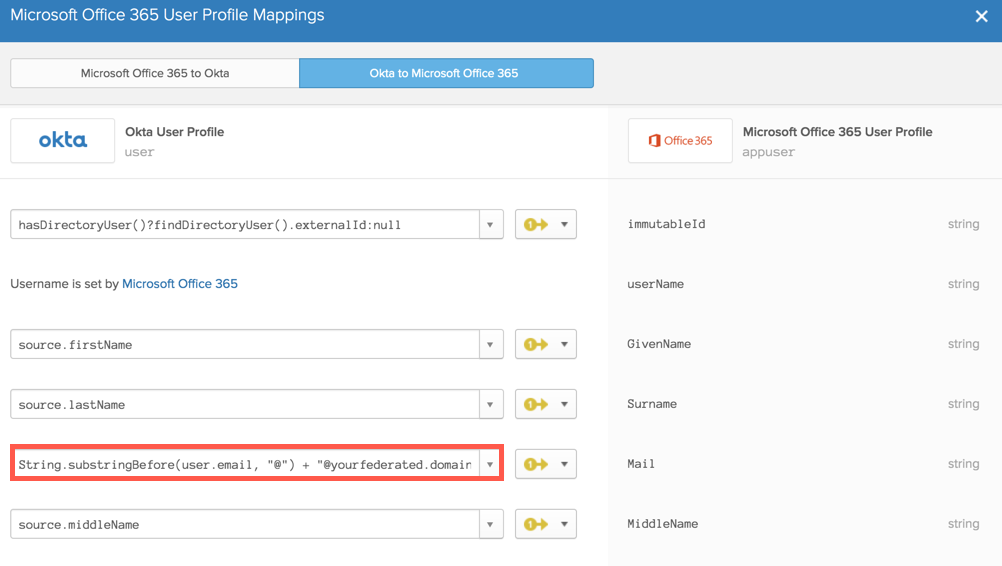
Map profile attributes Okta to Office 365
Depending on where your users are sourced from, the username format can vary. For users to successfully sign in to Office 365, their username for Office 365 must be in an email address format for the domain you're federating (username@yourfederated.domain).
You must remap attributes whenever you change provisioning settings.
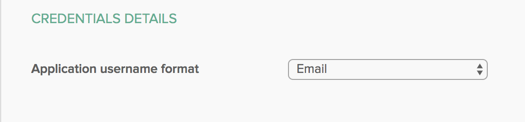
Map username unchanged
If your users already have their username in an email address format for the domain you're federating (username@yourfederated.domain) format, you can map the email without reformatting.
- Go to .
- In , select Email.
- Click Save.
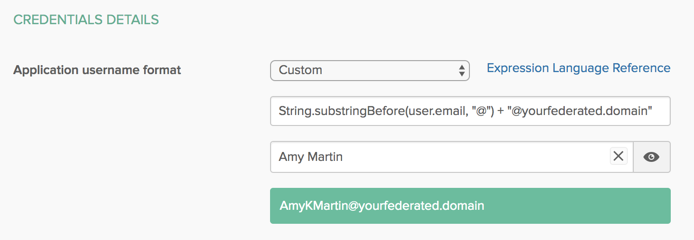
Map custom username
If your users are sourced from different directories or apps, their username format may vary. You can use the Okta Expression Language to customize the username that is passed on to Office 365.
- Go to .
- In , select Custom.
Enter this expression in the provided text box:
String.substringBefore(user.email, "@") + "@yourfederated.domain" - Replace
yourfederated.domainwith the domain that you're federating. - Enter an Okta user in the Preview box to check the result of the mapping.
- The resulting username should match the Office 365 username for the user.
- Click Save.
Map email address
If your users' email addresses don't reside in the domain you're federating, you can use the Okta Expression Language to customize the email address that's passed to Office 365.
Prerequisite
You should select User Sync or Universal Sync Provisioning type. See Provisioning options for Office 365.
- Go to .
- In the source.email field, enter this expression:
String.substringBefore(user.email, "@") + "@yourfederated.domain" - Replace
yourfederated.domainwith the domain that you're federating. - Enter an Okta user in the Preview box to check the result of the mapping.
- The resulting email address should match the Office 365 email address for the user.
- Exit Preview and save mappings.
- Click Apply Updates Now.
Test provisioning
Ensure that you have correctly configured provisioning by assigning Office 365 to test users in Okta and verifying that they appear in your Microsoft tenant. Be sure that you've selected the Create Users option in Provisioning.
In Okta:
- Open the Assignment tab of the Microsoft Office 365 app.
- Click Assign.
- Assign appropriate Office 365 licenses to test users.
- Click Done.
In the Microsoft Admin center:
- Open the list of Active Users.
- Ensure that all test users appear in the list with appropriate licenses.
In Okta:
- Log into Okta as a test user.
- Ensure that all Office 365 apps appear on the user dashboard.
If you've selected the User Sync or Universal Sync provisioning type, all users appear as Synced with Active Directory in the Office 365 tenant, irrespective of where their profile is sourced. However, individual users are still sourced from their respective directories.