Test the Cisco RADIUS ASA VPN integration
Testing the Cisco RADIUS ASA VPN integrations involves two configuration tests: Single step and two-step flows. The following network diagrams represent these flows.
Flow diagrams
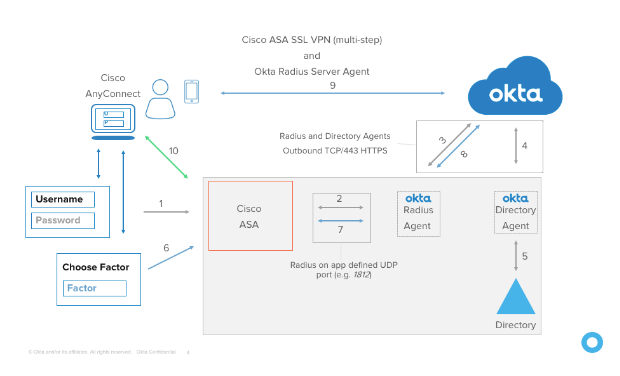
Network Diagram – Multi-step Flow
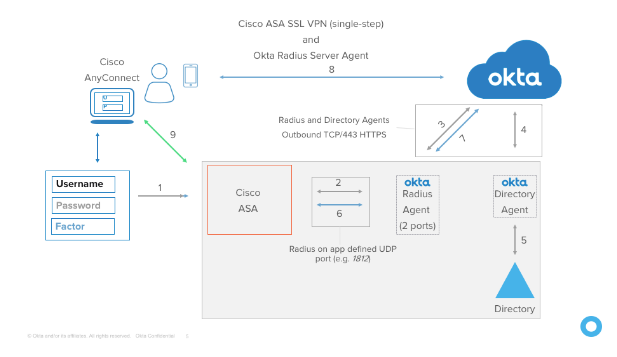
Network Diagram – Single-step Flow
Verify the Cisco ASA VPN Appliance is properly configured to work with Okta (two-step flow)
There are two parts to this test.
Part 1 – Test SSL-VPN with Cisco AnyConnect
- Open Cisco AnyConnect and click Connect
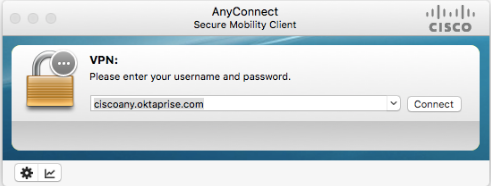 .
. - Enter your Username, Password, and a Group (optional). Click OK.
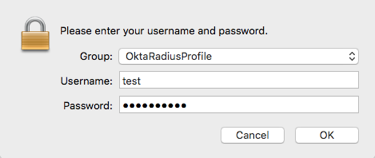
- The username must be in the format you specified when you added the app in Okta in Part 2, above.
- If configured, you concatenate the Password with a one-time password (OTP) or a keyword; for example
Password1,123456,Password1,push, orPassword1,sms, as follows:- 123456 – code from Okta Verify, Google Authenticator, or Yubikey OTP
- push – trigger push notice to enrolled phone
- sms – trigger sms to enrolled phone
- other – any other configuration
- If you receive the Login Failed screen, check you username and password and try again.
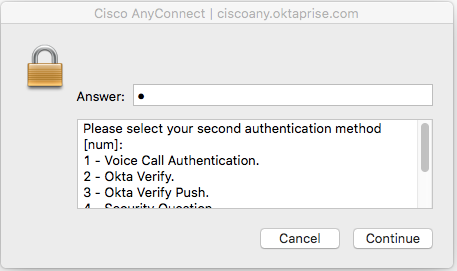
- When the challenge screen appears, enter the number that corresponds to the appropriate second factor and click Continue. Follow the prompts to enter the second factor challenge.
 Note:
Note:Users are challenged for a second factor to use based on the devices they have enrolled.
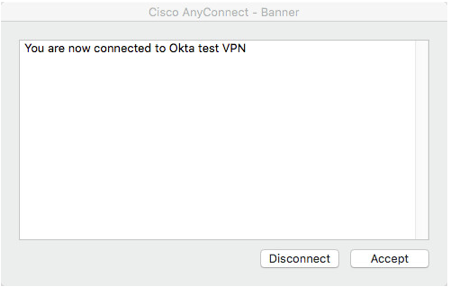
- After successfully completing the challenge, you are connected and see the following screen:
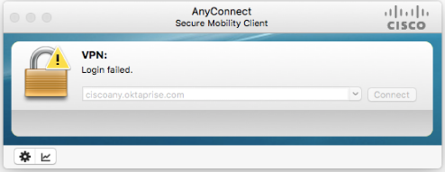
If you enter an incorrect value or take to long to respond to the push notification, AnyConnect displays the following screen:
Test the clientless VPN with the AnyConnect web portal
- Navigate to the Cisco AnyConnect web portal URL.
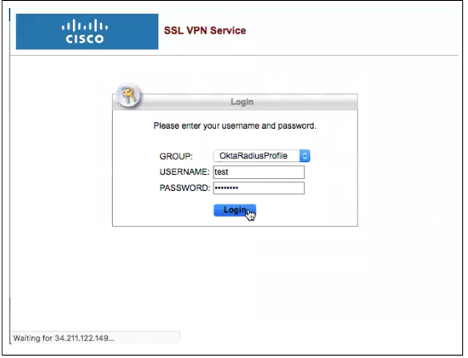
- Enter the same username, password, and group (optional), as in part 1, earlier.
- Enter the challenge factors when prompted.
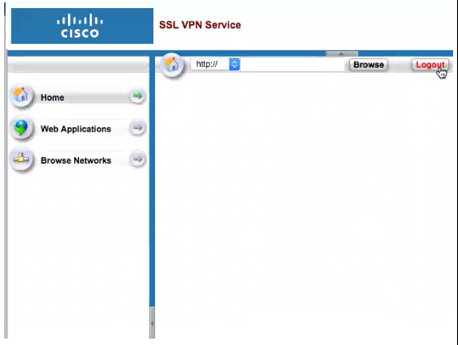
- After successfully completing the challenge, you're connected and see the following screen:

If you enter an incorrect value or take to long to respond to the push notification, AnyConnect displays the following screen:
Verify the Cisco ASA VPN Appliance is properly configured to work with Okta (single-step flow)
There are two parts to this test.
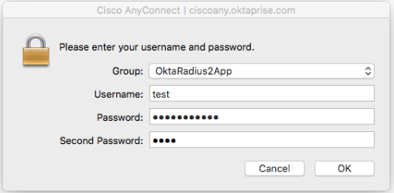
Part 1 – Test SSL-VPN with Cisco AnyConnect
- Open Cisco AnyConnect and click Connect.
Note:
The username must be in the format you specified when you added the app in Okta in Part 2, above.
-
Enter your Username, Password, and a Group (optional). Click OK.
- The username must be in the format you specified when you added the app in Okta in Part 2, above.
- Enter the second password, as follows.
- 123456 – Code from Okta Verify, Google Authenticator, or Yubikey OTP
- push – trigger push notice to enrolled phone
- sms – trigger sms to enrolled phone
- other – any other configuration
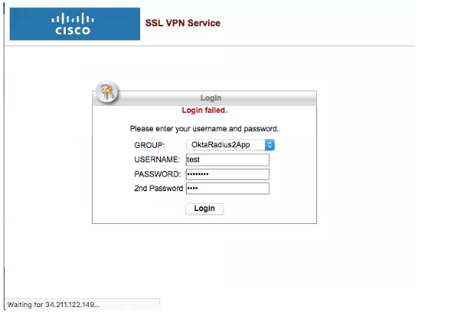
- If the Login Failed screen appears, check your username and password and try again.
-
After successfully completing the challenge, you are connected and see the following screen:
If you enter an incorrect value or take to long to respond to the push notification, AnyConnect displays the following screen:
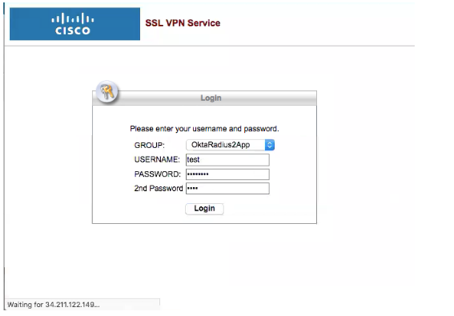
Part 2 –Test the clientless VPN with the AnyConnect web portal
- Navigate to the Cisco AnyConnect web portal URL.
-
Enter your Username, Password, and a Group (optional). Click OK.
- The username must be in the format you specified when you added the app in Okta in Part 2, above.
- Enter the second password, as follows.
- 123456 – Code from Okta Verify, Google Authenticator, or Yubikey OTP
- push – trigger push notice to enrolled phone
- sms – trigger sms to enrolled phone
- other – any other configuration
- If the Login Failed screen appears, check your username and password and try again.
-
After successfully completing the challenge, you are connected and see the following screen:
If you enter an incorrect value or take to long to respond to the push notification, AnyConnect displays the following screen: