Configure Active Directory Certificate Services
While Okta can act as a Certificate Authority (CA), many enterprises prefer to use their existing Public Key Infrastructure (PKI) with Microsoft Active Directory Certificate Services (AD CS).
Before you begin
Make sure that you have access to the following:
-
Okta Identity Engine org with Okta Device Access enabled
-
Microsoft Active Directory Certificate Services environment
-
Admin permissions to update or issue new certificate templates in AD CS. See Manage certificate templates.
You can only configure Active Directory Certificate Services for use with Windows devices.
For macOS devices, see Use Okta as a CA for Device Access .
Start this task
Configure the certificate template
AD CS certificate templates serve as a blueprint for certificate issuance, defining critical parameters such as key usage, subject naming, and security permissions. Configure a template to enforce compliance, streamline management, and safeguard enterprise identity infrastructure.
-
Open the Certification Authority snap-in, either by entering
certsrv.mscin your Windows start menu, or through the Tools menu in Windows Server Manager. -
Open the issuing Certification Authority.
-
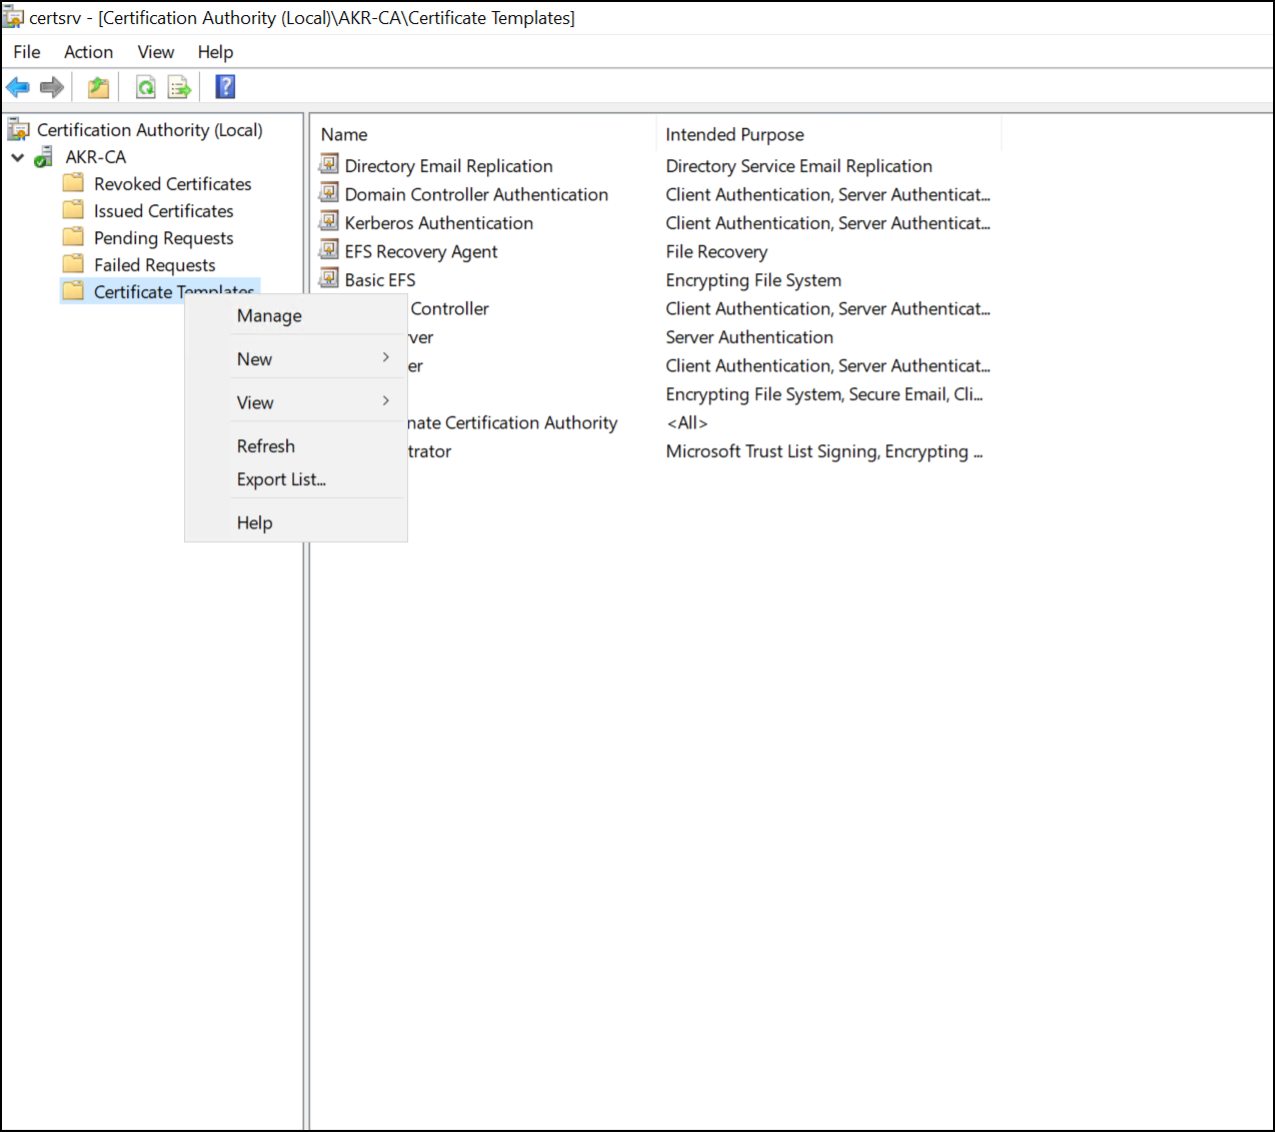
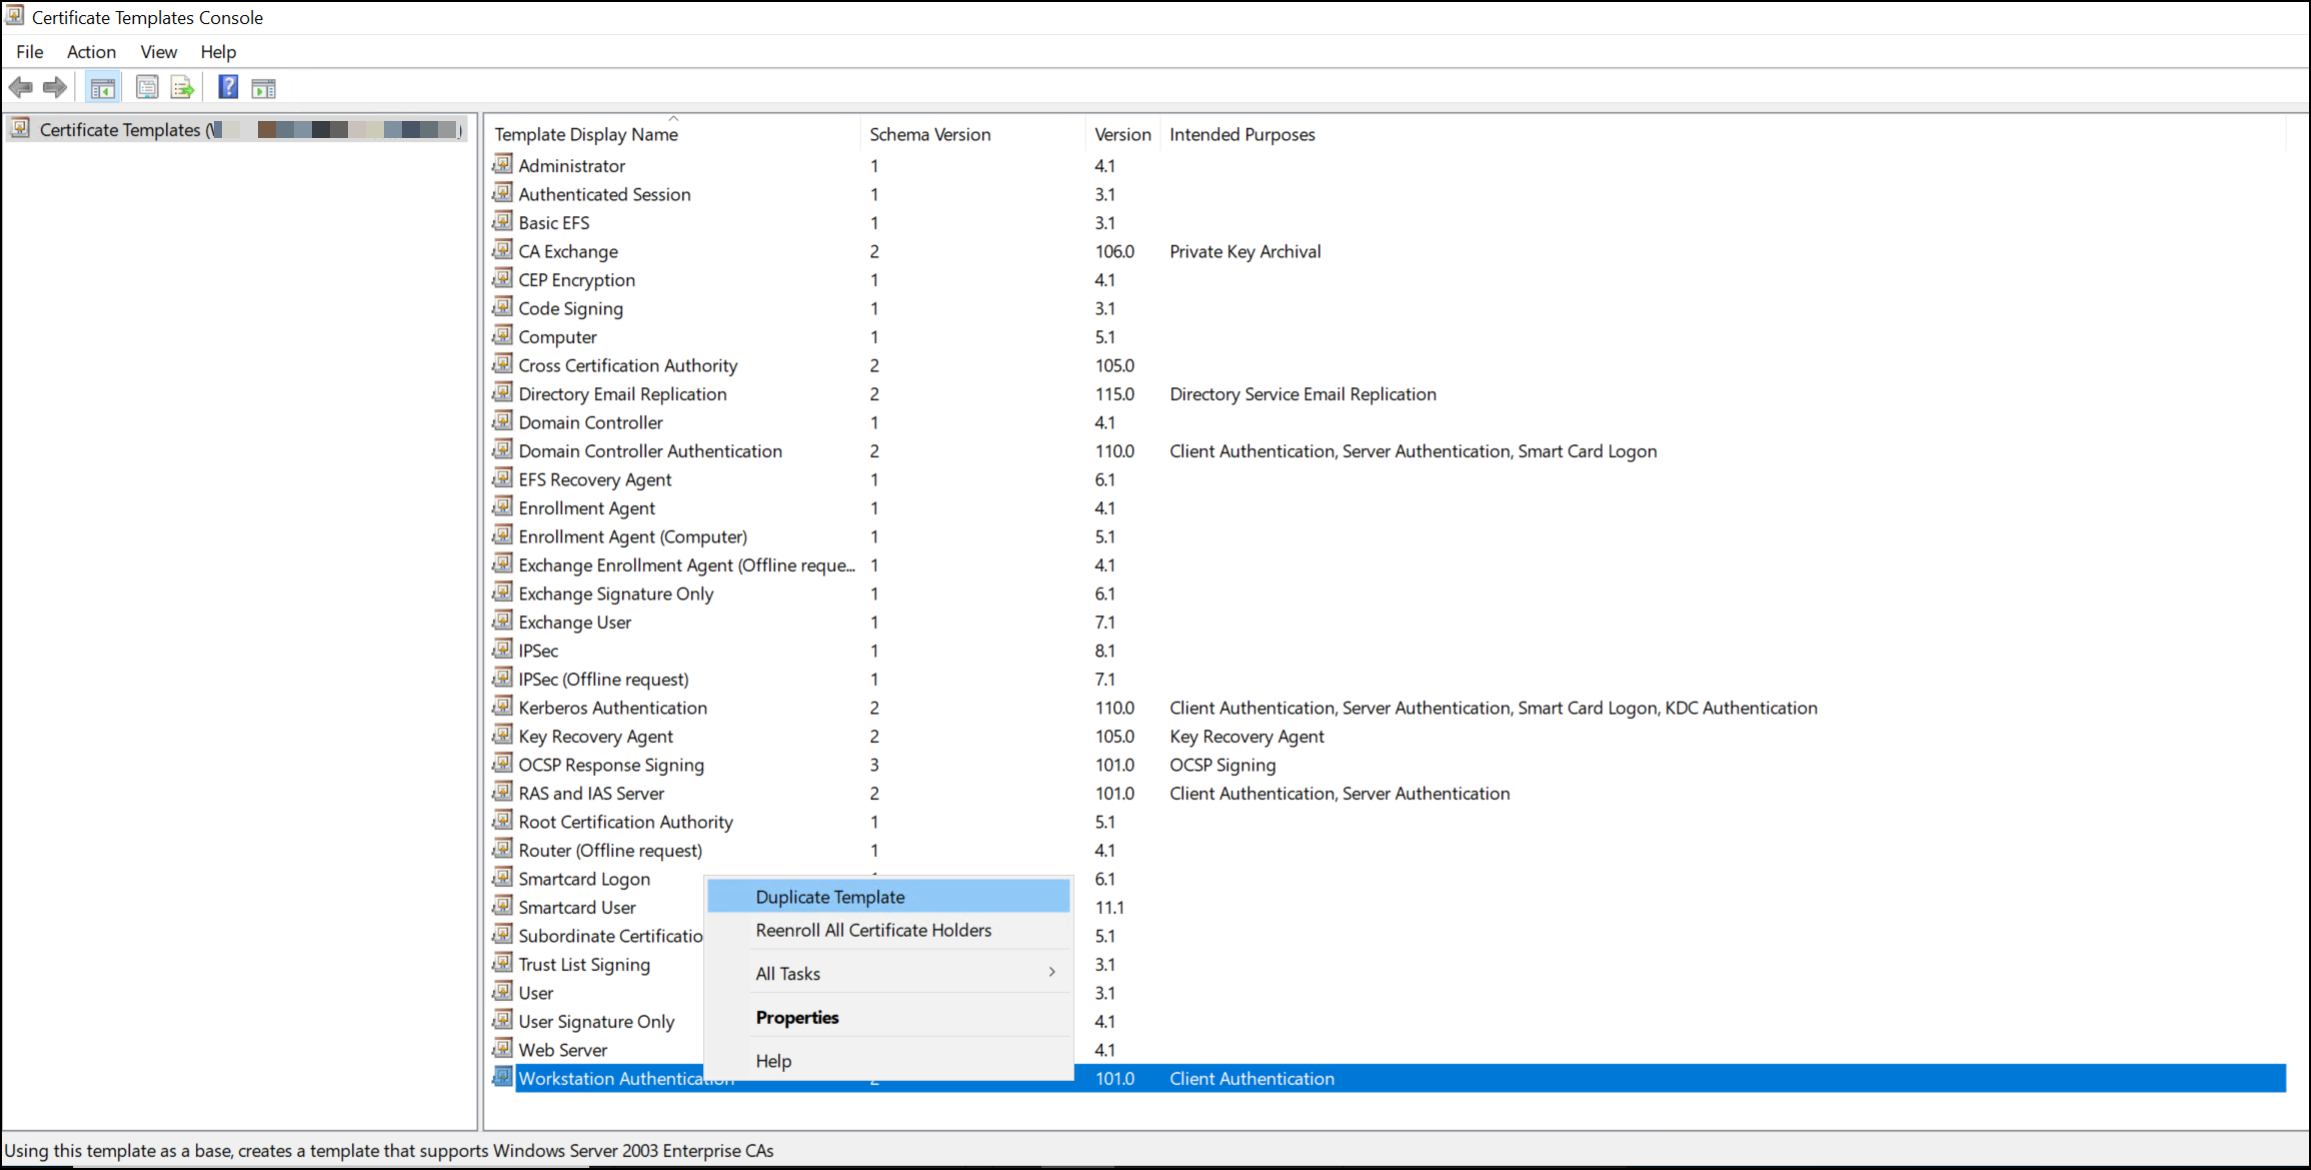
Right-click the Certification Templates folder and select Manage.
-
Select the Workstation Authentication template. However, you can choose any template that applies to computer-level authentication.
Right-click on the template and select Duplicate Template.
-
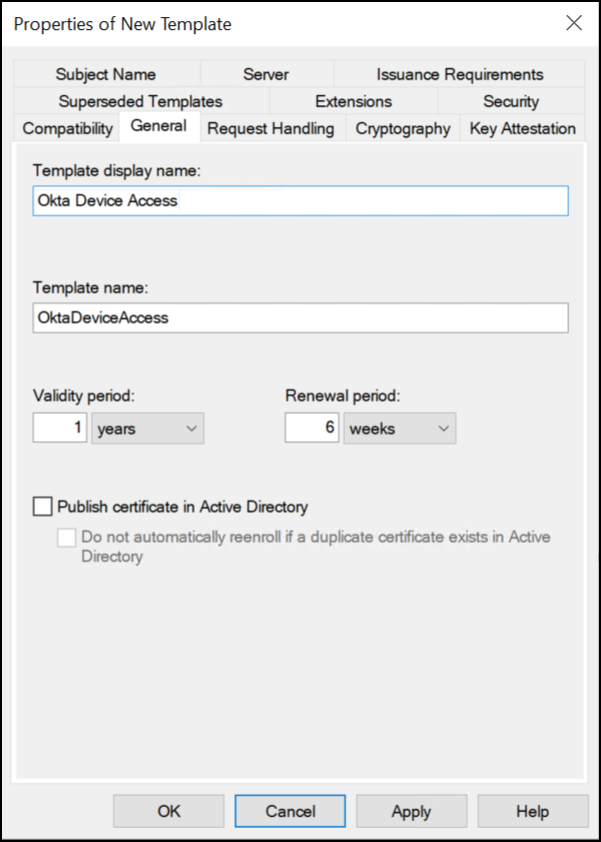
On the General tab of the Properties of New Template window, configure the following:
-
Name: Give your template a descriptive name.
-
Validity period: The duration, in years, that the certificate remains valid after it's issued.
-
Renewal period: The time window before the certificate expires, in weeks, during which systems can request a new certificate. This allows overlap between old and new certificates to prevent service interruption.
-
-
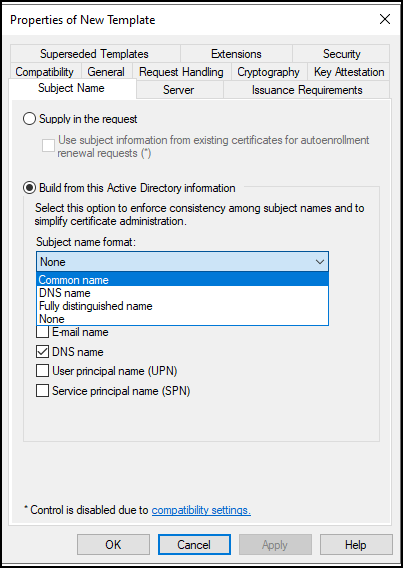
On the Subject Name tab, select Build from this Active Directory Information.
Choose the desired Subject name format from the dropdown menu. Desktop MFA supports any format in this list.
-
Okta requires a specific Extended Key Usage (EKU) Object Identifier (OID) to identify certificates issued for Device Access.
Add this OID using a new application policy.
On the Extensions tab, select Application Policies and click Edit.
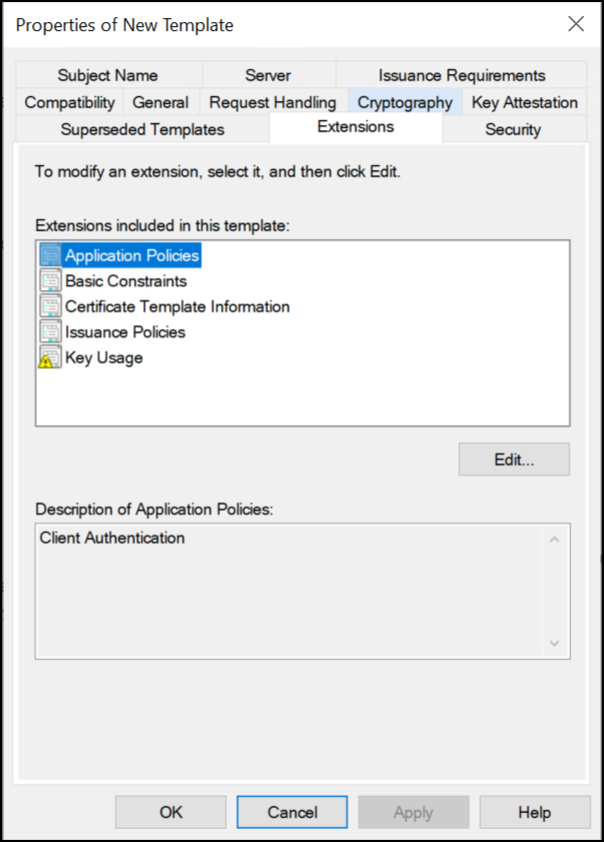
-
In the Edit Application Policies Extension window, click Add.
-
In the Add Application Policy window, click New to define a new policy.
-
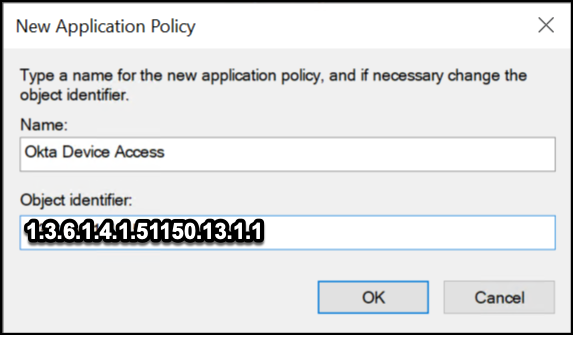
In the New Application Policy window, configure the following:
-
Name:
Okta Device Access -
Object identifier:
1.3.6.1.4.1.51150.13.1.1
Click OK to create the policy.
-
-
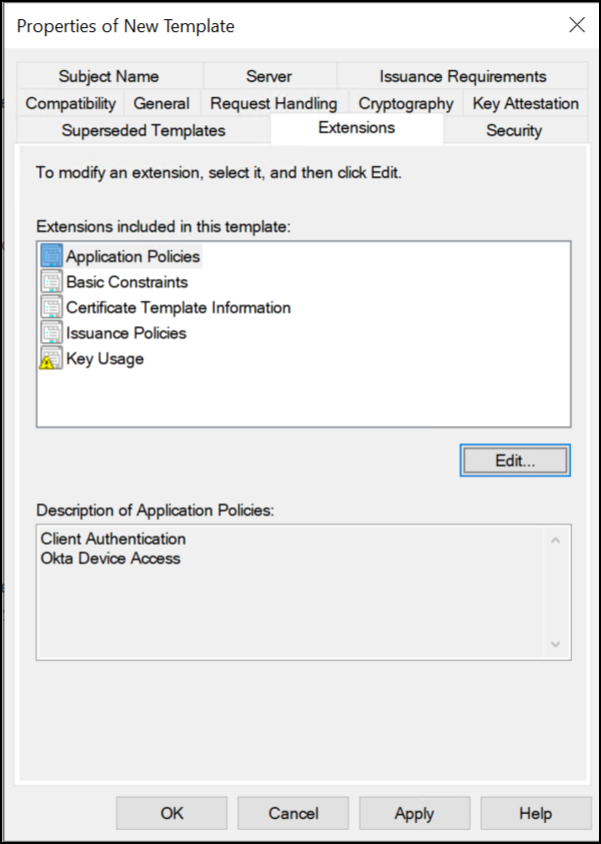
Verify that the new Okta Device Access policy is in the Application Policies list.
-
Click OK to confirm the addition of the new application policy, then OK again to finish editing the application policy.
-
In the Properties of New Template window, click Apply to confirm the settings for the new template.
Configure permissions
Decide on your certificate deployment strategy for your devices before you configure the permissions on these templates. See Adding Read and Enroll Permissions for Users and Computers.
You may want to deploy certificates to the following objects:
-
A certain group of admin accounts
-
A specific set of devices, for example, Domain Computers
-
Or a combination of those options
After you decide which groups and devices are going to request this certificate, you can configure the appropriate permissions. The requesting group or device must have at least Read permissions on this template.
Publish the new template
-
In the Windows Certification Authority console, right-click on the Certificate Templates folder.
-
Select New, and then Certificate Template to Issue.
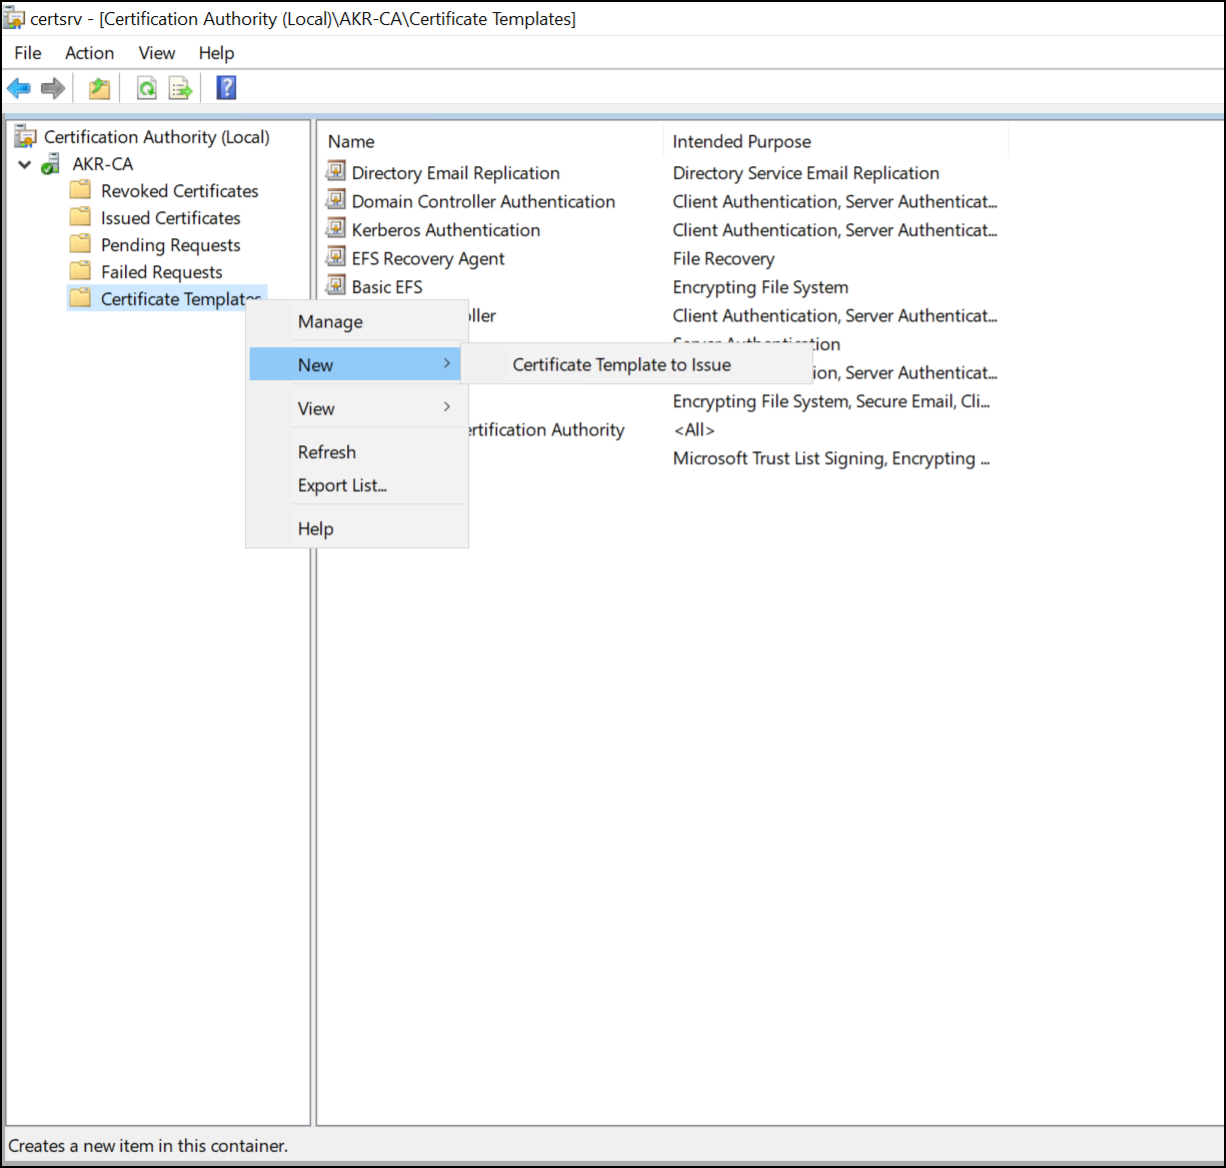
-
From the list, select the Okta Device Access template that you created and click OK.
You can see the new certificate template in the Certification Authority console. Your template is now published and ready to be used for Simple Certificate Enrollment Protocol enrollment.
Verify the certificate installation
-
On the Windows device, click Start and type
certand then click Manage user certificates. -
Expand the folder.
-
Locate the newly issued certificate and double-click the certificate to open the certificate properties.
-
On the Details tab, scroll down and select the Enhanced Key Usage field.
-
Confirm that the field contains Okta Device Access with a value of
1.3.6.1.4.1.51150.13.1.1.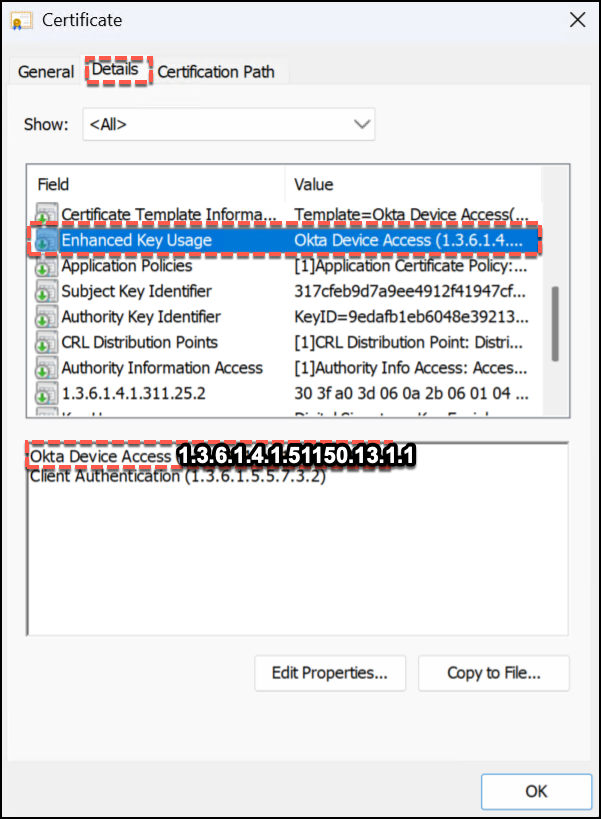
-
This confirms that the certificate has been successfully issued with the required custom EKU.
Configure the Okta Certificate Authority
Configuring Okta as the Certificate Authority (CA) for Device Access is a critical step in enabling secure, certificate-based authentication for managed devices. The CA establishes trust between your devices and Okta, to ensure that only verified endpoints can access resources in your org.
-
In the Admin Console, go to .
-
On the Certificate Authority tab, click Add certificate authority.
-
For the Issue certificates for option, select Device Access .
-
Upload your CA root certificate. You should see a
File successfully uploadedmessage. -
Click Close.
Your new CA is available in the Certificate authority tab.